A Tale of Two Tyynis

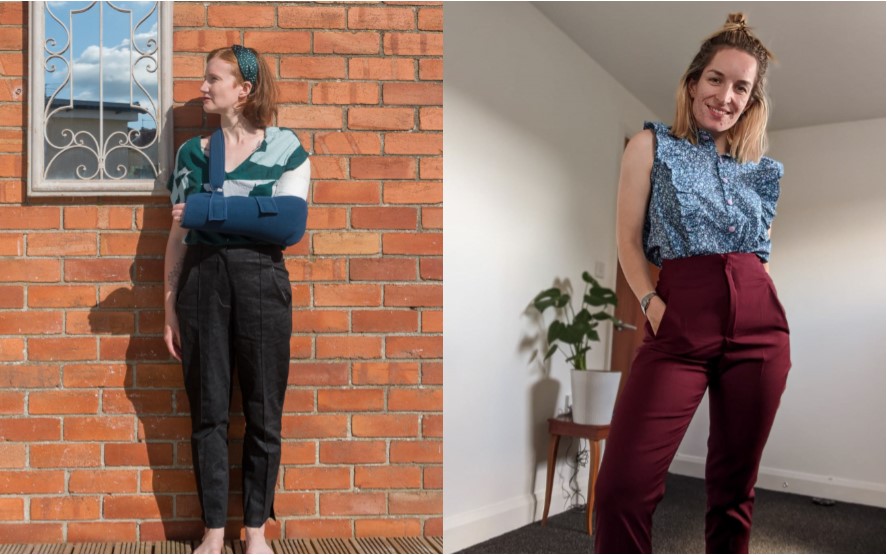
Between myself and Kat of Measure Twice Kat Once we’ve been on quite a trouser spree recently. Kat is starting her graduate job and I’m enjoying finding my sense of style so we decided to make some trousers together!

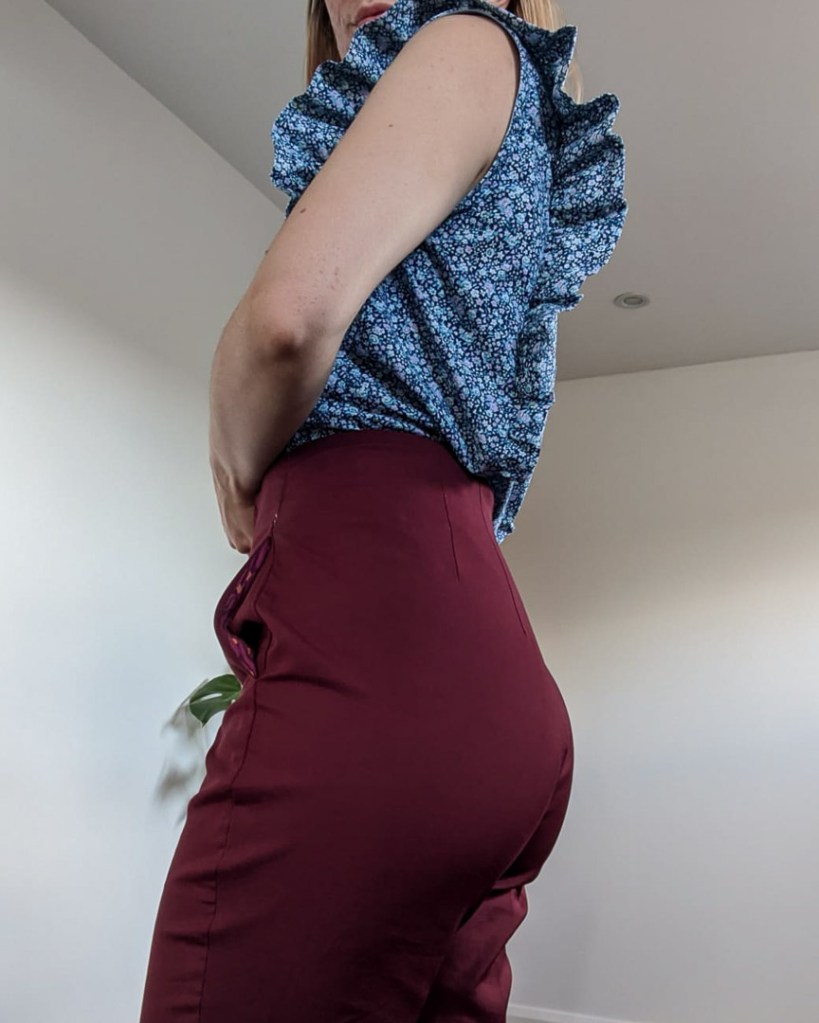
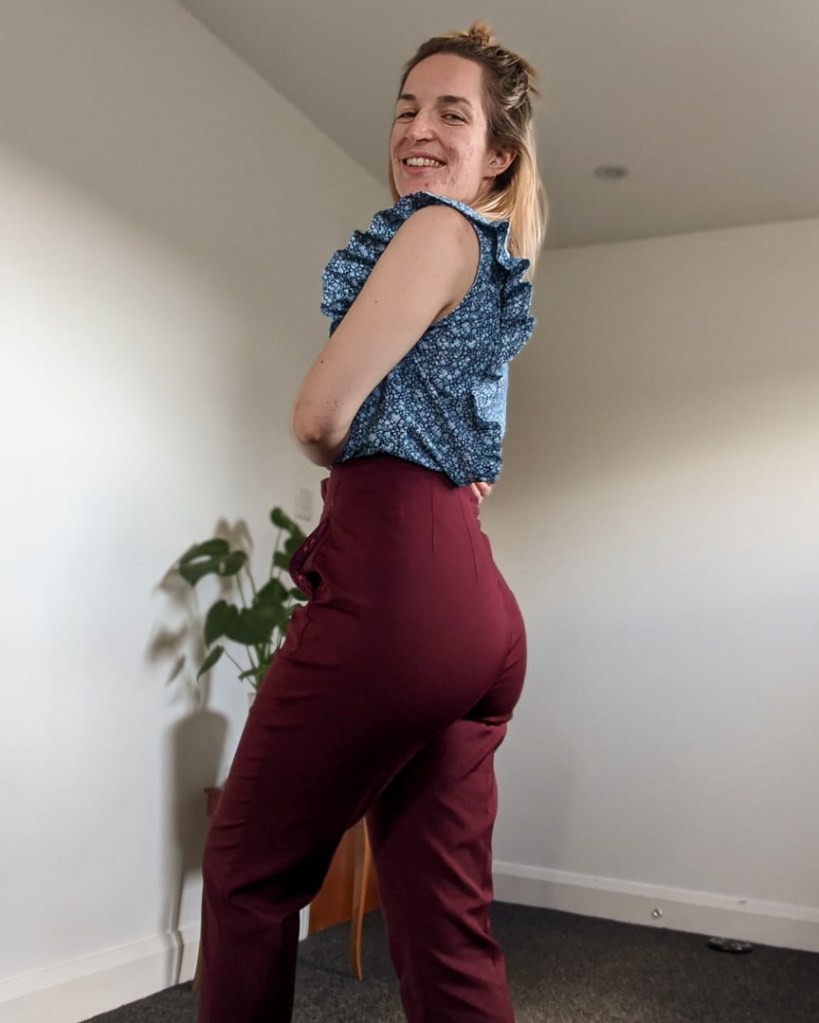
Vicky: Kat suggested the Tyyni trousers from Named Clothing. What drew us to the pattern was the shaping waist darts, the pockets and the nice detail of the side vents. This made them a little different to what else we’d seen out there. They also seemed fairly ideal for our pear-portions (puns make me happy).

Kat: To me, the Tyyni trousers seemed like a very classic work trouser, and so I had hoped to make a pair which fitted both my hips and waist – something which I have had difficulty finding in the past.

Size Selection/ Alteration

Vicky: My measurements are currently B32.4” W28” H39” which put me in the UK size 10. I tend to pick off finished measurements rather than size charts in general. I didn’t make any adjustments because there wasn’t any info available on the rise, where I usually make my trouser adjustments. The pattern does have handy marks about where the hip and knee are too.

Kat: My measurements are B33”, W25”, H37”. My hip measurement was closer to a 10 and waist closer to a 6, but after speaking to Sharlene (she made a gorgeous jacquard pair and matching blazer – my semi-inspiration) decided to  cut a UK 6 due to the slight stretch of the material. I took 2 inches off the length as the pattern is drafted for someone who is 5’6”.

Vicky: Both of us were, to a large extent treating this as a wearable toile knowing that these would fit us way better than ready to wear but would still require some edits. Plus, we also needed to learn some construction techniques!

Fabric Selection

Vicky: This is always one of my favourite parts. The pattern calls for a stretch woven with 5-10% stretch. This was a totally new field for me but I knew Sarah at Likesewamazing had some gorgeous paisley designed deadstock in. I was inspired for these trousers after a chat with Stacie (Notions of a Dressmaker) who’d made the SOI Ultimate Trousers. Pockets wise I used some Grey Bamboo Tencel Twill I had leftover from previous projects because it is dreamily soft.

Kat: I struggled to find a nice stretch woven for ages, but when I was buying shirt material for some shirts I spotted this Burgundy stretch cotton suiting fabric from Croftmill, which was quite a steal at £6 a metre, so figured it would do for a wearable toile. I had some Burgandy Rayon leftover from my Sudley so used that for the pockets, which maybe clashes a bit but hopefully won’t be seen!

Construction

We constructed the lions share of these on a zoom call together. We used a regular stitch i.e. not zig zag or stretch for the seams and a sharp needle. We were a little unclear on if this was correct but it seems to have worked.

Vicky: I was slightly behind on construction compared to Kat as she’d already cut hers out. I added the pintucks as I enjoyed the overall aesthetic. I had to unpick the ones on the back as I’d used the wrong notch at the top but fortunately I’d used a longer stitch length!

After Kat had forged ahead and we looked at the instructions we used the method we were already familiar with to insert the inseam pockets. I’m not great at left and right so my fly is actually on backwards, I followed the instructions for inserting the fly mirrored.

Kat: This was my first zip fly as when I’ve previously made trousers I’ve done the button fly, Vicky has a bit more experience from making her Dawns.  I’d tried my trousers on at this point and identified I needed to take in about 4cm at the waist which I did using the back seam, starting from level with the bottom of the darts and grading up.

Vicky: We both found the fly insertion instructions to be tricky. I would recommend reading instructions for another pair with a fly too to really help understand the method. Once the fly had been inserted I tried mine on. The fit in the waist is great but in the hips they’re too large, I think I’ll size down to an 8 in the hips if I make them again.

Kat: Attaching the waistband was a challenge, I definitely had to put these in the naughty corner at least once. I was so confused by the instructions and my zip not being neatly sewn didn’t help. After cutting off the section it says to remove for the one side and about 4cm off the waistband as this was the amount removed from the back seam, I just couldn’t get the waistband to fit on. I ended up sewing on an extra section so it would work. This is possibly because my zip wasn’t sewn close enough, but to be honest I was very confused and frustrated at this point.

Vicky: having been slightly behind Kat I knew that this insertion was going to be a challenge. I sat down and had a cuppa first. My advice for construction is:

  1. For the fly overlap, baste this prior to attempting waistband construction
  2. Remember you are sewing the short sides of the waistband to the fly first.
  3. Don’t cut any of the seam allowance before you’re 99% certain the waistband is on correctly.

Kat: The final few steps were comparatively easy and I enjoyed the construction of the vents at the bottom.

Vicky: My final tip for the fly is chalk on where you’re going to topstitch or you could end up incredibly wonky!

Verdict

This is definitely an intermediate sew and these are more challenging than the Chandlers or the Pietras. If you can find a sew along definitely do use one, but during Kat’s waistband meltdown she couldn’t find one.

Vicky: My fit requires a few more tweaks. I need to do a crotch to waist analysis and probably take them in to the 8 at the hips. These trousers are destined for my sister to see if they fit her. It’s not a priority but I would like to make another pair.

Kat: I actually really like the fit and style of these, but my zip was a massive fail. I am tempted to try again so it is a neater finish as think these could be great for the office. Hopefully no one will be staring at my crotch too much! My pockets stick out a bit, which may be due to not following instructions, or just down to my hip to waist ratio! Overall, a really nice pair of trousers which I’d like to attempt again and hopefully do a bit better!

Likes

  • The different style compared to what else is available
  • The pattern markings showing the knees and hips
  • Leg Vents!
  • Pockets

Could be better

  • Complicated to follow instructions
  • Lack of information on the rise

Make Nine 2020 – It’s Dawning on Me

I’ve gone a little bit out of order here. As of yesterday I have a shiny new second pair of Dawn Jeans so I’m sharing them whilst my edits and the experience are fresh in my mind. I said previously I wanted to make these as my old ready to wear pairs had seen better days and they never really seemed to fit me.

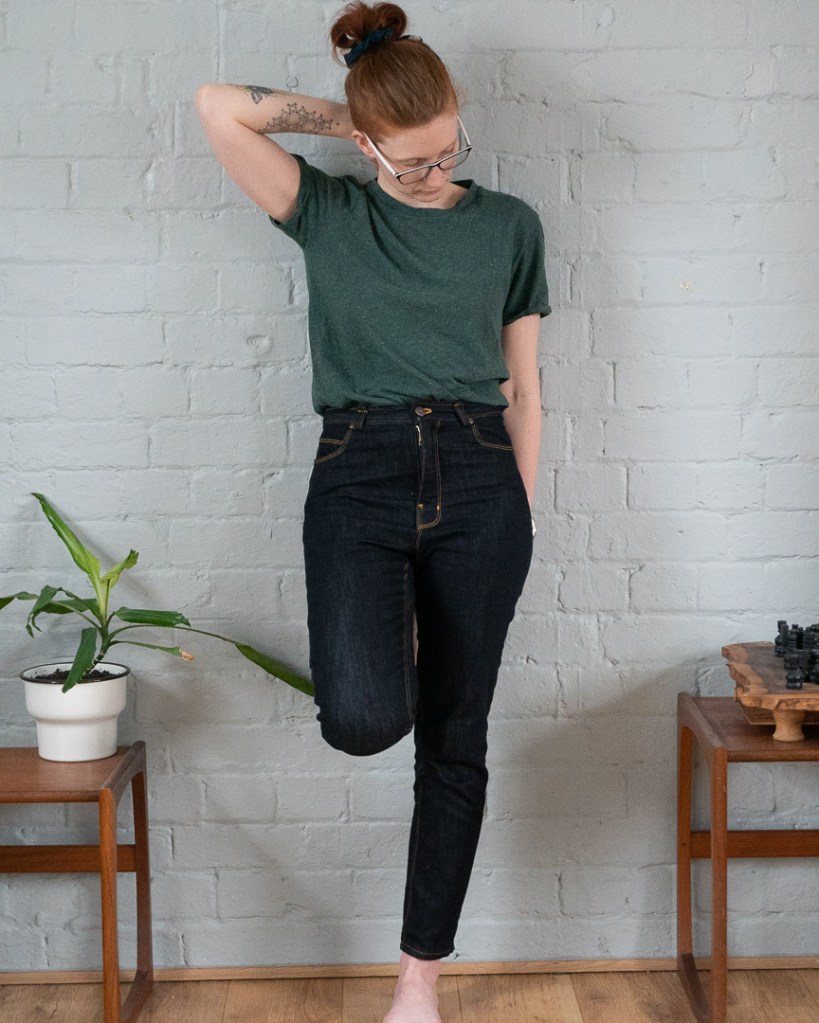
I made my first pair of Dawns in March in a blue (slightly) stretchy denim from Likesewamazing which I bought at the shops 1st Birthday Party! I had a voucher from my Grandparents for Christmas and I knew this would be a perfect use (my Grandparents are very supportive of my creativity). I cut the pattern as a straight size 6, regular length as my waist is 27(ish) inches and my hips are 37(ish) inches and I started sewing!

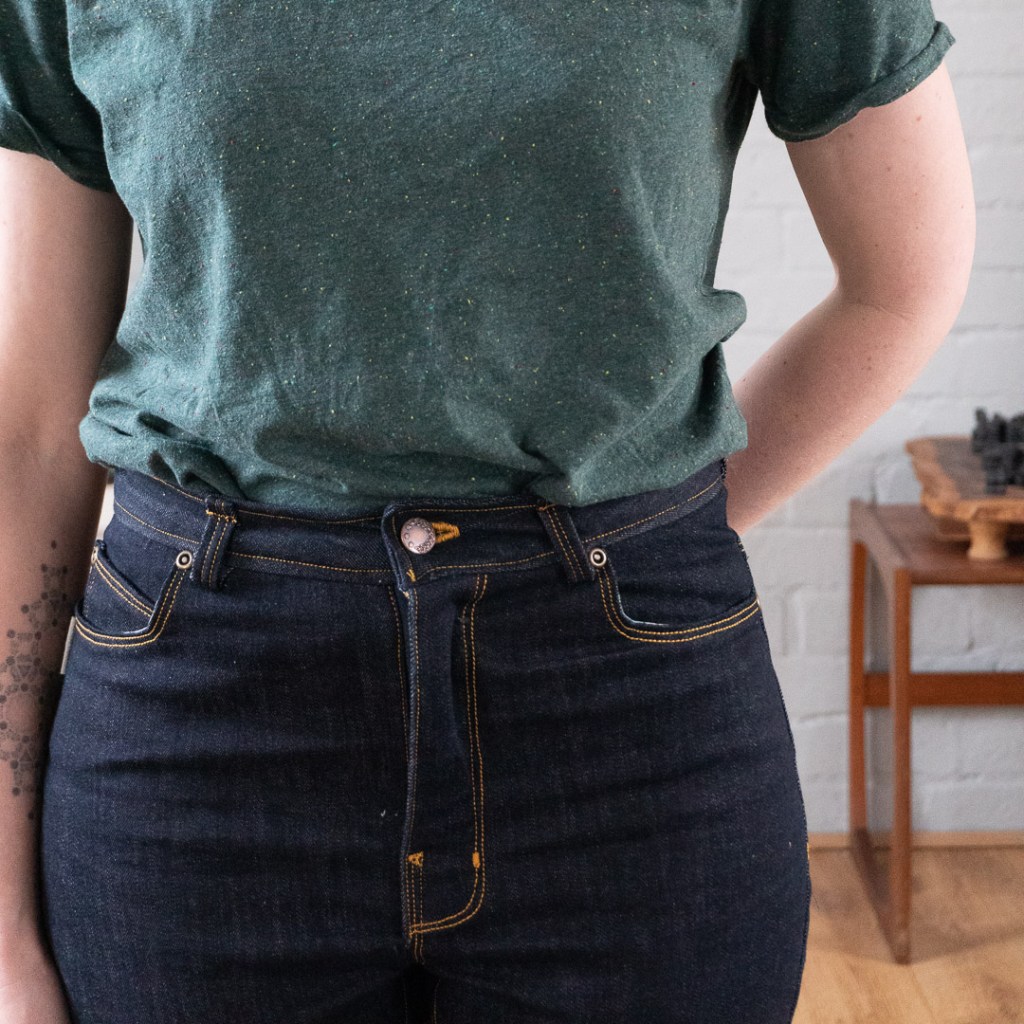
I really enjoyed making these jeans. I went high risk for my first attempt and selected golden yellow for my topstitching. Making my Dawns helped me to realise I really love topstitching. I put my initials on my back pockets because I can and I wanted something a little personal. I wouldn’t have been able to do such neat (in my opinion) topstitching without the straight stitch foot that came with the Singer 201k. It really helped me to visualise the spacing.

One error I made on the first pair is not grading my seams enough. This made it REALLY hard to do the button hole. I almost cried at sewing club when it wasn’t working because I was so frustrated. However, I eventually got the buttonhole completed, hardware on and have a pair of jeans that I love! BUT I knew I could make the fit even better….

Enter the second pair of Dawns! Having assessed the fit and sent WAY too many pictures of my (clothed) crotch and backside to @Measuretwice.katonce I had a vague idea of where I could make the fit better. I identified these using the Closet Core Patterns fit guide for the Morgans.

  1. Sway back adjustment due to the wrinkling at the top of the back
  2. A flat pubis adjustment due to the wrinkling at the front
  3. A low butt adjustment due to the wrinking at the bottom of the back

I made a toile of these edits in some non stretch stripe denim I’d had in my stash for years, maybe a decade? They were a tad tight around the thigh so adjustment number 4 was identified.

4.Full thigh adjustment

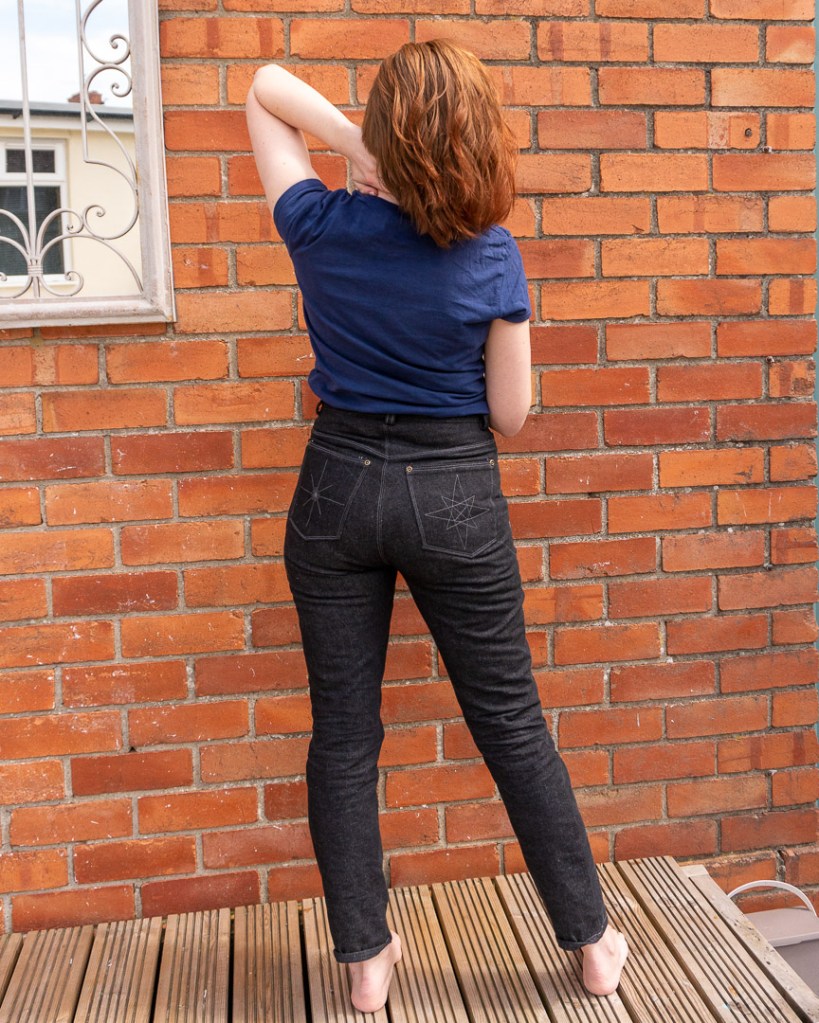
This pair were made in some non-stretch denim from Stof Stil which, was bought for me by my Gran for my Birthday. It’s taken me 3 months to work up the courage to start making these adjustments(!). For the sway back, full thigh and low butt adjustments I made edits to the back pattern piece (see below). For the flat pubis I made adjustments whilst sewing to make the front inseam slightly deeper.

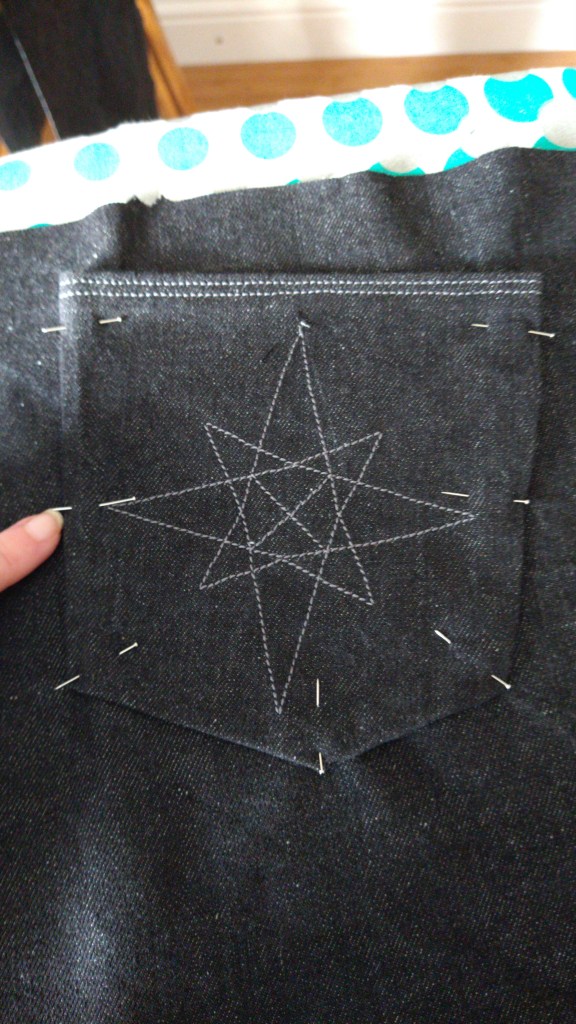
I chose not to put my initials on this time and my back pockets have a starburst and compass style of designs. I put these together using Microsoft publisher on an A5 size sheet and the design is 12cmx12cm square. This was then transferred onto the pockets using wax paper and one of the tracing wheels. I didn’t get the compass one quite straight so I slightly fudged it so the topstitching didn’t overlap.

After I’d sewn together the yoke and the back legs I realised that my pockets weren’t even. Some days I would accept this but I couldn’t this time so I unpicked and re-stitched. I was a lot happier with them the second time round.

One construction tip I have is: when you have sewn your inseam DON’T TOPSTITCH YET. Baste the side seams together and check for fit. This way if you aren’t happy with it you don’t have to unpick 3 lines of stitching and potentially some overlocking you only have the side seam and the initial inseam. I didn’t have to unpick but this is part of the reason I said ‘meh’ it’ll do to the first pair on the fit.

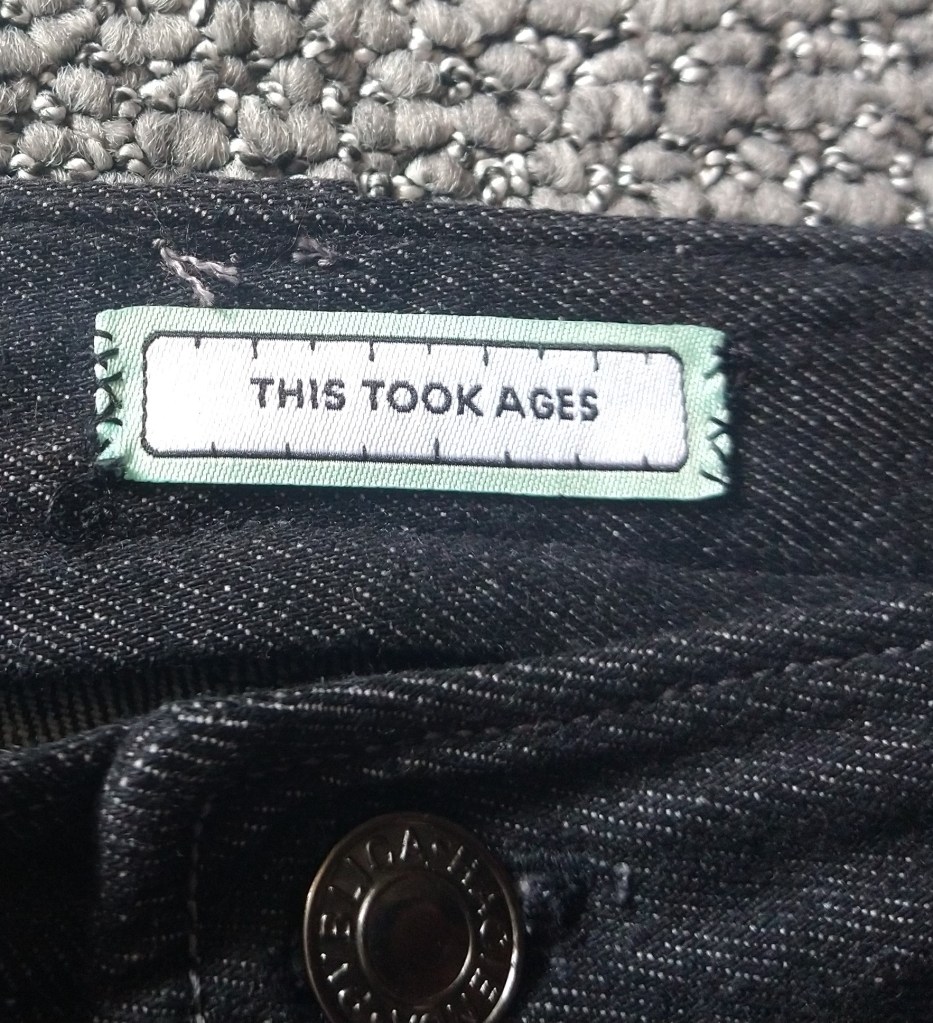
Once I’d fitted them I ploughed ahead with the rest of the construction. I have had a minor ‘Sewing fail’ as one of my belt loops is on inside out but I’m living with that. I also had trouble with the button hole again, despite having graded my seams much better this time. However, they are together, fitted better and I’m thrilled with them. I finished with a Pink Coat Club ‘This took ages’ Label because I spent time on this project and did unpick topstitching I wasn’t happy with several times.

For my photoshoot styling I have attempted to add some entertainment by emulating some vintage jeans adverts. Photography is another of my passions and I enjoy mucking about with the camera.

Things I like

  • Incredibly thorough instructions
  • Fun options for topstitching
  • High waisted and flattering cut
  • Regular length hits me in the right place without having to chop loads off

Things I don’t like

  • I often forget to put a label in until it’s too late
  • Buttonholes on thick denim are very tricky
  • Bartacks on thick denim are tricky too

Enjoy sewing, you can have jeans that fit, topstitching is surprisingly fun!

Make Nine 2020 – Getting Wilder

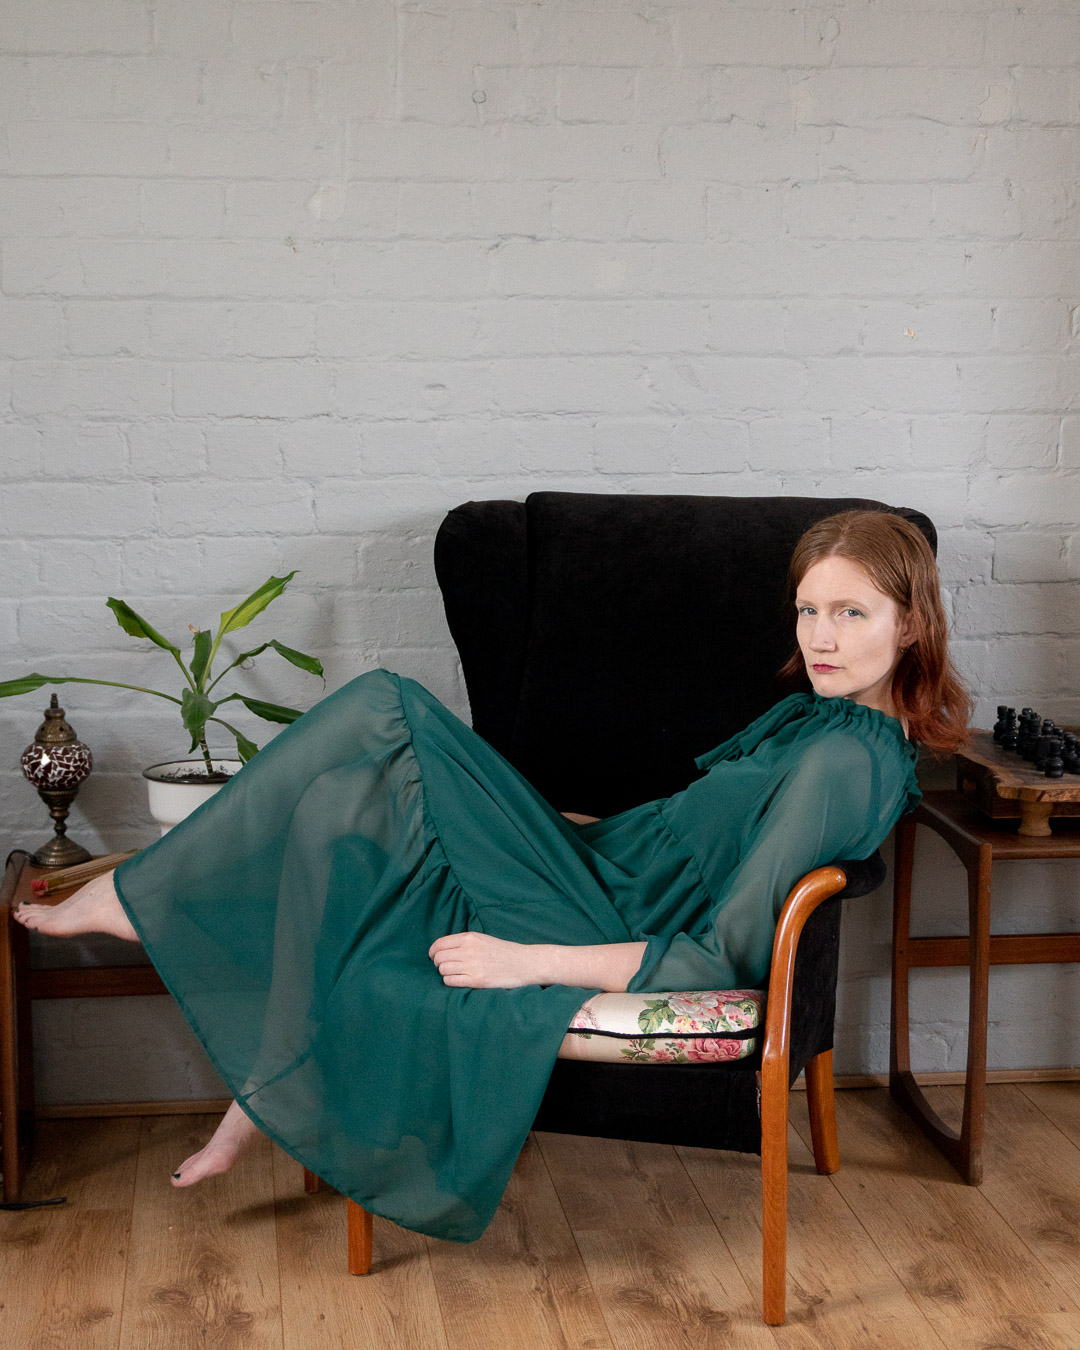
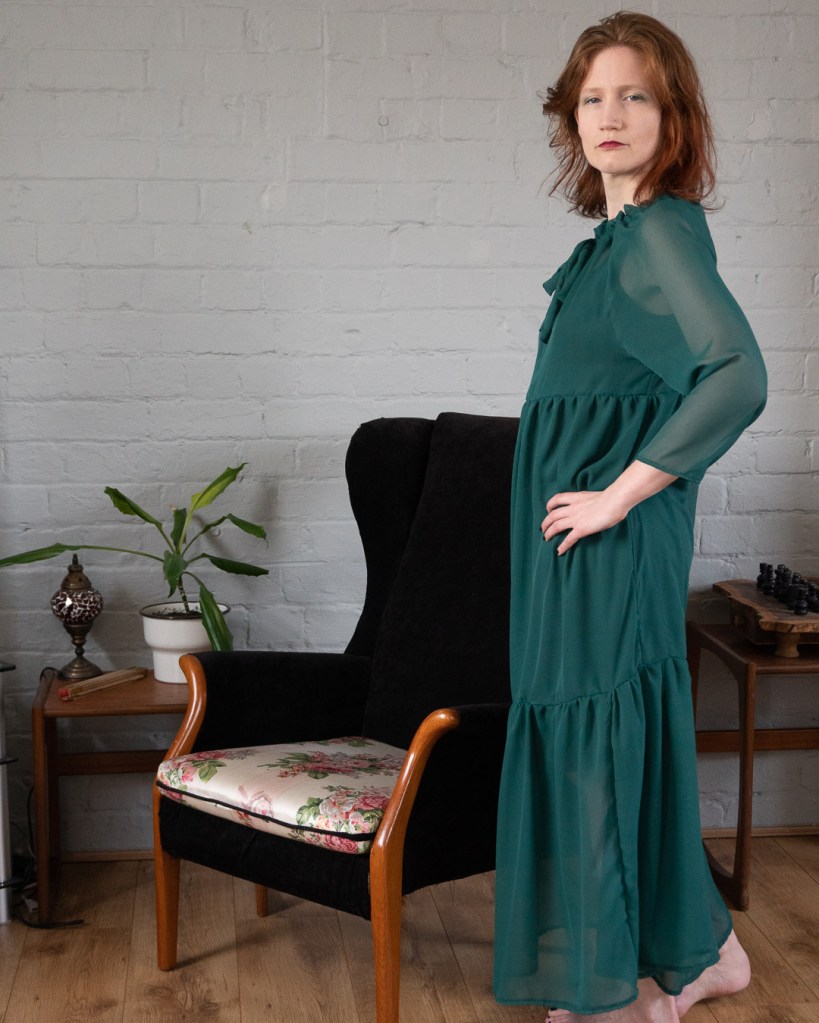
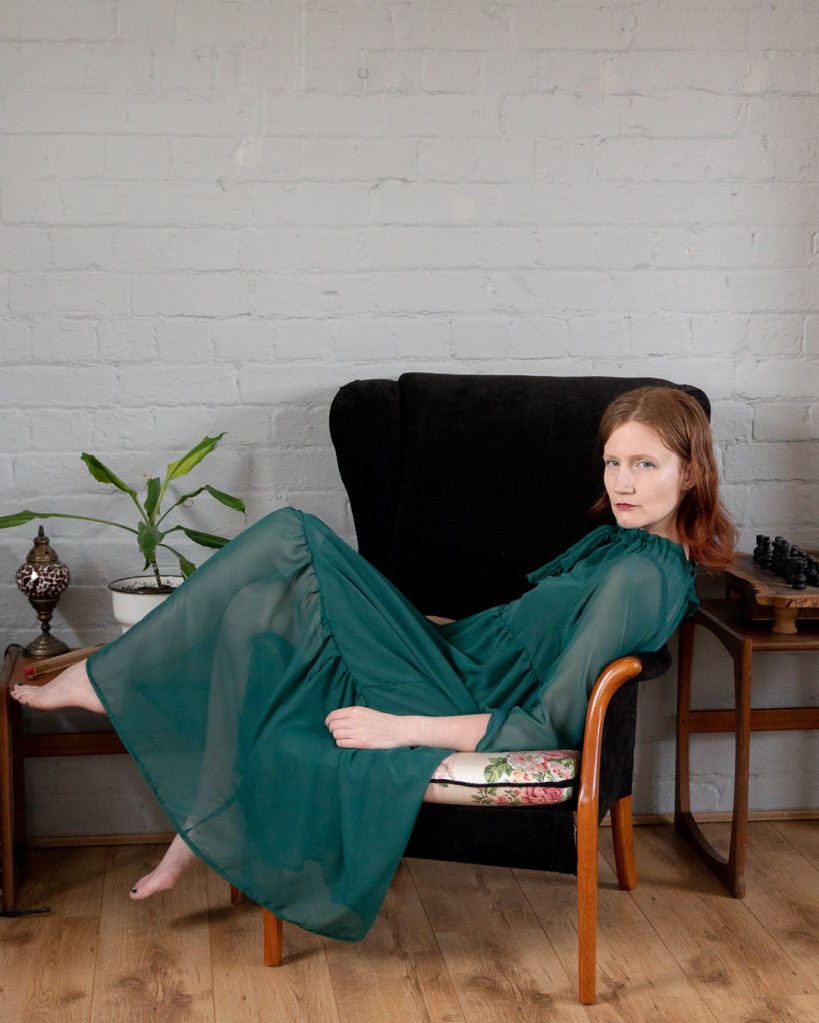
Sorry about the pun. We had a big debate at sewing club about whether it was pronounced Will-der or WILDer. I’ve gone with WILDer, correct me if I’m wrong. I’d seen a lot of really lovely ones on everyone and was getting some major FOSMO (Fear of Sewing Missing Out). I mentioned in my previous post how the one from @lesbonbecsfabuleax had inspired me so I was really wanting to make it in a green chiffon (purchased from Fabric Land). No Toile here, I jumped straight in (error)!

I cut out my pattern in an XS according to my measurements and it fits really nicely. Due to the fabric choice of chiffon I also planned to make it lovely on the inside with French seams. Unfortunately due to brainfog (that I now know was Covid-19, horrible stuff, wear a mask) I managed to sew the first few seams incorrectly.

To help anyone who may make this mistake from the instructions: I had sewed the centre seam of the bodice the wrong way i.e. I had basted the part that was a seam and seamed the part that required basting. At this point after unpicking chiffon, with no holes, I decided it would be safer to not French seam.

The pattern is excellent. It is well written (despite my muppet moment) and comes together really quickly, I also like how different it looks to a lot of other patterns. I can see why everyone has gone bonkers for it. I’ve already made a shirt version in a gorgeous mango coloured fabric and I MAY make a winter dress version in a slightly heavier weight fabric. Inspired by Likesewamazing’s hack I’d add pockets.

This pattern would be great for beginners, with a more stable fabric as there are no tricky closures and it introduces some fun techniques. I would recommend getting some of the PRYM ‘turny things’ to turn the neck tie through as these decrease frustration by around a million percent.

To go underneath as I am not body confident enough or well co-ordinated with my underwear enough I ‘hacked’ an Ogden cami. This was mildly successful, I added a bust dart (originally in the wrong place) and lengthened it at the lengthen lines. I need to hack it better but at present it is a slip dress for being under things so it’s OK. Fabric for this was purchased from Minerva.com it’s a black armor washed satin style. I had enough left over to make a normal Ogden and I really like wearing that too.

Things I like

  • Absolute wafty gown of dreams
  • I got to try a pattern hack
  • Really fun and easy pattern to put together that looks totally polished
  • Lots of variations available

Things I don’t like

  • The chiffon catches on things occasionally and I have to hold my breath
  • I’ve made the bust darts on the Ogden look like I have very pointy nipples

Enjoy your sewing, wear a mask, read the instructions correctly.