I have made a grand total of 3 Chandlers, two trousers and one pair of shorts. The pattern was released in January 2020 by Brittani of Untitled Thoughts, just after I’d ‘locked in’ my Make Nine 2020! I really like the pattern shape with the flat front and the elasticated back. For my personal preference it helps me feel a bit more ‘put together’ than a fully elasticated style. I have gone for the pleated option all three times as it fits my mental image of what I wanted.
Fit Modifications
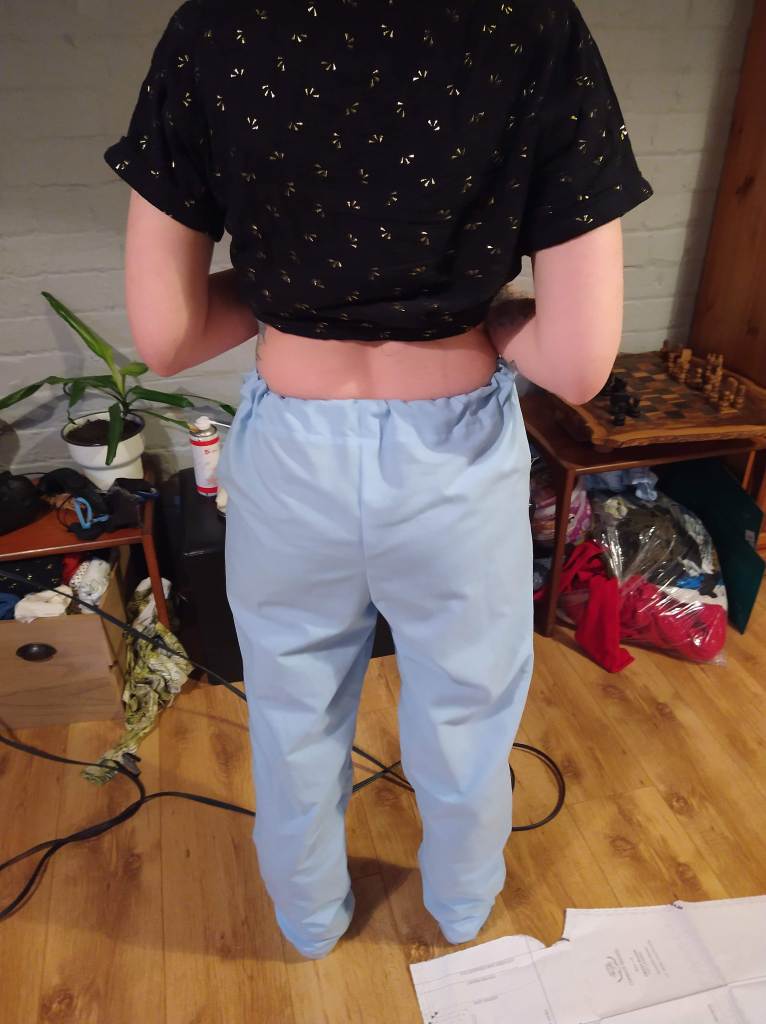
I made my initial toile out of a lovely pale blue bedsheet donated by my Mum. I knew I’d definitely need to fit these differently as a) they were my first pair or trousers (after Helens Closet Winslows) and b) The pattern instructions say ‘This pattern was drafted for someone standing at 5’8” with a slightly longer torso.’ Being 5’2” with a short torso, there were some clear indications that these may need some alterations.
I sewed up the toile and tried them on, initially I was thrilled with them and thought the fit was OK. If they were ready to wear, they probably would have been bought. However, after a bit of a nose around on Instagram I realised that I could fit them better. I went to Rumana’s (@thelittlepomegranate) story highlights to see what edits she had made. This helped me to identify I needed to move the hip up, which was achieved by taking 3.5cm out of the rise. I also shortened the legs by 2.5cm and, due to personal preference removed about 0.75cm from the side seams and inside seam to give a more dramatic taper (although all bets are off for pair 4). The final edit, which I didn’t understand how to do / that I needed to do until pair 3(!), was to take a wedge out of the side seam of the back pattern piece to ensure the side seams properly lined up at the notches.
On the left the original toile from the back and the front. On the right, the edits made to one leg of the toile
The Three Pairs
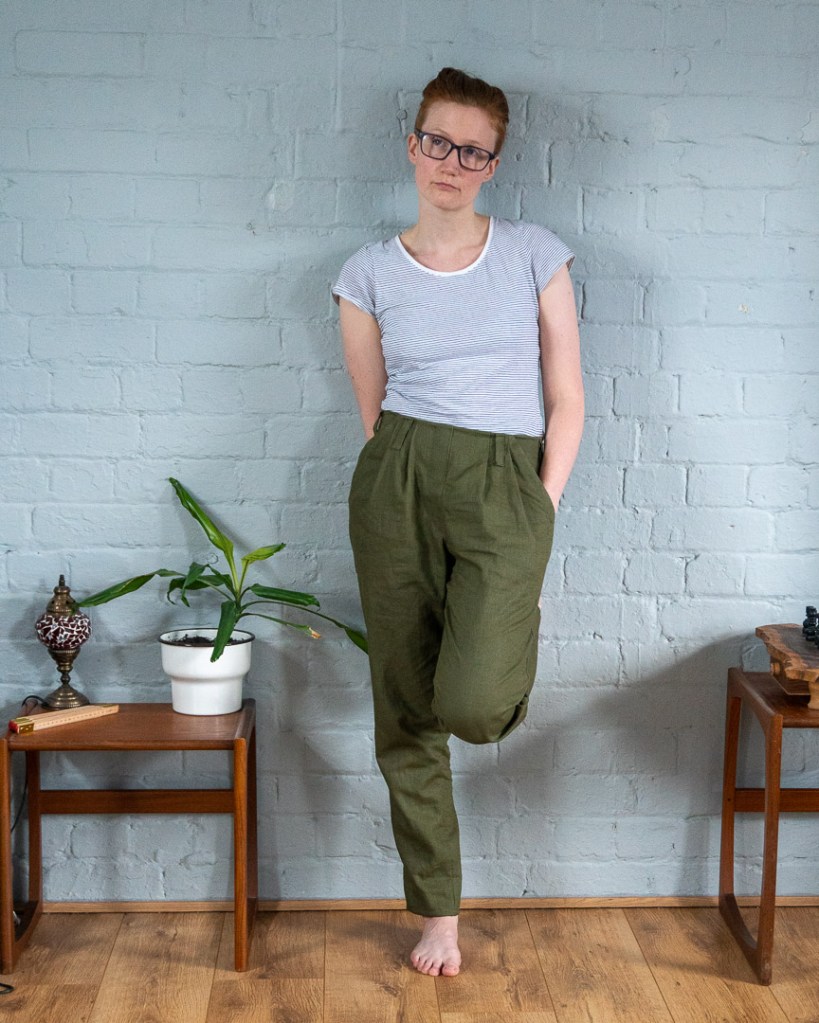
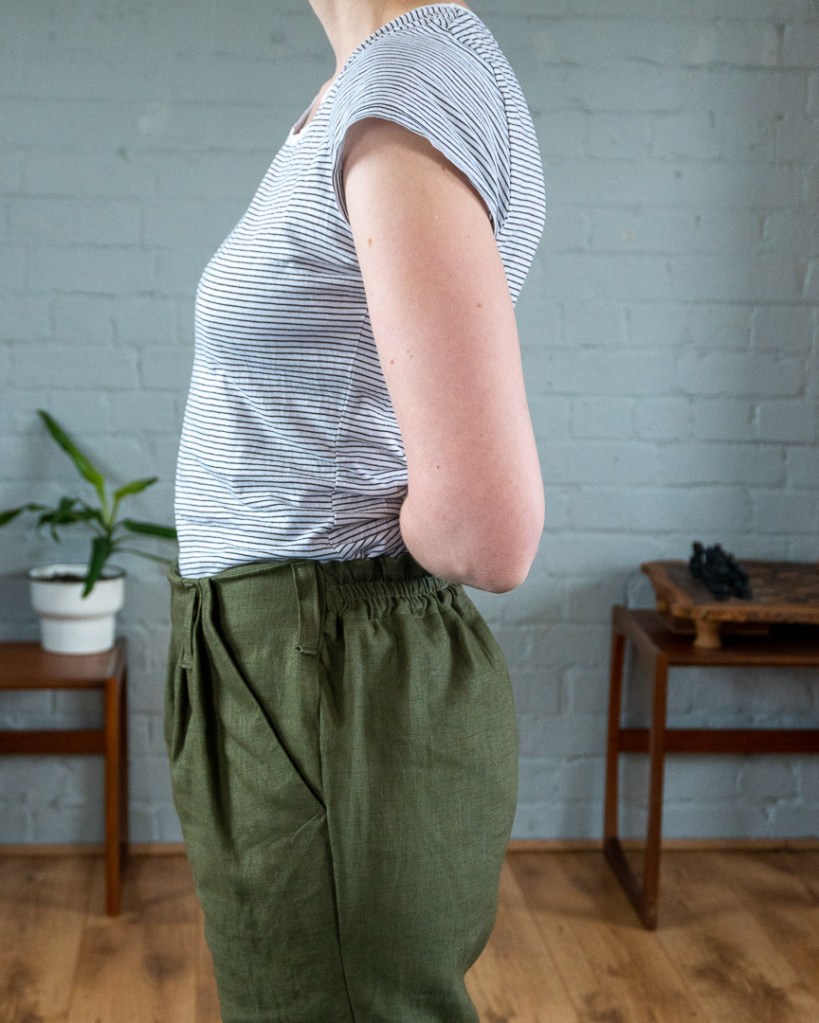
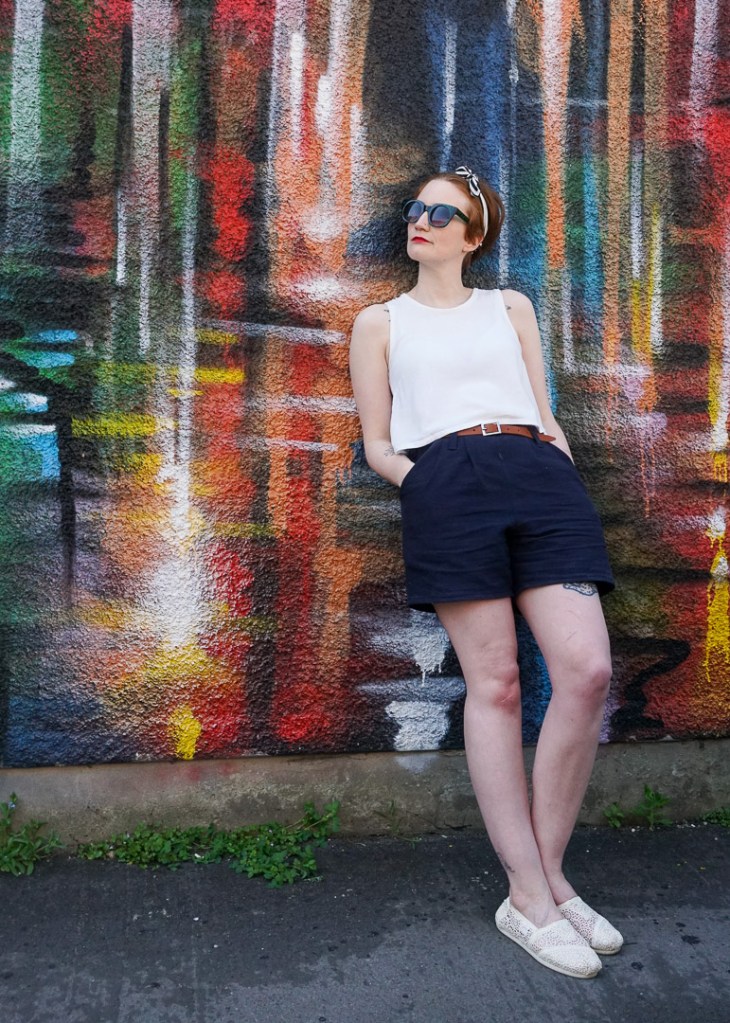
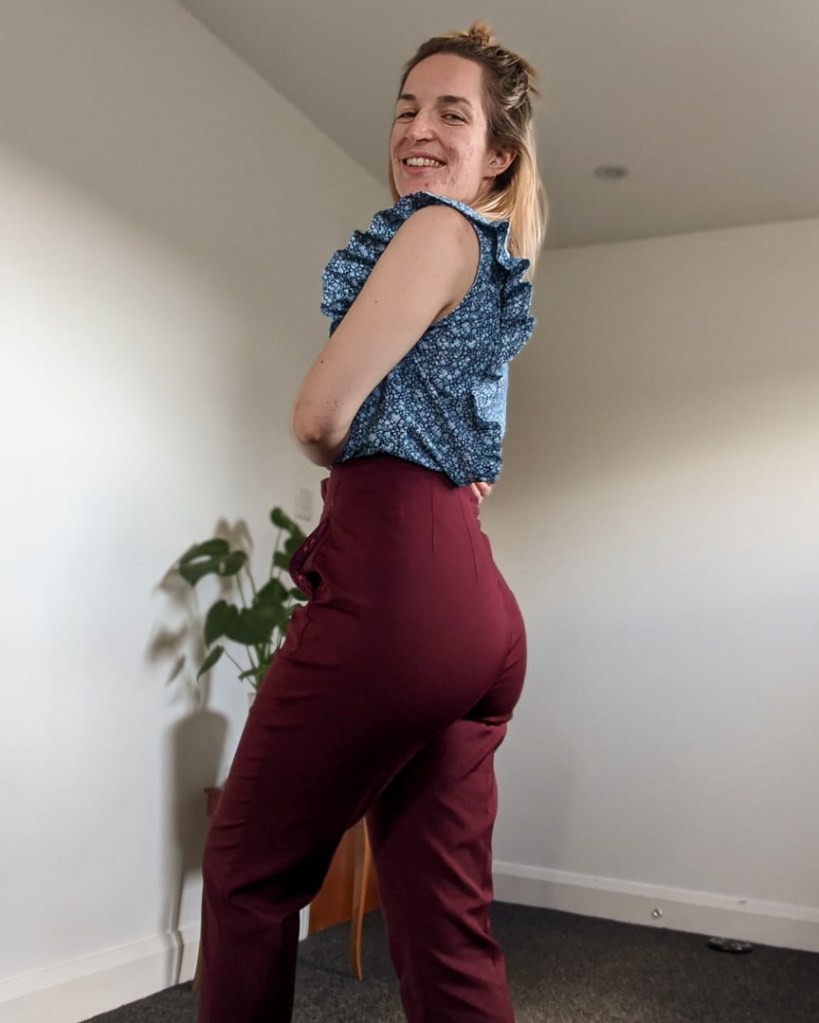
My first pair was made in an olive green linen which I bought at the Knit and Stitch Show 2020, just before the pandemic struck. I really loved the colour and I knew they’d fit in my wardrobe pretty well. It’s been just over a year since I made them and I’m still in love and reach for them very often. They’re the perfect level of put together comfy and they go with a lot of different things in my wardrobe.
Far away and close up of the front and back of the chandlers, also showing the POCKETS!
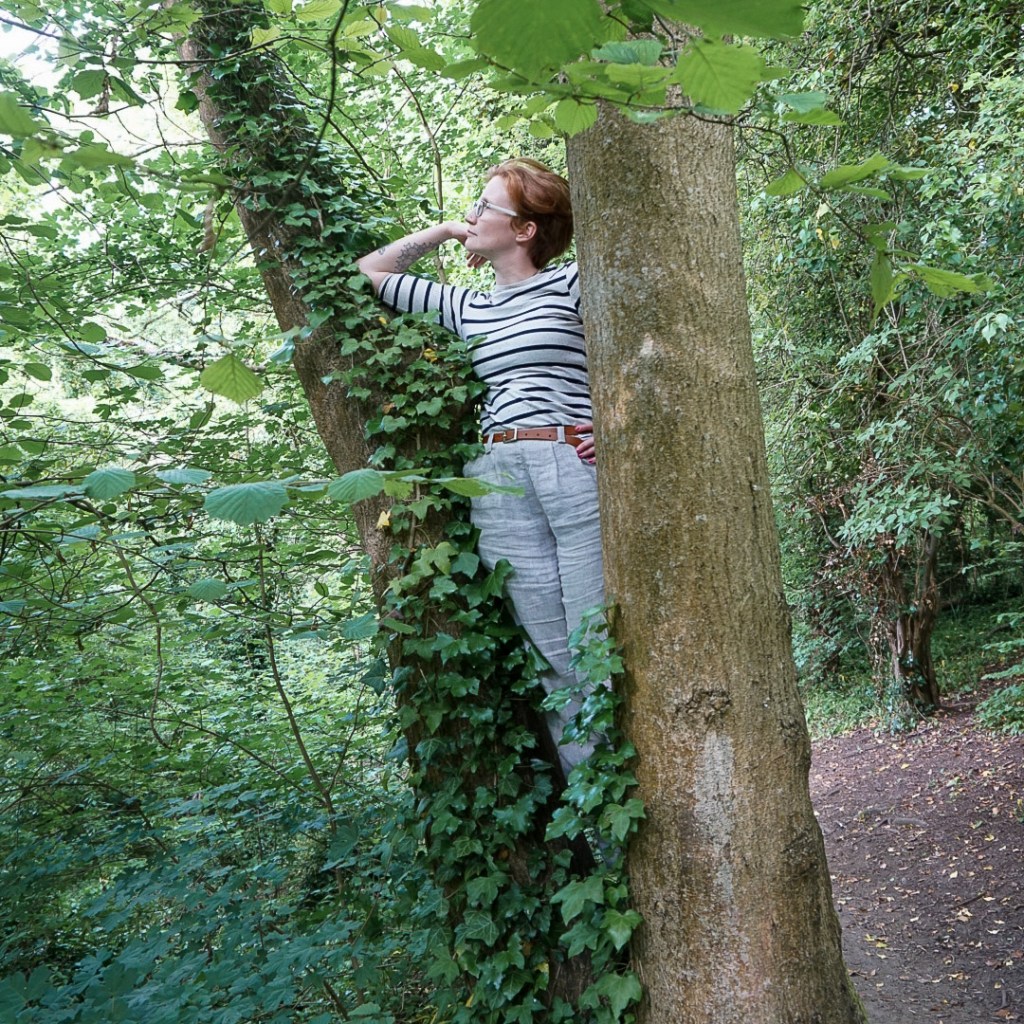
I decided I needed another pair, this time the vision was a ‘stone linen’ pair. However I wanted the linen to have a bit of a pattern, which led to me dithering ever so slightly (I didn’t want a huge stash just prior to my house move). I ended up snapping some stone herringbone linen from Fabric Godmother and it made these trousers super snuggly and soft. Incidentally, also an excellent pair of trousers to go tree climbing in. Photos taken by the lovely Jenni during a Snip Sew Snap challenge run by Like Sew Amazing in June 2021.
Photos of me climbing a tree in my Chandlers, which by now had been sewn up for over a year!
From ages 12-16 (maybe even longer) I rarely wore shorts, having been an adventurous kid, playing cricket, climbing trees and getting skinned knees. So, even many years later, I can be a bit funny about shorts. Sewing for myself means that I can feel fairly confident about getting something I’m comfortable in. I also don’t have to go into changing rooms. Having made two pairs of trousers, I knew that I was going to be able to get the fit of the shorts to enhance my shape rather than fight against it.
This was also the pair I fixed the non-matching side seams. To do this I slashed and closed a 3.5cm area of the back side seam. No more mismatched leg seams for me and the feeling of a sewing level up! I have also, in my opinion, started to really nail the distribution of the elastic to secure it across the back.
I’ve decided this is an excellent trouser pattern for adventuring as, as well as climbing trees, they can be used to roll down hills! Them being a cotton-linen blend also means I’m less likely to have the crease marks to show this achievement.
Another Snip Sew Snap adventure in the sun, photos taken by @give_us_a_toile!
Round Up
In case you couldn’t guess I really like this pattern, I find it a fantastic sew with clear to follow instructions. I did have to do quite a few fit adjustments but I’m not surprised by this being a bit vertically challenged. It’s definitely a great trouser pattern for beginner sewists as you won’t have to do too much fitting due to the elastic at the back. One word of caution is that if you have a very wide hip to waist ratio, you may have to insert a side seam zip.
I have a pair planned for my sister and my friend is going to get a pair of shorts with a turn up for her (extremely) late birthday present. Following that, there’s probably another pair for me in black, maybe even in a lightweight wool!
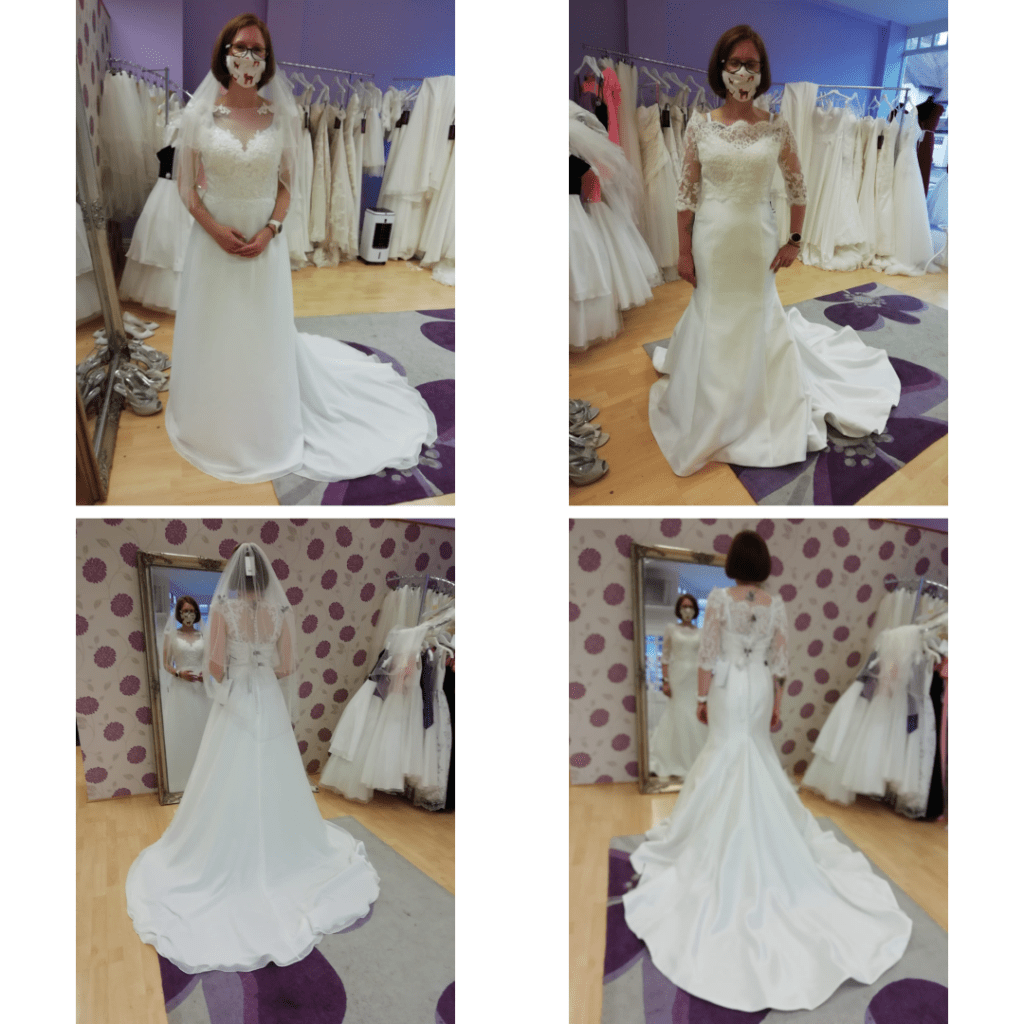
Being in the middle of a global pandemic meant that creating complex fitted masterpieces for my bridesmaids was out. Also, the fact that I had 4 (down to 2 due to number constraints) meant that fitting and creating 4 bridesmaids dresses, a wedding dress and a suit between July and March, alongside a broken arm, was a herculean effort that was beyond my motivation levels
Concept / Design
Comfy was my main criteria, I personally believe that when people are comfortable in what they’re wearing they look extra beautiful. I also wanted to make them semi-breastfeeding friendly (for two of my bridesmaids). I looked at two dresses the Delphi Dress by Named Clothing (this has now been discontinued) and the Hilo Dress by Friday Pattern Company.
Named Delphii Line Drawing on the Left, Friday Pattern Company Hilo Line Drawing on the Right
There were two contributing factors which helped me decide on the Hilo in the end. 1) I broke my arm meaning I needed help from my lovely sewing friends. 2) The Delphi was only available in A4, with non-nested sizes. I love that my friends offered me help but I’m not such a bridezilla that I would make people kindly giving up their time to help me piece 4 A4 tiled patterns that may then need tracing and grading!
Some of my lovely sewing friends, who just happened to be walking past as we exited the ceremony!
I then got the A0 sheets printed by my local printer. A note about this – Friday Pattern company are absolutely brilliant at trying to reduce fabric waste however the cutting layouts often (certainly for the Hilo and Sagebrush) show the whole piece i.e. cutting on the flat. On the pattern which you print, there is only one ‘half’. So I printed 10 copies (2 for me, 2 for each bridesmaid) of the pattern to be able to piece them together to be able to cut out on the flat without losing my marbles, they are LARGE pattern pieces. They were even larger as I had then made them maxi dresses and on one had altered the length of the bodice.
I also relied on my lovely Bridesmaids to take their measurements, which for non sewers, can be a bit of a nerve wracking moment. Fortunately, on to another great point about the pattern, is that it’s for Jersey! So the stretch is an excellent bit of forgiving help if any errors have been made.
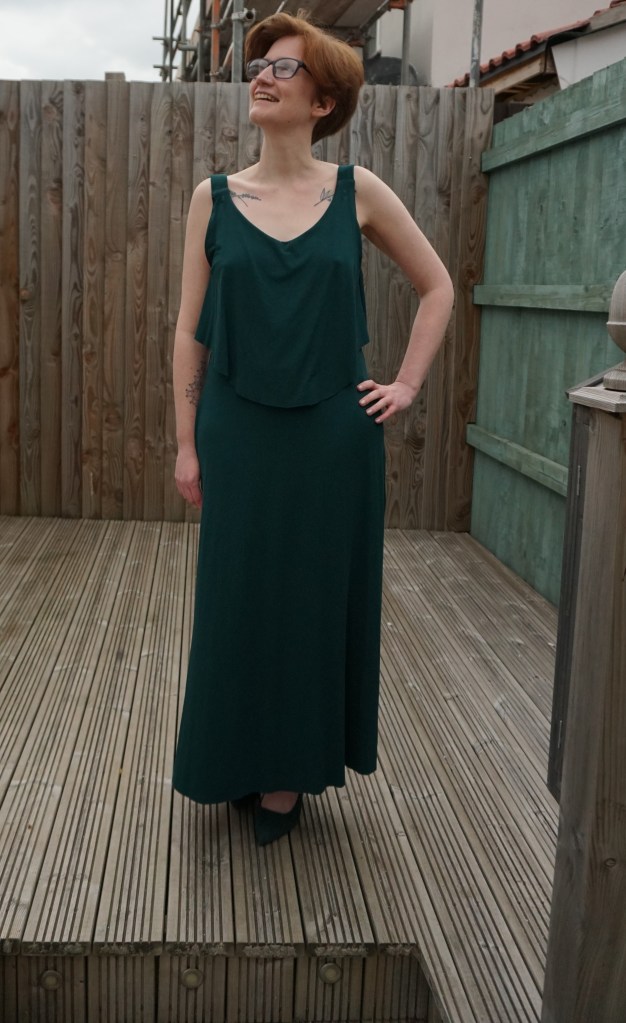
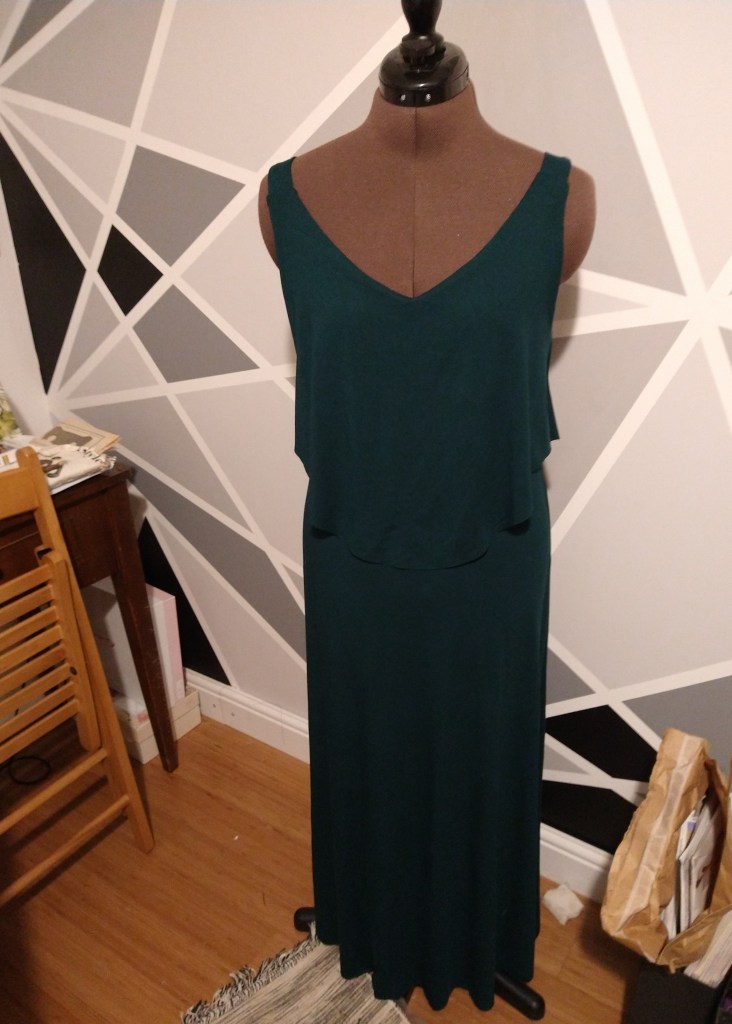
The fabric I selected, after getting quite a few samples, was a bottle green viscose jersey from StofStil. I decided to use a viscose jersey as I wanted the dresses to have a drapey, wafty movement. One thing that is also great about this fabric is it doesn’t go really see-through when stretched.
I made myself a practise garment so I could establish the fit and the look of the garment. I made myself the low-back version. A few notes on fit here *low back dress only* – Size down. My measurements put me firmly in the size S. However the back gaped a lot and you could most definitely see my pants. I ended up taking it in at the sides a fair bit, it now fits much better over the lower back. I then read the instructions again properly as I was concerned about the fit on the bridesmaids, which reassured me that sizing down slightly for the lower backed dress was normal. The bridesmaids had all requested the higher backed version due to the wedding being in March so I didn’t size down for them.
Cutting and Making
I cut my one in my sewing room on my table (75x150cm) this was not large enough. I cut my second one on the living room floor, helped by my cat. So my third was cut in my office room on the floor with the cat locked out! She likes to help.
When I’m sewing Jersey I tend to use wonder clips instead of pins. Sometimes I find it hard to get pins through Jersey and also, clips are harder to miss and go over in the overlocker. I had a real issue sewing the first dress, skipped stitches galore! I have since re-read my sewing machine instructions and am more confident now! I skipped the sewing machine for the other dress and made it completely on my overlocker. I also love that with the viscose jersey, I could choose not to hem the edges as they wouldn’t fray!
Finishing Touches and Final Thoughts
I really enjoy putting labels in my clothes. No label I could find felt more appropriate than the ‘Room for Cake’ labels from Joy of Pink Coat Club. My Sister and Sister-in-law have said the dresses were super comfy so I think the brief was nailed! I like to think, in a very cliched way, that these are dresses that you can wear again.
The Hilo is great and really easy to follow, like most Friday Pattern Company patterns. I would recommend this for a beginner, especially as there are very few fit issues to struggle with. I also managed to whip these up pretty quickly, the cutting was the longest part. I also think I’ll be making myself another one, potentially hacked into a top!
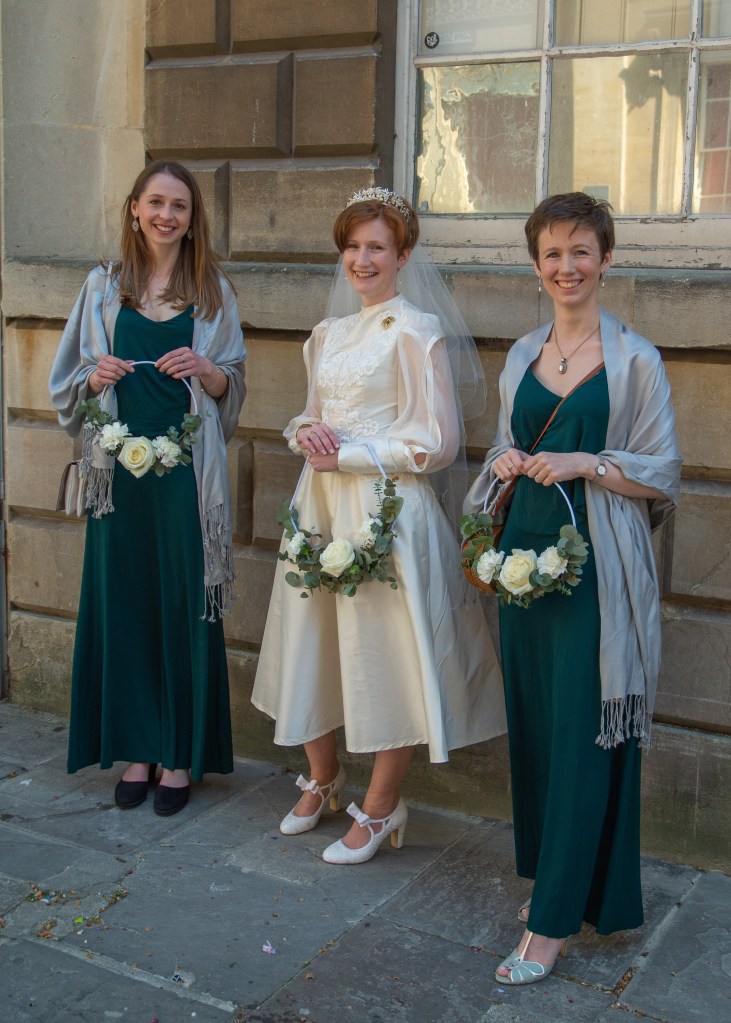
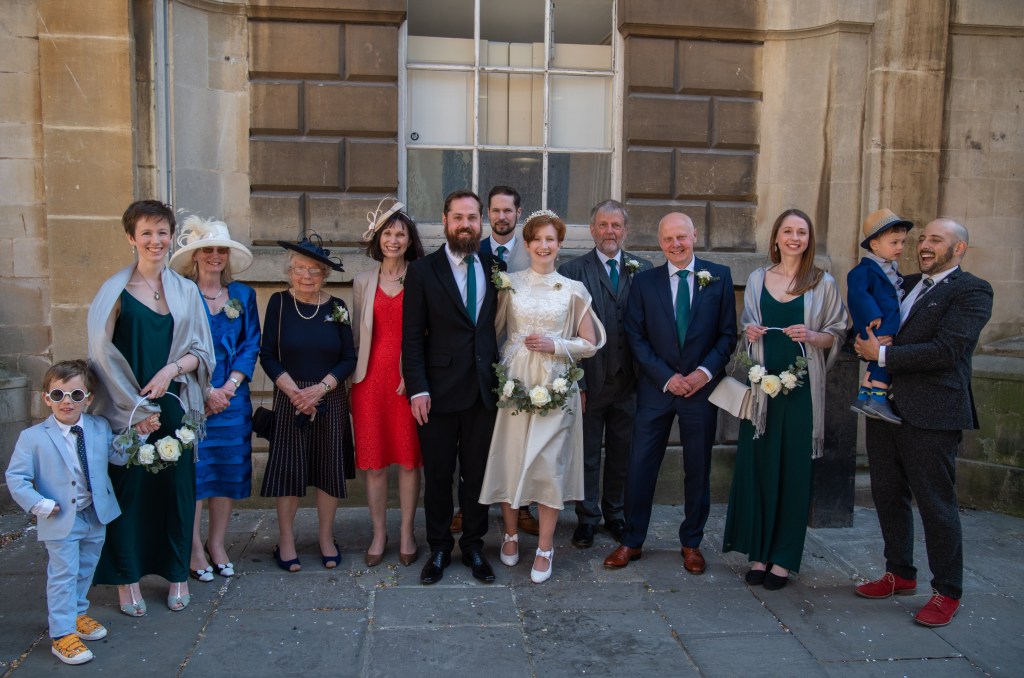
My Beautiful Bridesmaids in their Dresses. Photo by Brown Eyed Photos
Looking on as I’m suitably confettid!Dressed up all Glam!
Last time I showed the pattern selection for the suit alongside the toile making process. I also filled you in on where I bought my fabrics and which fabrics I used. In this blog I aim to detail some of the construction and some of the parts I found particularly tricky.
I had bought one large length of the fabric (it’s available in 10cm increments) so cut out the jacket and trousers in one fell swoop. This was a test of mental toughness as there were around 50 pieces between them, plenty of tea was drunk during the cutting process.
The Jacket – Vogue 8890
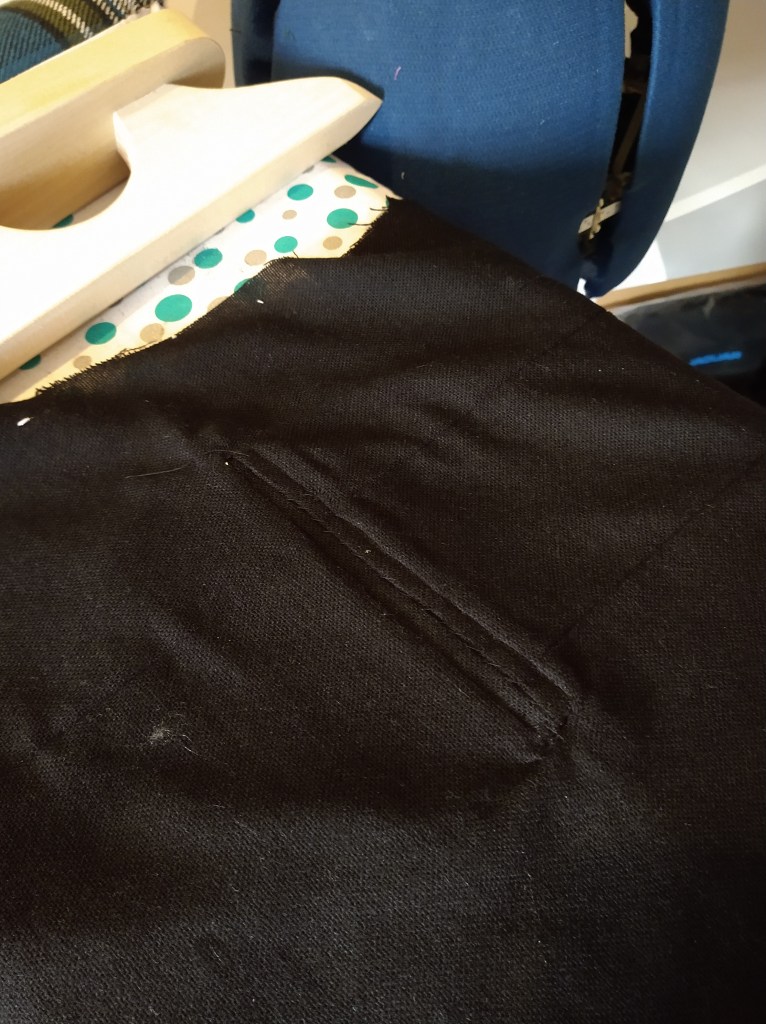
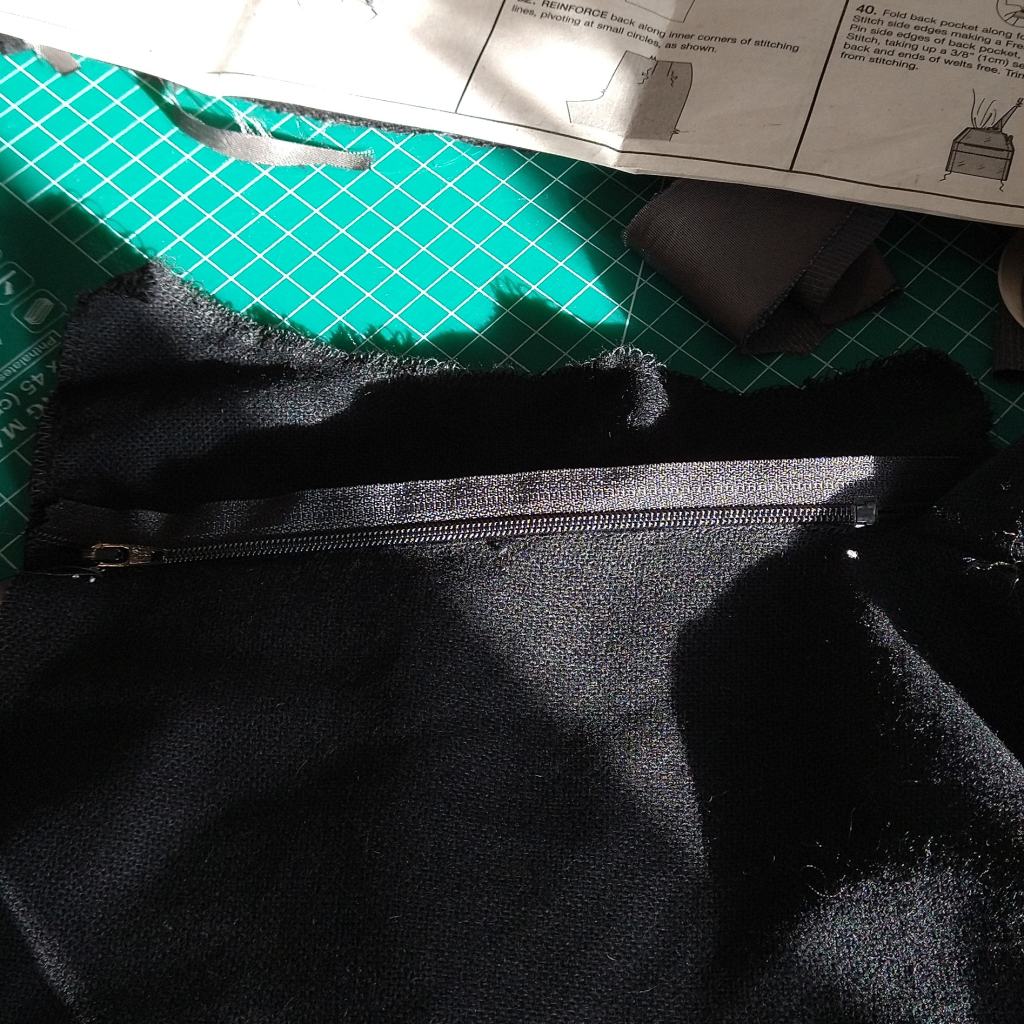
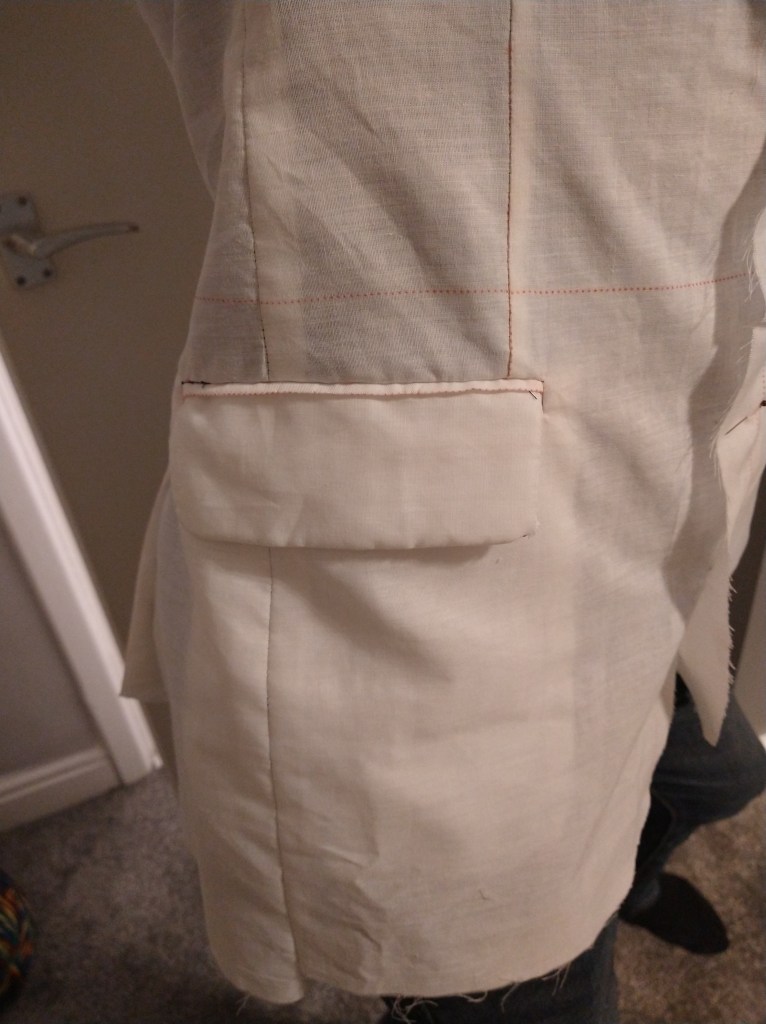
The construction starts with a bit of a baptism of fire, after constructing the dart and joining the front and the side panels, it’s onto welt pockets 1&2. The fabric choice made this complicated, the loose weave nature of the fabric meant that the triangles, which make or break a welt were very tricky to secure.
Left, the inside of a welt pocket on the front. Right, the sealed welt pocket post construction, the flap is hidden inside – for now.
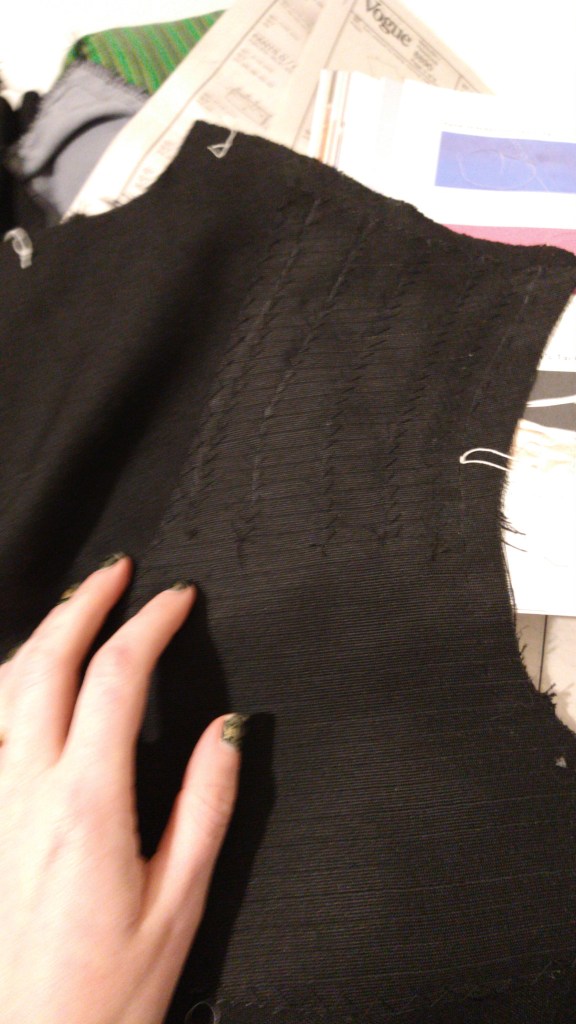
Following that, it was time to start some of the plethora of hand stitching involved in the construction. Step 1 was to attach the chest canvas to the standard canvas, this is done using fell stitches round the outside and pad stitches to hold shape. Fortunately, compared to the stitching on my wedding dress, where I had to hide in my sewing room I could do this stitching in the living room. I then attached this structure to the front and side of the jacket, this included a fell stitch to secure it around the edges. One of the key parts of construction for the shaping of the blazer is to attach some twill stay tape to the ‘roll line’ of the jacket, then padstitching is again used to help the jacket lapels sit properly.
Left, chest canvas attached to the standard canvas, Right, the lapel with the twill tape attached to the roll line and padstitching on the lapel
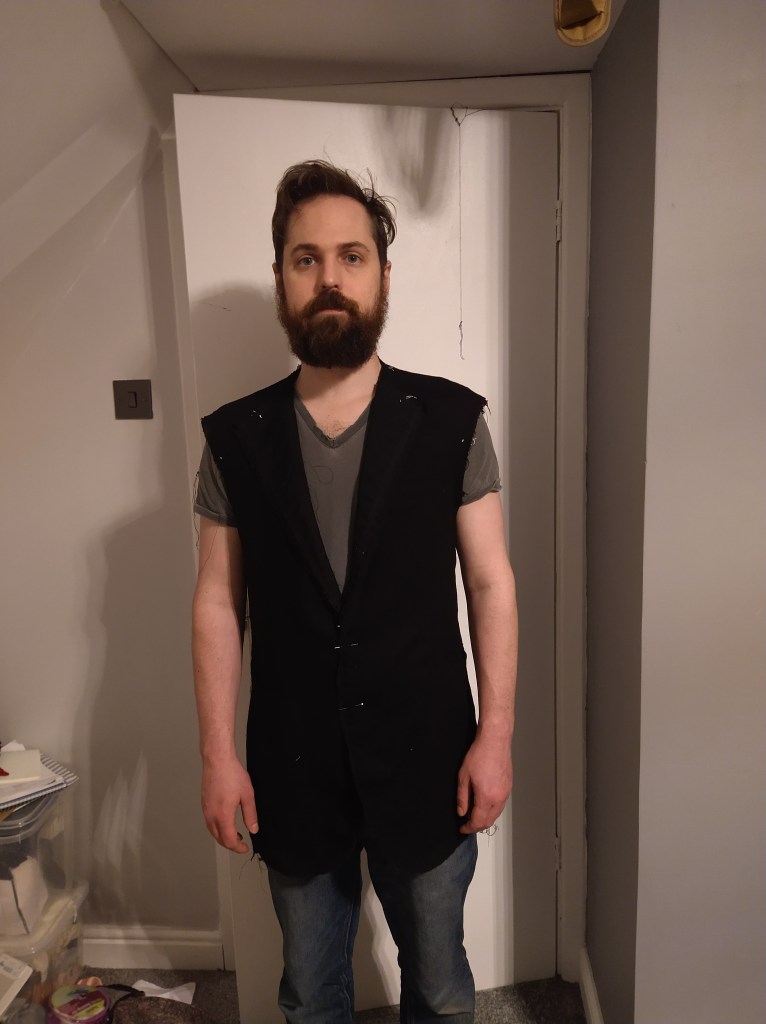
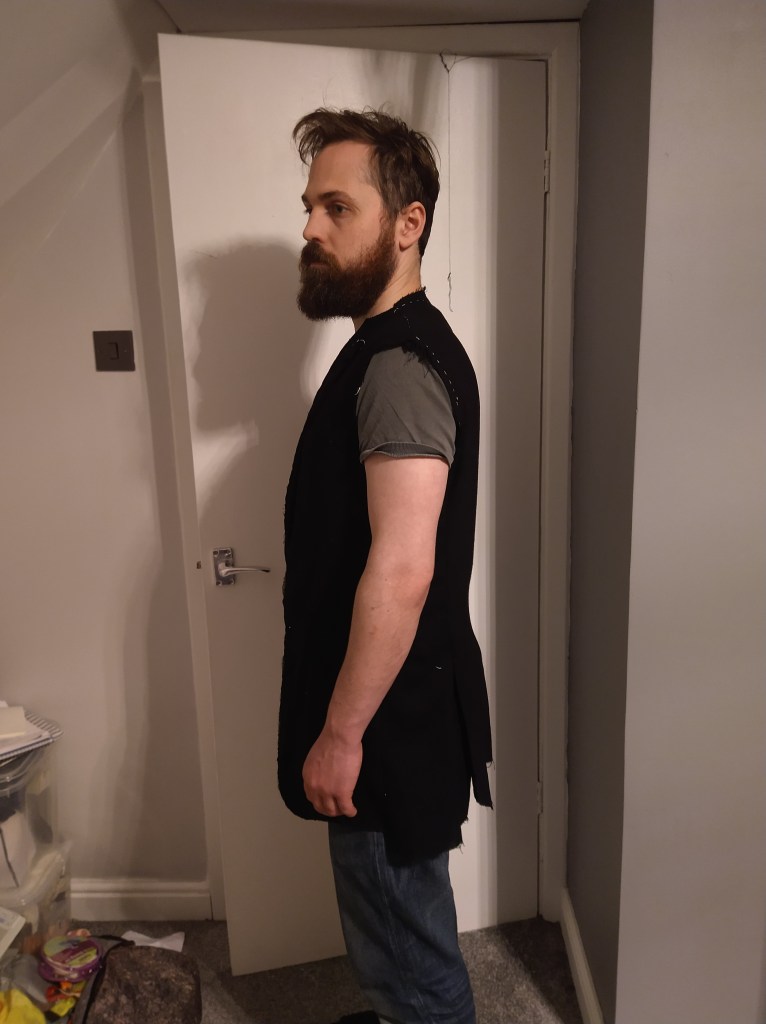
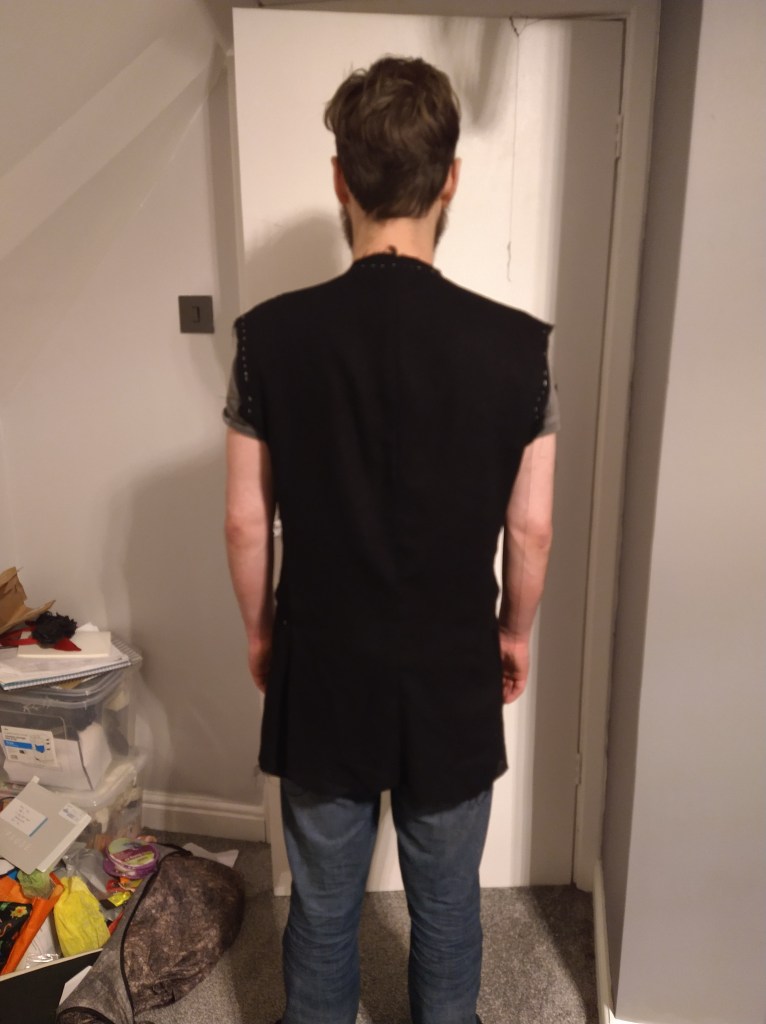
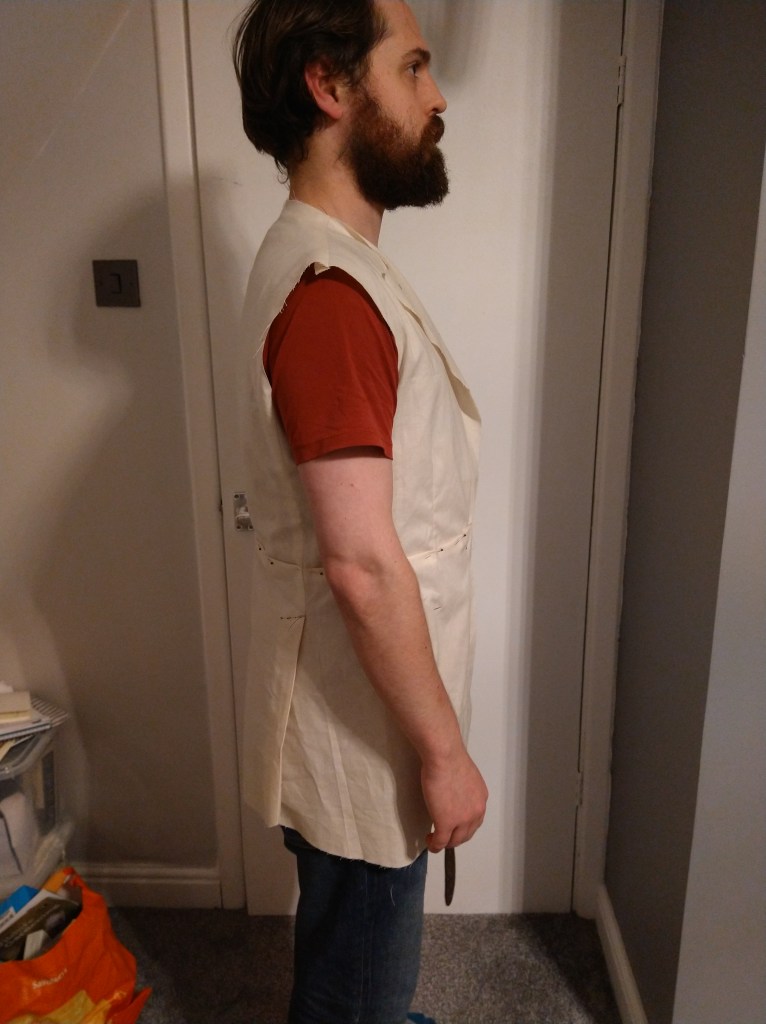
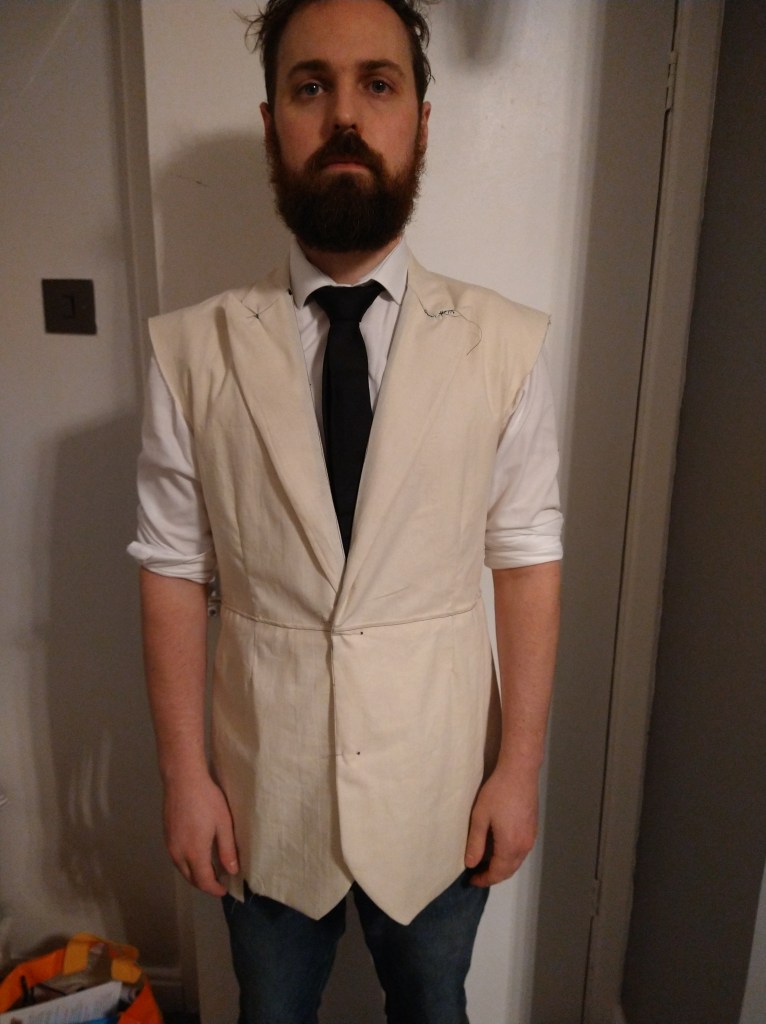
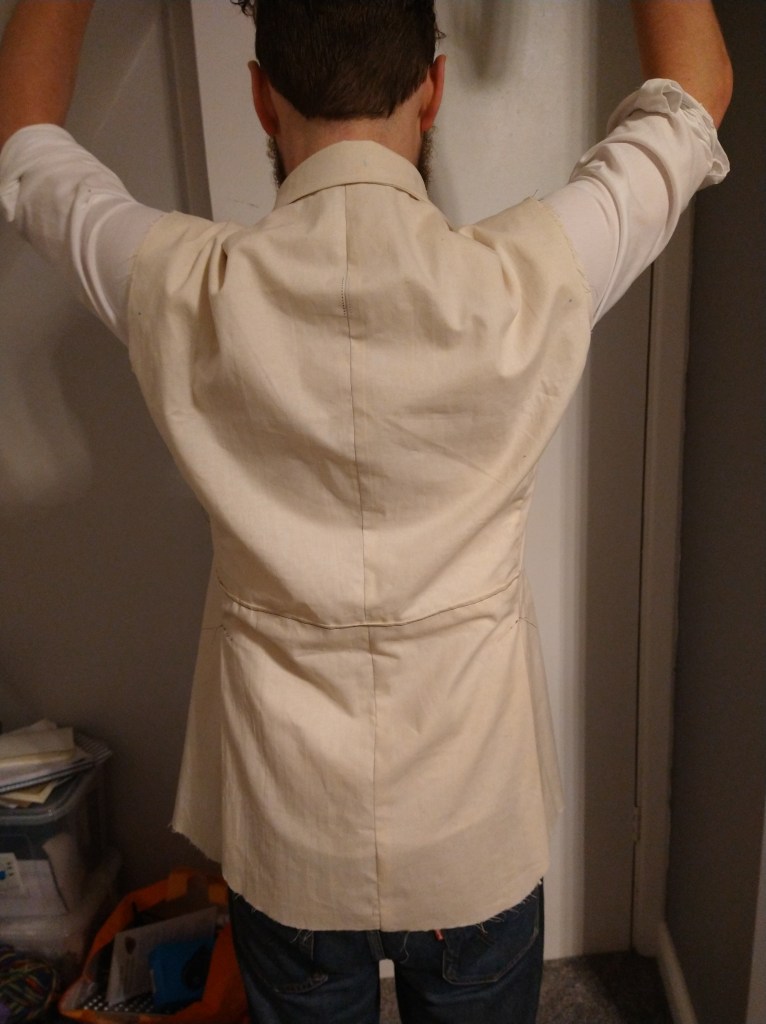
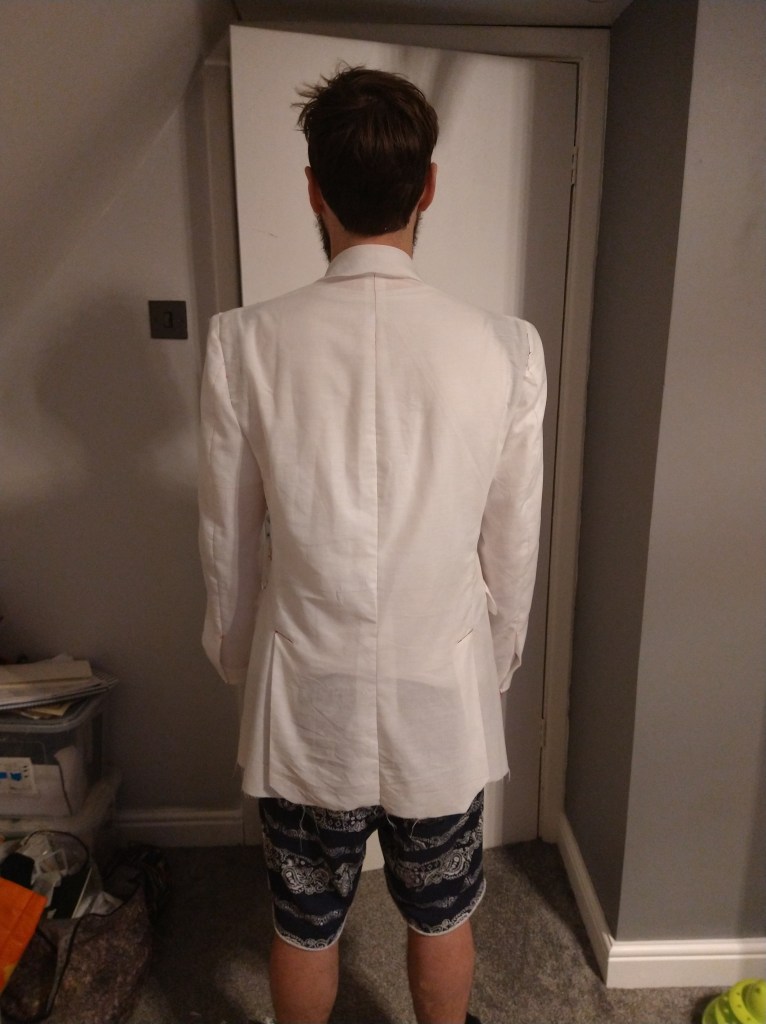
Following the tailoring book, I also included a back stay to help with the hang and shaping of the jacket. You can see the tacking around the outside of it attaching to the collar and armholes in the photos below. In these photos you can also see the shape of the jacket is clearly starting to gain its shape. I still had a fair way to go as the sleeveless vest wasn’t the desired look.
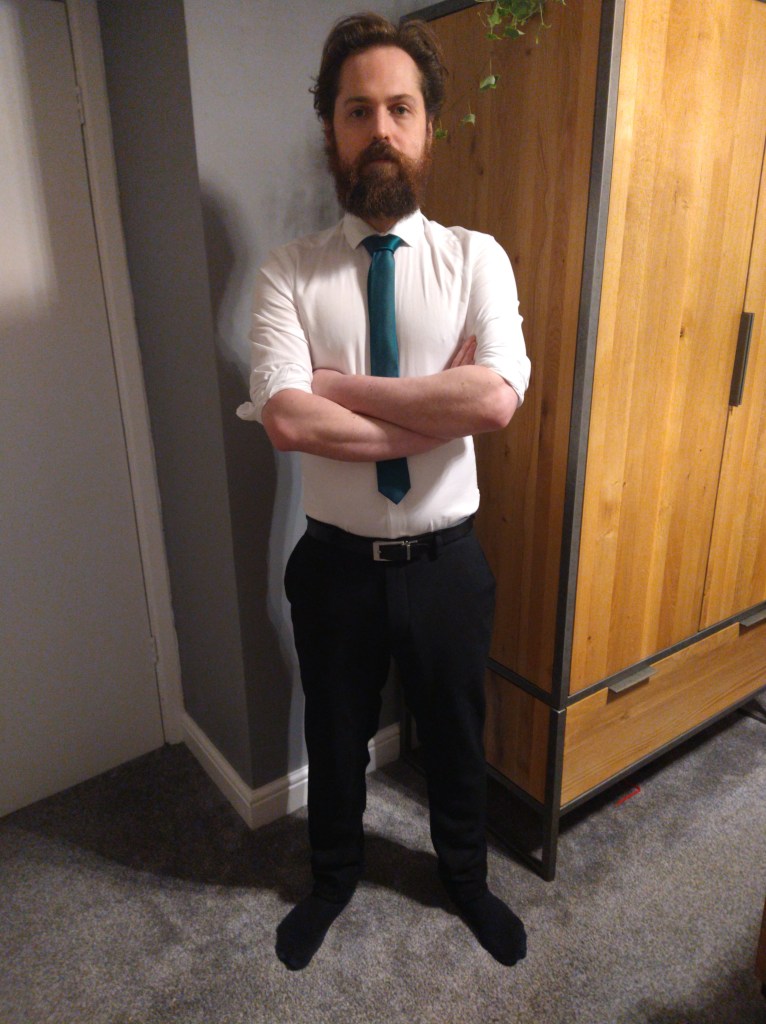
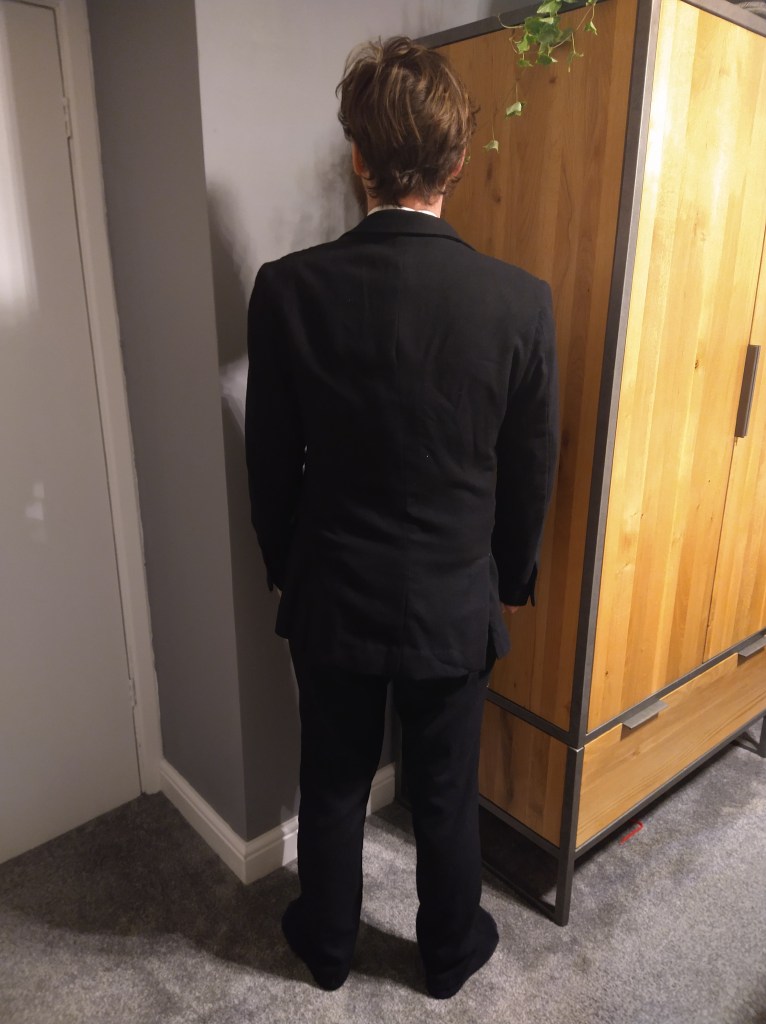
Front, side and back views of the initial suit construction
Then it was on to the sleeve construction and insertion. The sleeves came in two parts, these had also been altered when the armhole was raised in the initial toile. The bottom of the sleeves were mitred corners and I really enjoyed making these, the construction details were really satisfying. Once the sleeves were comfortably set in (without too much trauma) It was time to add the sleeveheads and the shoulder pads. I found this great fun, having not got the opportunity to wear them in the 80s (I was only 8 months by the end of them). I think the fit was looking pretty splendid with them in.
Then it was time to start the lining. Welt Pockets 4&5 (the third different construction method) went in with a bit of a fight. Basting thread and taking my time was definitely my friend here! I attached the lining to the facing. I really wish I’d used grey topstitching here instead of black. I’m not quite sure why I went for visible topstitching, but it is there!
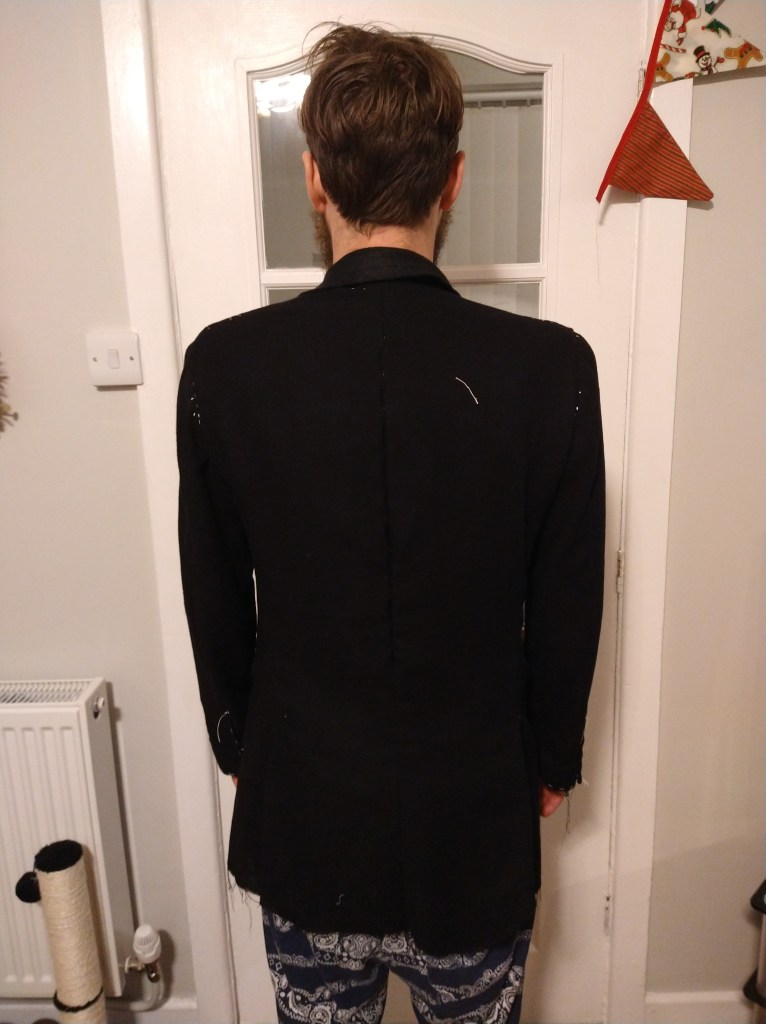
Some tailors marks still present and black topstitching!
When joining the lining to the suit I added some twill tape around the outside to ensure a better structure to the jacket. This was another deviation from the instructions and following the book. I hand stitched the lining of the arms to the cuffs and the back lining was also hand-stitched. I messed this up quite a few times and it took a bit of head scratching. I’m thrilled with the final result. It was then on to the trousers.
The Trousers – Vogue 8988
Where the toile had gone really unbelievable smoothly, the first attempt at the trousers did not. My two welt pockets were wonky and extremely hard to ‘poke the triangle through’ and the waistband was a nightmare. I didn’t realise HOW wrong I’d done it until I’d trimmed the seam allowance, I then tried to fix it, only for it to go even more wrong. I also struggled with the lining, it’s beautiful quality but I found it too tricky to cut on the bias. My lengths went totally awry, they stretched and distorted and it was another contributing factor to the terrible waistband. I abandoned this attempt when Matt tried the trousers on and the front pockets just wouldn’t stay flat.
So, for attempt 2, I bought some more fabric. Sometimes you just have to accept the fail. I also switched up to another fabric for the facings, this was a little more stable and in my comfort zone.
This went much more smoothly and, having gained the experience in the first pair I took extra time with the welt pockets, so they were neater. I also stay-stitched the diagonals of the front pockets to prevent bagging as much as possible. I also like the instructions for putting the fly in on the pattern, it’s done in a really calm and methodical way. Once it was in I also kept the basting stitches in to help with waistband attachment.
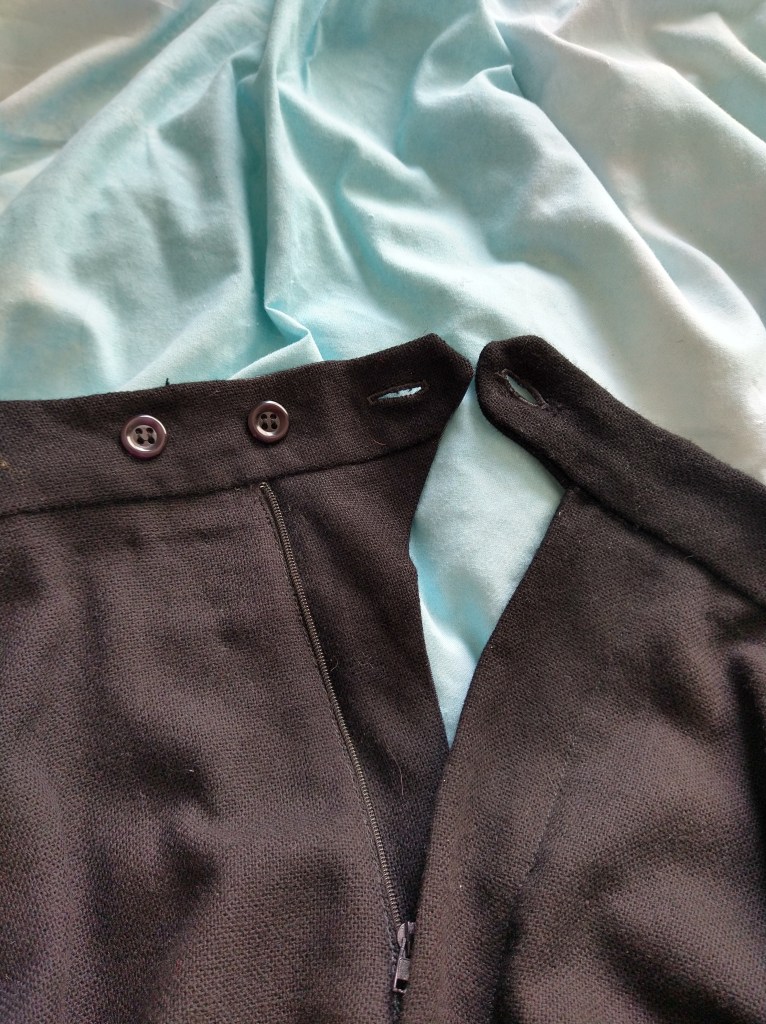
The Zip insertion on the fly
This time I had a cuppa prior to waistband attachment and read the instruction 3 times until I felt confident. I took it extra-slow and even talked Matt through it to check I was doing it right. The waistband was in! I the had the nerve-wracking challenge of adding the buttonholes. My Janome has 1-step buttonholes which has made my life much happier than my angry Toyota 4-step (this isn’t a cool dancemove). However, The welt pockets at the back ALSO have buttonholes and buttons to keep them shut. I did not want to mess these up. Fortunately, they went in without too much swearing. I got Matt to try on the trousers, with his shoes, before hemming them to make sure the length was correct. I hand hemmed them, because by this point, if I wasn’t doing some hand stitching was I even sewing. The waistband was also finished by hand.
Finishing Touches
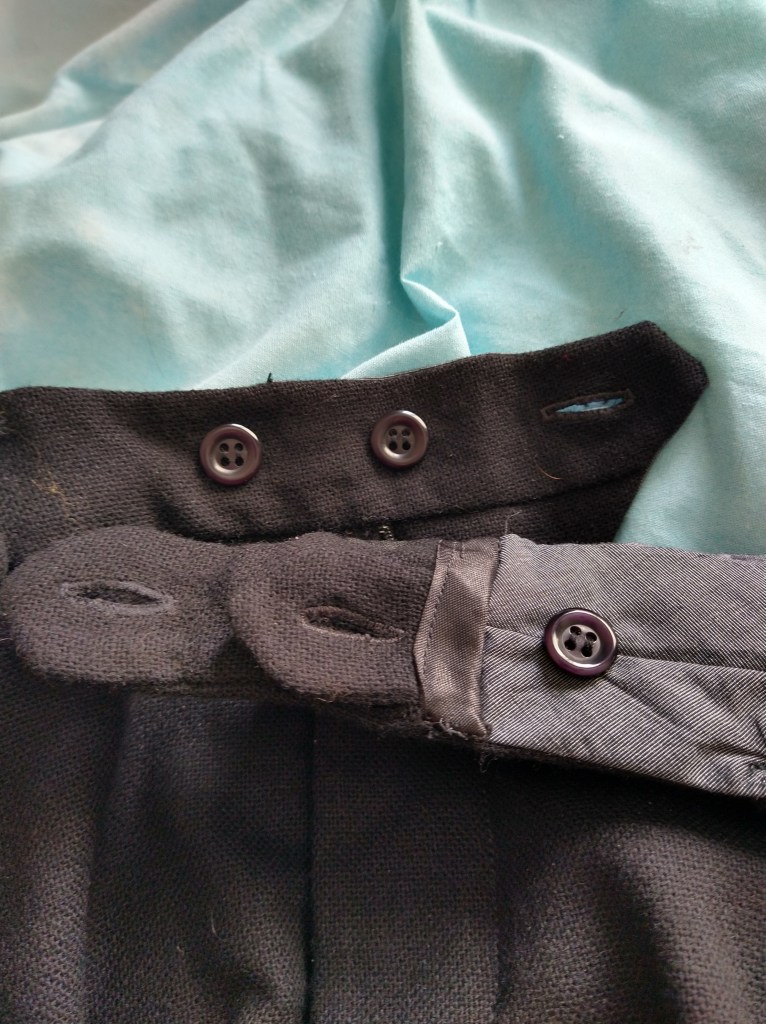
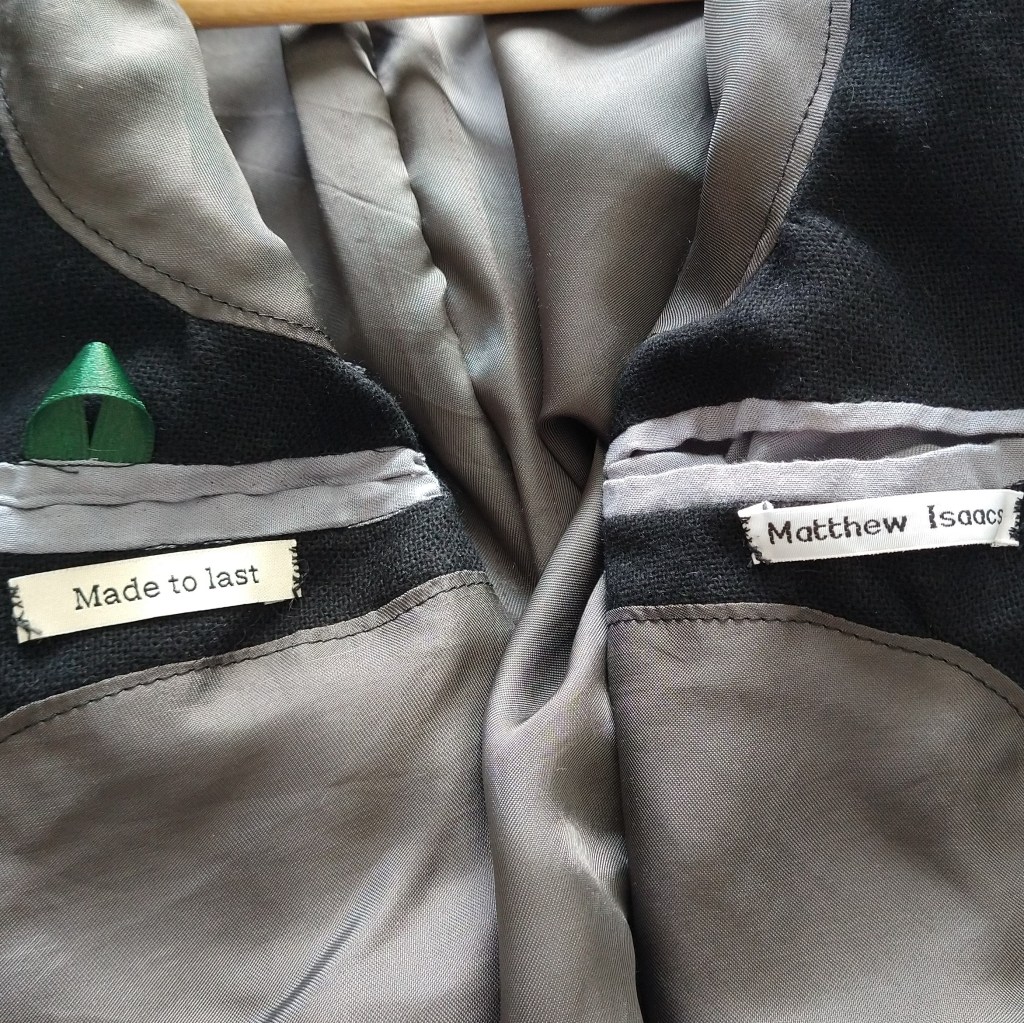
Due to Matt knowing his own mind, the buttons were always going to be circular and rimmed with 4 holes. He didn’t want labels, but I added them anyway (seamstress’ prerogative). I asked my Mother-in-law to be for the labels she used to sew into his PE kit, so he has one each in the jacket and the trousers. I also added a ‘made to last’ label in each, they spoke to me about my hopes and feelings for our marriage.
Final Thoughts
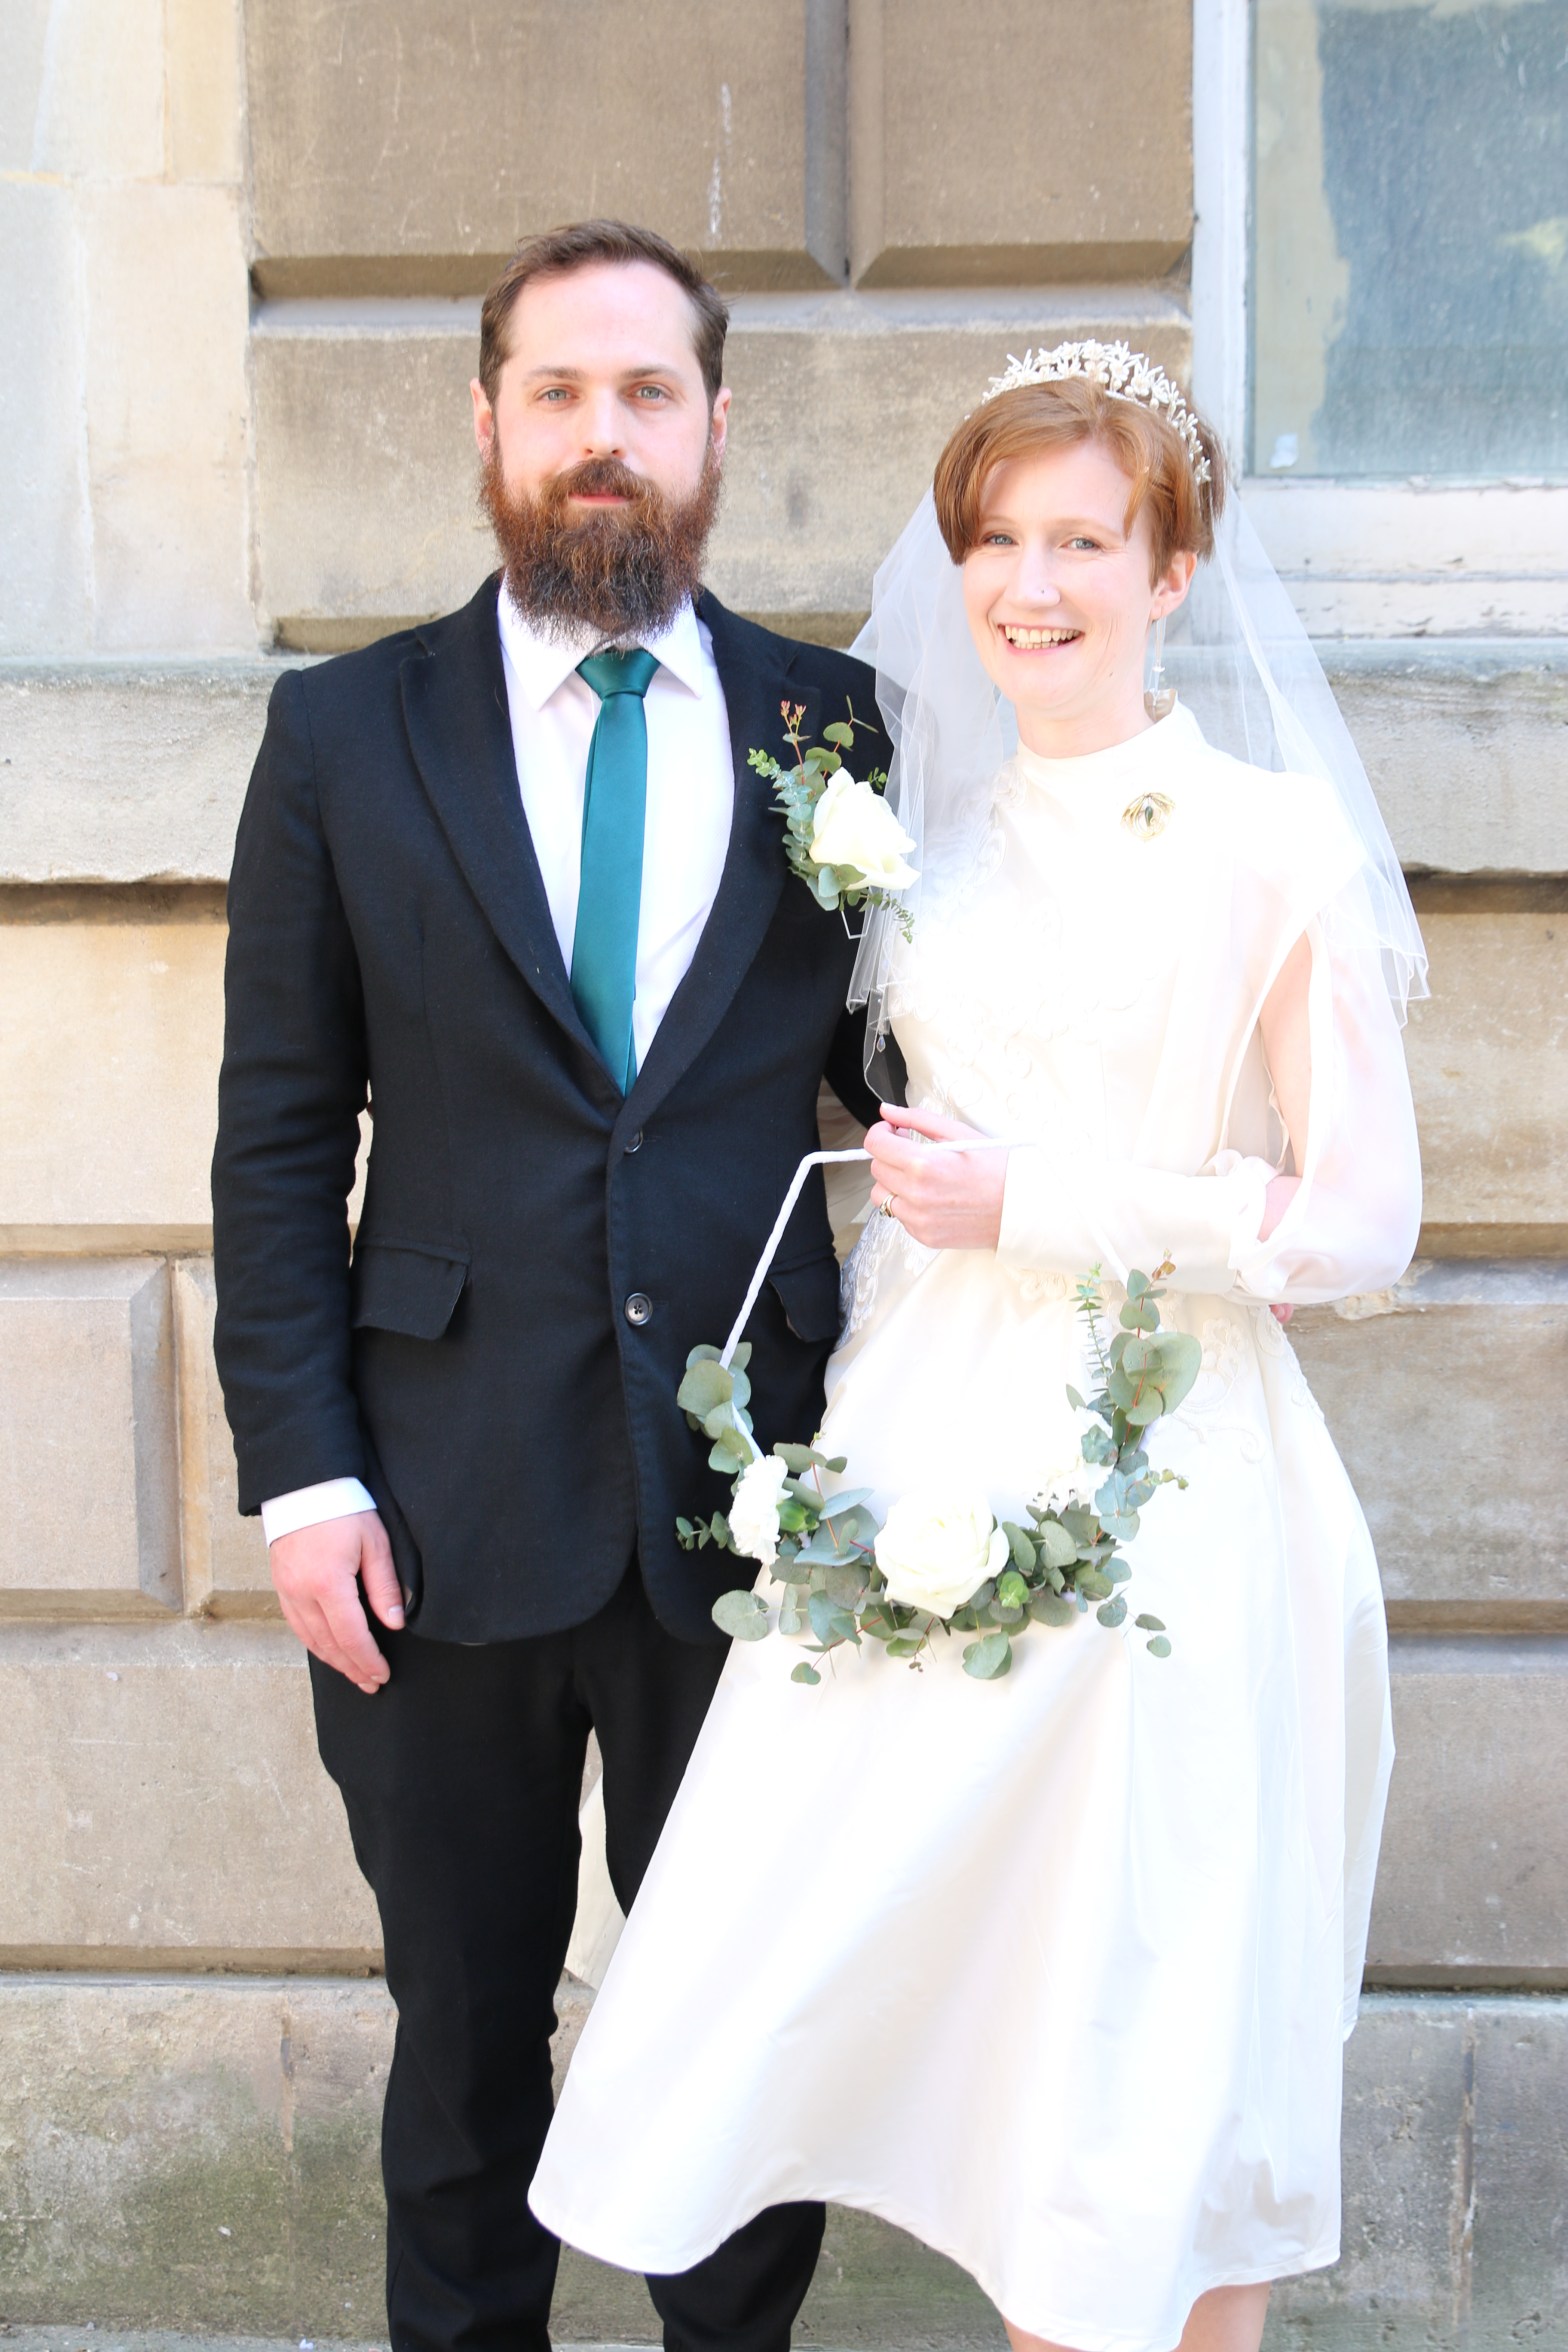
I really enjoyed making this suit (despite my #sewingfail), I learnt so many new techniques and pushed my skills. Matt is one of the more exacting recipients of my ‘selfless sews’. He had a definite vision and knew what he wanted. This helped me to push myself to make it the best that I could. We took it to the local dry cleaners for a decent press prior to the wedding too. We also had to starch the lapels to get them to sit right. This was a great lockdown couples activity one evening!
I’m happy to field any questions on the construction even though I am by no means an expert. If you would like to see some finished pictures I have included a few from our ceremony and reception in DIY Wedding Dress – The Big Reveal.
Matt (my Husband) already had a suit. So I knew that I could try to make one with very little pressure on myself if it all went horribly wrong. Even my lovely sewing friends thought I was a little bit mad. I thought I was a little bit mad. Without further ado: the suit making process.
Resources and research
When deciding to make a suit I did a lot of research into techniques, processes and materials. Brittani of Untitled Thoughts had recently made a suit jacket for her groom and so I read all of the blog posts available (Part 1 here). The amazing resource that got us both through our suit making journey is the book: Tailoring: The Classic Guide to Sewing the Perfect Jacket. I found it to be an invaluable resource on ‘how to’ and rather helpfully ‘why to’.
One of the many things you read about when making a suit, coat or similar is that you need to use a clapper to get crispness in your seams. I bought mine from Maven Patterns but there are several available. I also used a tailors ham and sausage to get the pressing right alongside a pressing cloth. I had cleaned my iron using the hemline cleaner, I would not recommend this. There are now deposits built up in the non steam holes in my iron. One of the best tips I can give for suit making is to really, really, really spend time getting the pressing right whilst you make the suit. Following making the suit also consider taking it to a Dry Cleaners for a professional pressing too.
There is even more hand-sewing in the suit than the dress. One of the tips for the hand sewing is to use a silk-thread, when completing the hand-sewing it is important to cover the thread with beeswax and to heat it quickly to prevent it from tangling.
Pattern(s)
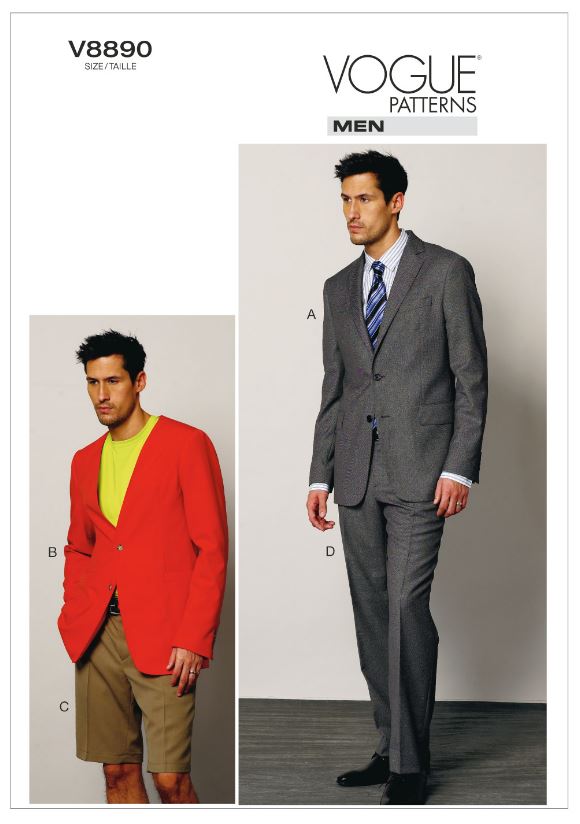
One of the key things that Matt wanted in a suit was for the jacket to be lined. He also wanted pockets, two buttons and for it to be single breasted. There are surprisingly few mens suit patterns available for home sewing, Vogue do an excellent line.
The first pattern that we bought was Vogue 8988, I should definitely have paid more attention when getting Matt to buy it. It didn’t have a lining so I would have had to draft one myself. Nevertheless we cracked on. A note to Vogue, the stripy fabric used for the single breasted sample is not helpful to people looking to make the garment to review style lines.
I made a toile of the jacket first, it was a fairly straightforward sew, I didn’t french the suggested seam as it was a toile. If I were making it properly, without lining, I would 100% have done this. I took 2” out of the length above the waist and would have also taken some of the ease out of the back and done a narrow shoulder adjustment. However, shortly after this jacket was put on pause for one with a full lining.
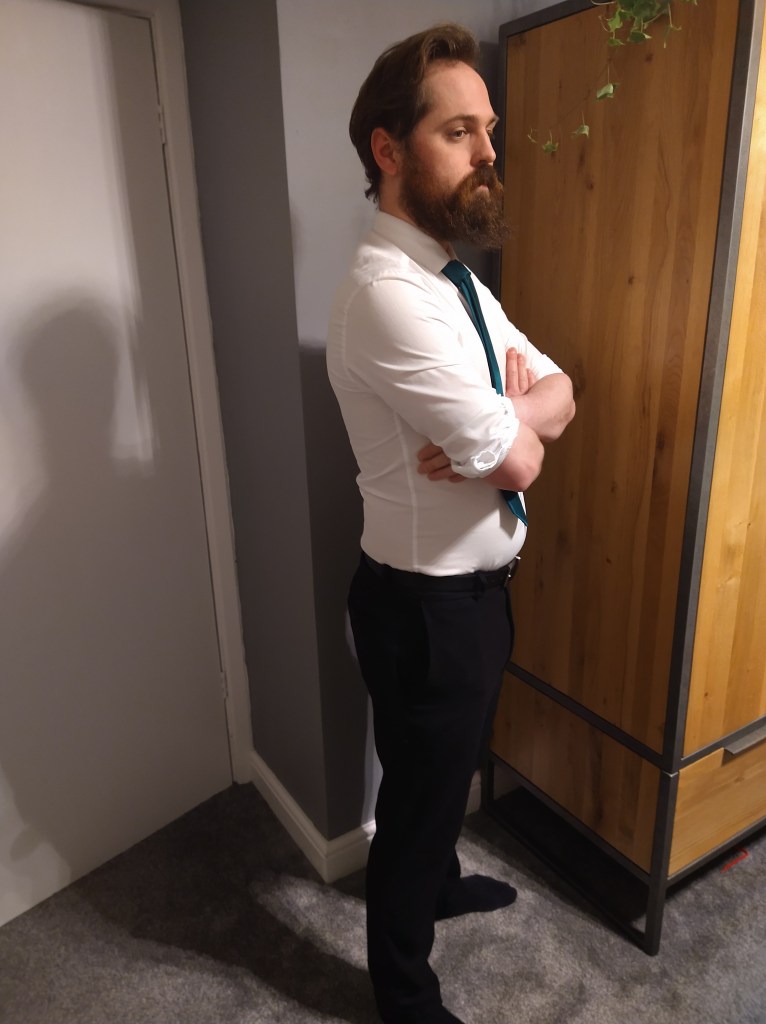
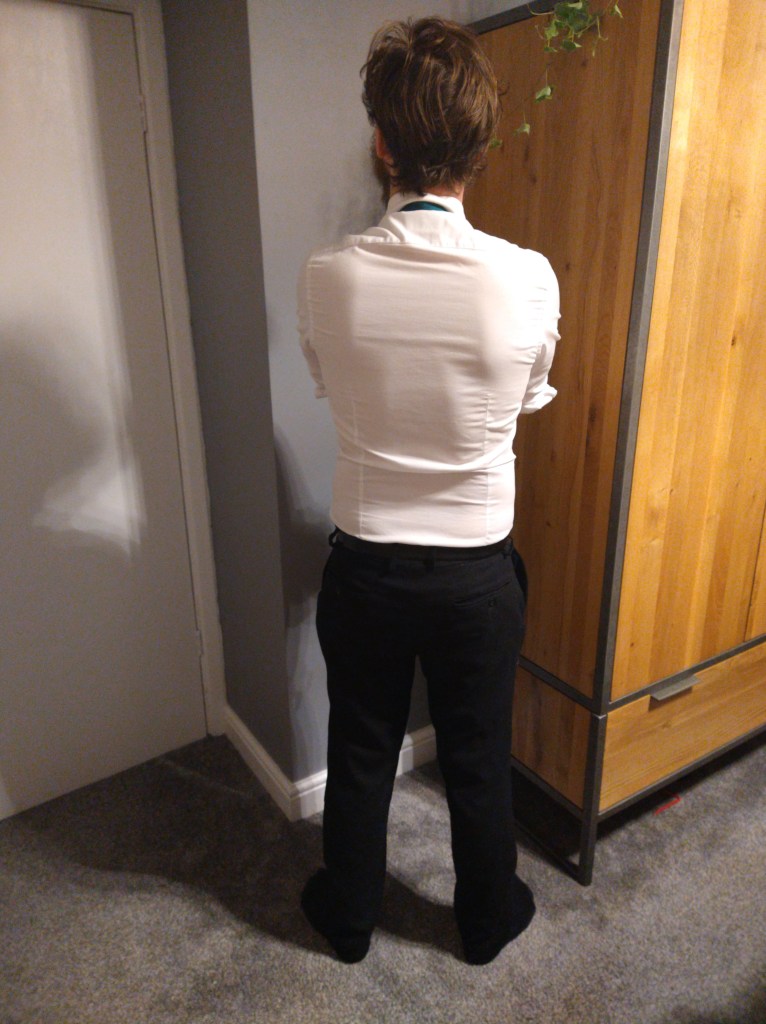
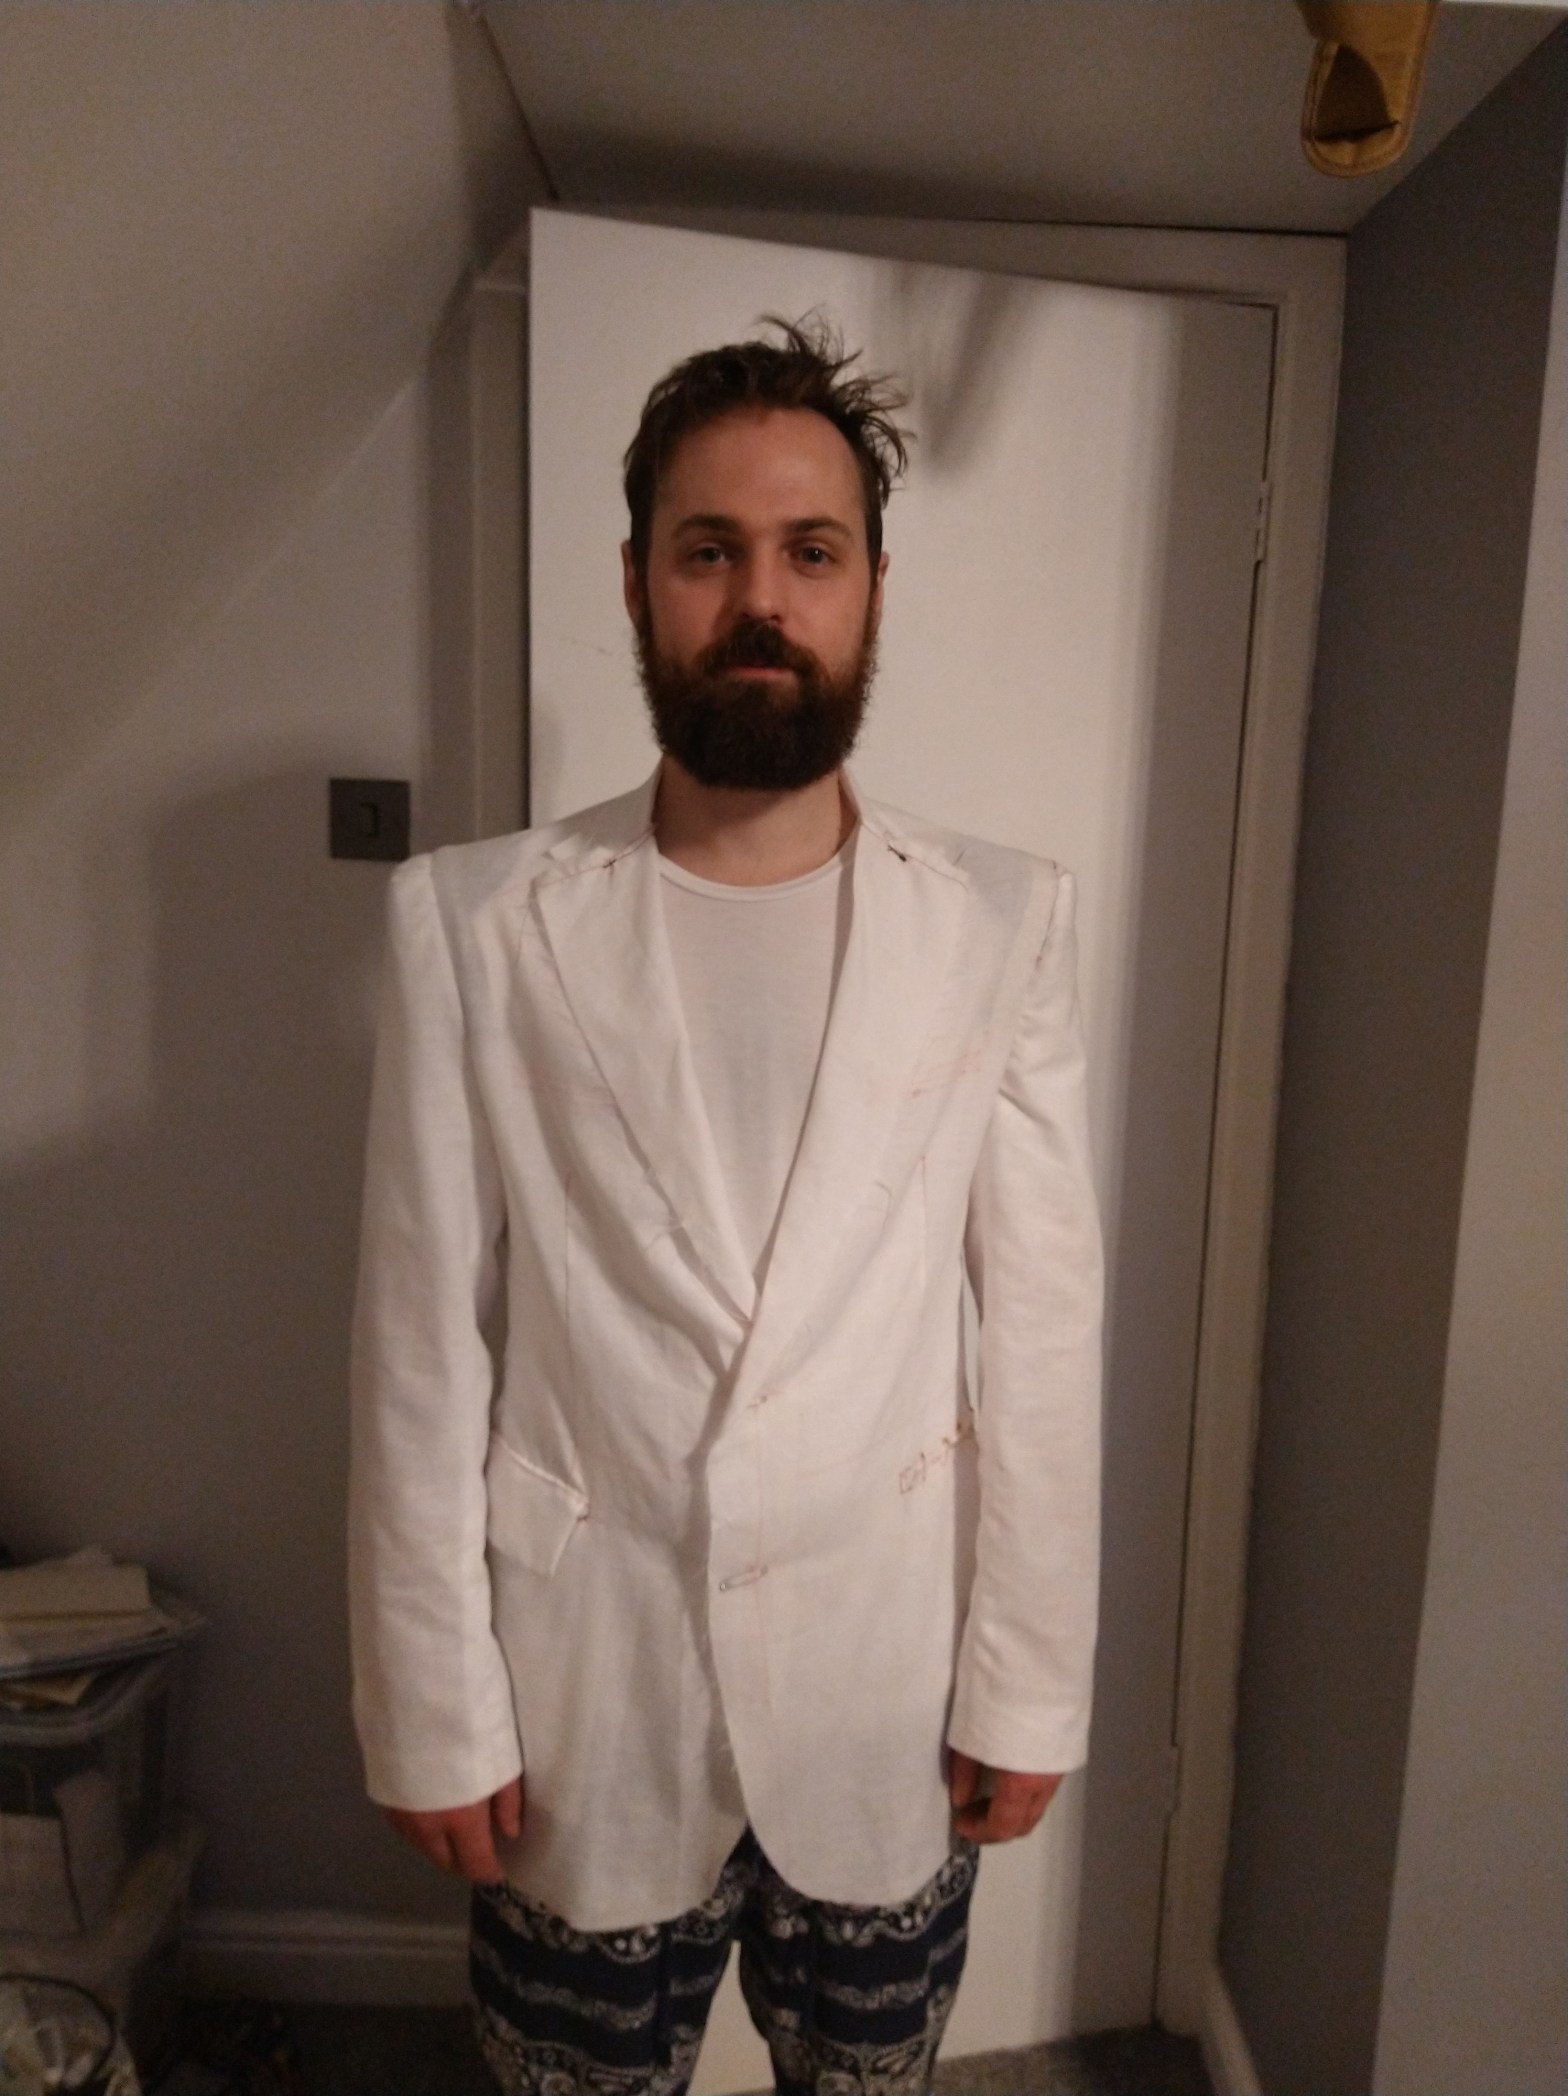
Images showing the toile of Vogue 8898, Please note, he is actually quite happy about this. He just didn’t see the need to smile!
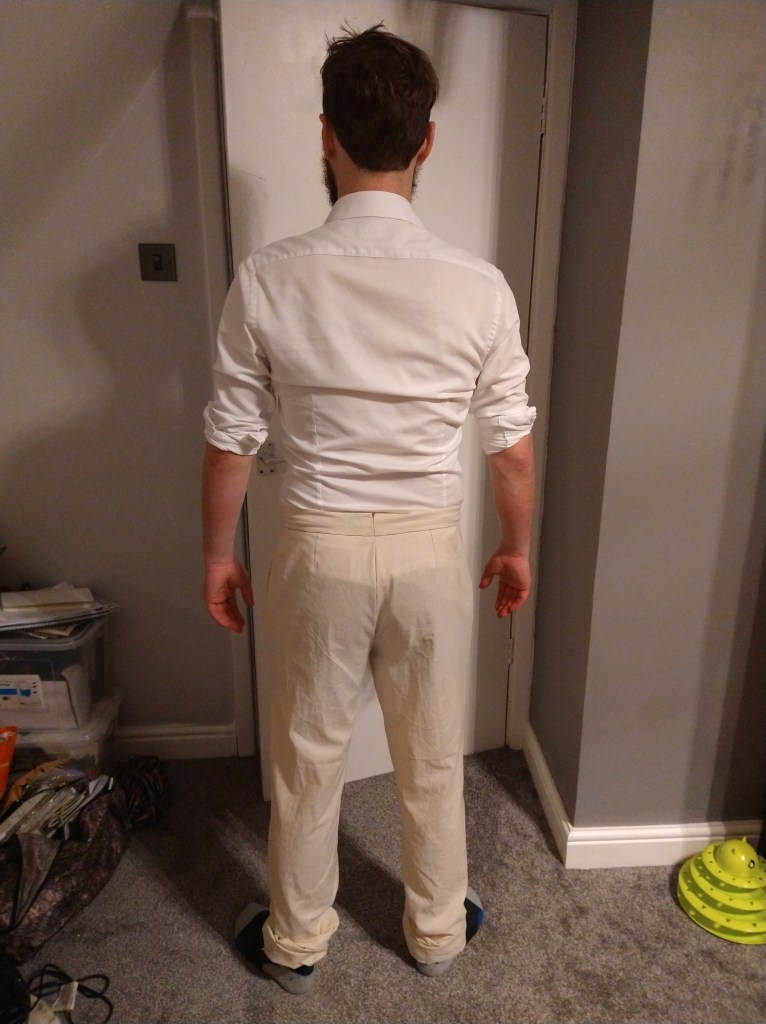
Whilst waiting for the second jacket pattern to arrive I made the trousers. These fit surprisingly well out of the envelope in size 38. The biggest issue was the need to remove 7” (17.5cm) from the length. I found the construction fairly straightforward on the toile. The waistband would prove to be trickier in the actual construction.
Pattern Number 2 – A Jacket with Lining!
This time we selected a pattern with lining! We’d originally discounted V8890 due to the weird view B with no collar (I’m not a style trailblazer). The style lines are fairly similar to the V8898 with the exception that this also has a side panel where the 8998 did not. Now keen to get on with making the suit, I started the toile. I started at the size 40 and made adjustments from there. Due to the construction method of the jacket I also practised a welt pocket!
I did a ⅝” narrow shoulder adjustment, ½” reduction at the side seams and ¾” for the back seam. The sleeves were also reduced by 1” but kept fairly long at the preference of Matt. I also put the sleeve head and the shoulder pads in the toile to ensure that they were sitting right. It was time to start the real thing!
Fabrics
Matt had a very definite aesthetic in mind for the suit. It was always going to be a black suit. We ordered quite a few samples from multiple shops and there was some debate over:
Too patterned
Too fine
Weird texture
Wrong black
The fabrics purchased to complete the suit
Finally we settled on the McElroy Seattle, a 100% wool Mini Hop-sack Weave Suiting which we bought from Sherwoods Fabrics. Matt liked the texture and slightly more informal look of the fabric. I was a bit nervous to make my first suit in such a loose weave but forewarned is forearmed so off I went!
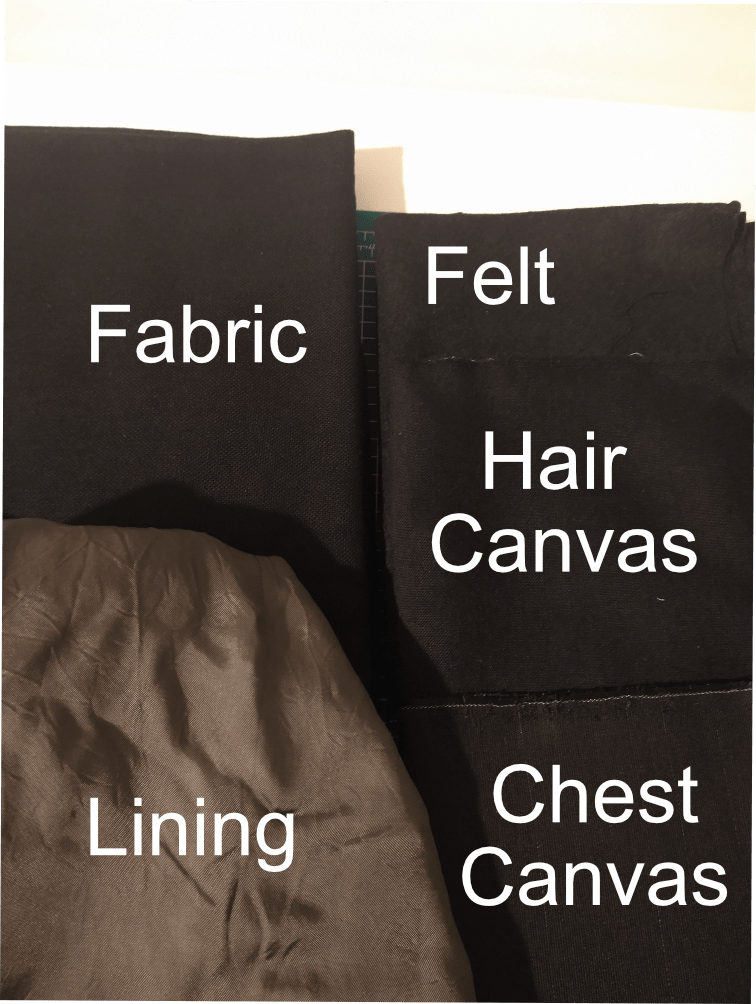
Having done my research and read the pattern envelope I knew that I was going to have to buy some specialist fabrics. I identified a UK based company (helpfully called the lining company) that sells tailoring supplies and purchased:
Chest Canvas – a special canvas to bolster and stiffen the structure around the chest
Hair Canvas – specially used for interfacing,stiffening the front (and back) of the jacket, also giving the lapels, collars and cuffs structure.
Collar Felt – specifically for the undercollar to assist with shaping.
The lining fabric was purchased from Like Sew Amazing, a gunmetal (we went rogue on the colourscheme) ex-designer viscose. It was beautifully soft and really helped to elevate the look and feel of the suit.
Up Next
Up next will be the suit construction and nitty gritty! Plus some pictures of the suit and the wedding. This was even more challenging than making the dress for me and was a lot out of my comfort zone. It was, however, really fun and I will be planning to make myself a blazer in the near future, once I’ve got through all the sewing I neglected whilst completing the wedding makes.
Bonus pictures of the Jacket and the Trousers together!
There isn’t an awful lot to say that hasn’t been said about the dress now. Post 1 was concept, Post 2 was fit, Post 3 was construction. I did promise two things, reflections on what I wish I’d known and the overall success.
What I Wish I’d Known
How emotional I’d get when I started being able to try the dress on. This surprised me it was the emotions of all of the love put into the dress and the knowledge that this was a creation I was going to start a new chapter of my life in. I also said to several of my friends that the sewing on of the appliques felt like each stitch was putting a little bit of love and hope into our marriage.
I also wish I’d known other bits of fit information prior to starting the dress, but that was OK. I knew fitting was a process that takes patience and surprisingly for me, I had the patience to do the dress justice.
Overall Success
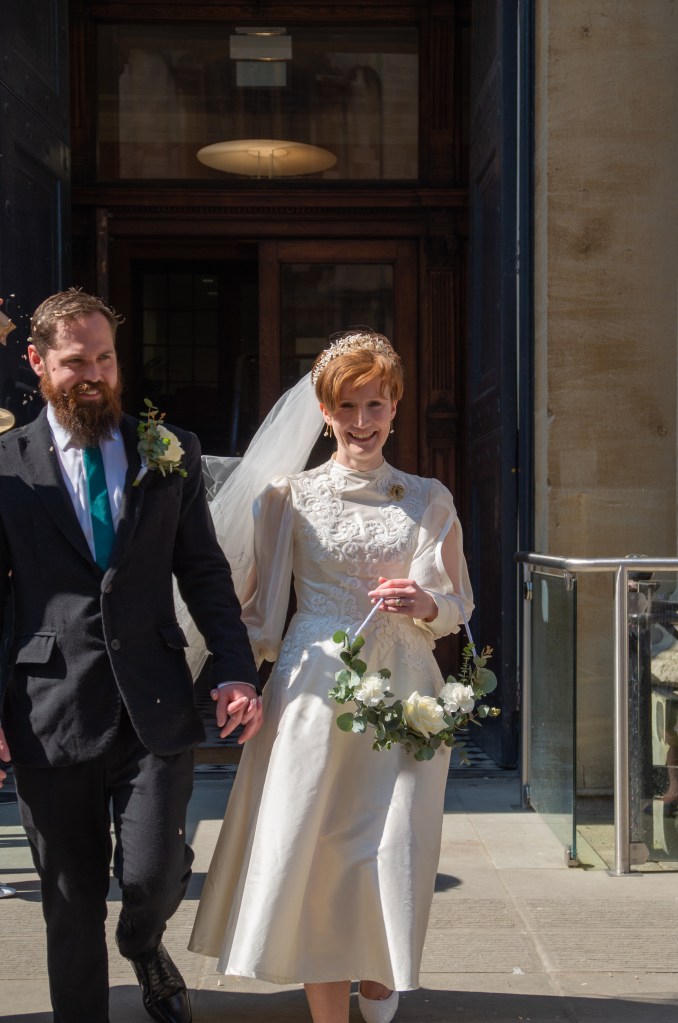
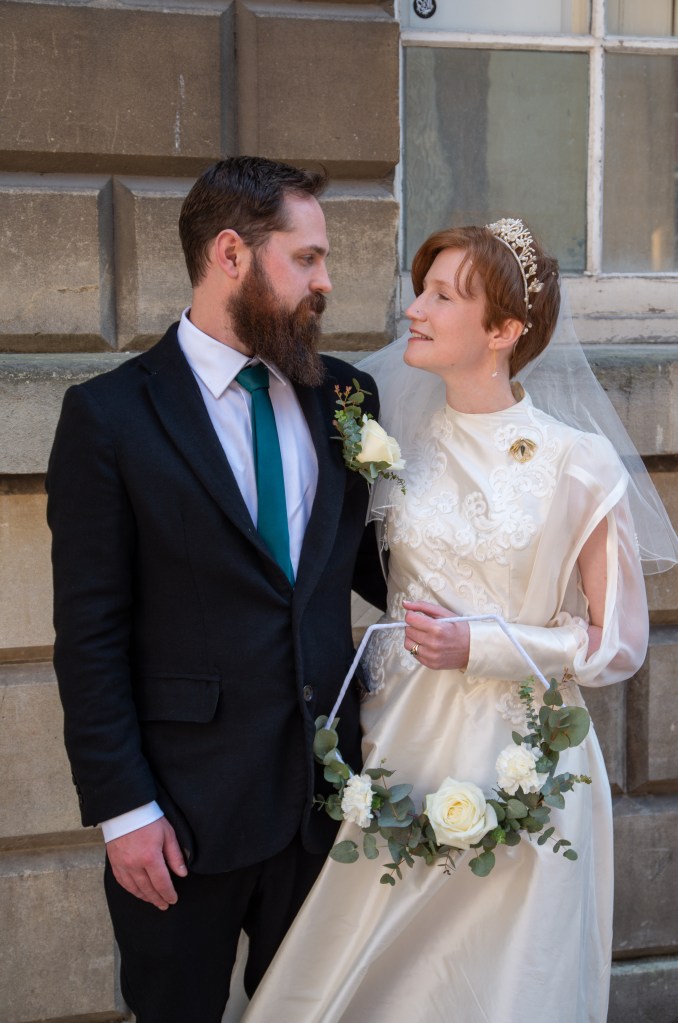
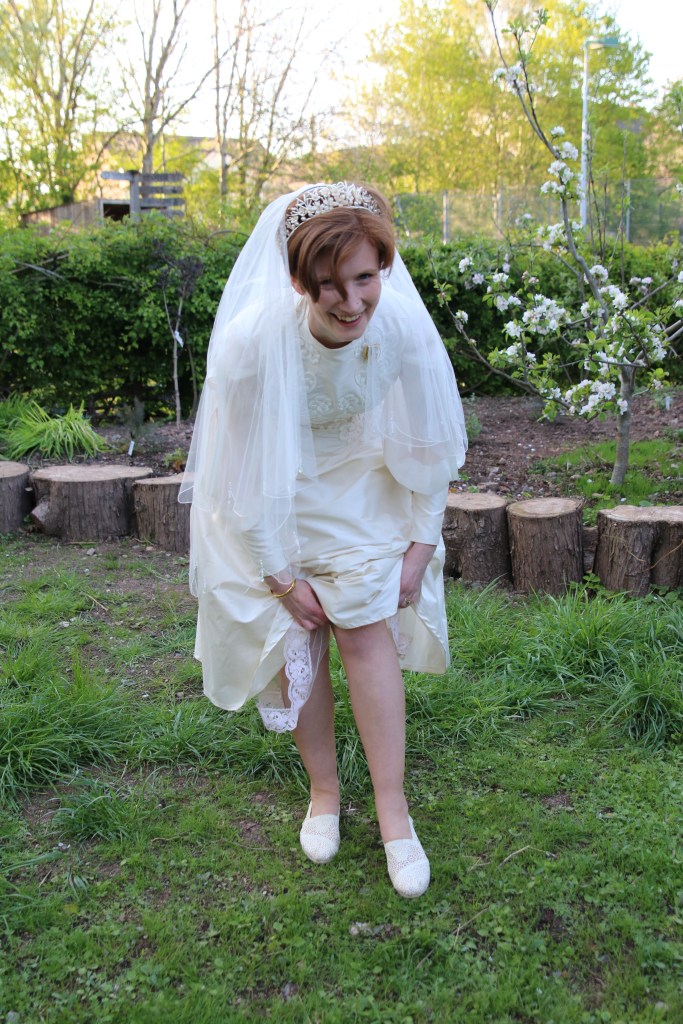
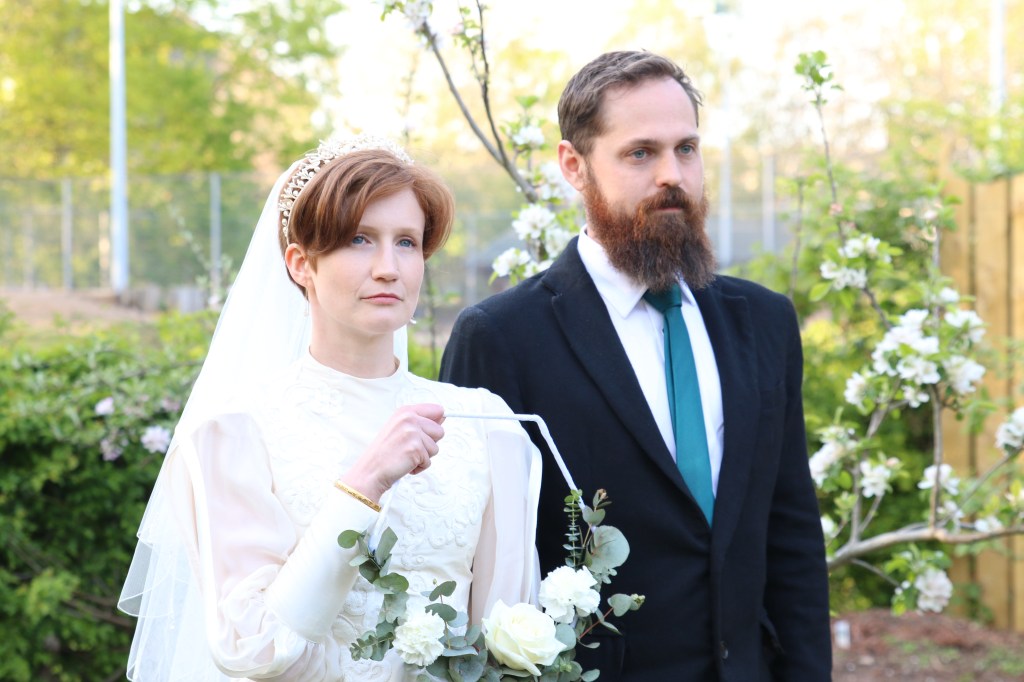
Did I have a dress to get married in? Yes. Did it fit? Yes. Did I trip over it? No! (success achieved). I could nitpick and I could say what I would do next time (some musings in the previous posts re: hand hemming). However, I am thrilled with it. I have married the man I love wearing a dress I made (and he wore a suit I made for him). Please enjoy looking at these photos which show how happy I am to be with the ones I love and enjoy looking at the details of the dress. Photos were either taken by Nickie of Brown Eyed Photos or My Father in Law Trev.
Other Details
Old – My headdress which belongs to my Gran, my brooch which belonged to my other Gran.
New – My veil, dress and undergarments!
Borrowed – My headdress and my garter
Blue – My garter (not pictured)
The next installment of the DIY Wedding will be two posts on the suit. Until then, enjoy a prosecco, tea or coffee for me!
In Part 1 I explained my style choices & Fabrics, Part 2 showed my fitting journey. You’ve made it to Part 3, putting the first two blogs together! I started cutting and putting the dress together over the period following New Year 2021. With the UK going into lockdown I didn’t really have a huge amount else to do.
My Machine
I am incredibly lucky to be the owner of a Singer 201k, this previously belonged to my (now) husbands Nannie, Cissy Isaacs. My In-laws gave it to me when she passed away and it has truly re-ignited my passion for sewing. I could not think of a more fitting thing to do to involve her in the wedding than sew my dress (and Matts suit) using her machine. My own Gran, Ellen Smith, used to take a keen interest in my sewing when I was at school and I know that both of them would be absolutely rooting for me throughout the process of creating the dress.
Equipment
I am a BIG sewing gadget nerd and am a huge believer in having the right tool for the job. (Caveat: I also enjoy a good bodge when it’s not necessary or important to get it fully right). A few of the tools I found exceptionally useful are listed below (Links are own opinion, nothing was gifted)
The straight stitch foot, the quilting foot with adjustable seam allowance, the rolled hem foot and an invisible zip foot.
Microtex needles to ensure that I wasn’t snagging or pulling the fabric during sewing
Gutterman silk thread and beeswax for the hand sewing elements
Applique pins (these are much shorter and make you less likely to prick yourself when hand sewing)
A lot of audiobooks, I have an audible subscription but where I live in the UK I can also access free audiobooks through the Library. I cannot recommend this enough.
Cutting
I’m not going to lie, prior to cutting out the dress there was a HUGE pep talk to myself. Accompanied by a thorough clean of the sewing room as it was post Matts suit construction and that fabric was very fluffy (Blog to follow soon). Post the final edits to the bodice I traced it out on to printer paper. For the bodice front, I transferred the pattern to make it not on the fold, this allowed me to transfer the markings much more accurately. The only other piece cut on the fold was the skirt front. The pattern did call for cutting the skirt on the cross-grain, due to the length I removed from the skirt (3 inches) this wasn’t required. I took my time on the cutting, especially on the silk habotai which liked to shift around like a leaf in the wind.
Construction
Petticoat
I previously mentioned that I made the petticoat prior to the end of the toile to get the skirt volume and length as I wanted. Construction of the petticoat was fairly straightforward, I French Seamed throughout and bias bound the bottom raw edge of the yoke of the petticoat. The tulle doesn’t fray so it didn’t require any finish on the hem (just not wonky cutting), I then put the dyed trim from my mums dress around. The trickiest part of the petticoat was getting the elastic right so that where it sat there was no obvious gap between the bodice lining and the separate petticoat.
My petticoat hanging up on the door
Bodice
I went a bit backwards in the construction here and constructed the lining first, the fabric is so lightweight I wanted to make sure it didn’t have a chance to waft across my sewing room or get looked at funny and distort! I french seamed all of the seams in the dress, there are other blogs which can explain the french seam process. However, my tips are to press it nice and flat, then put it flat on a cutting mat and very carefully trim your seam to approx ⅛” to ensure it is encapsulated when you create the second seam. I didn’t want to use an overlocker for my dress as I wanted to take a more couture approach. For any of the edges inside I used my 6mm rolled foot to create the finished edge.
Pretty Bodice Insides!
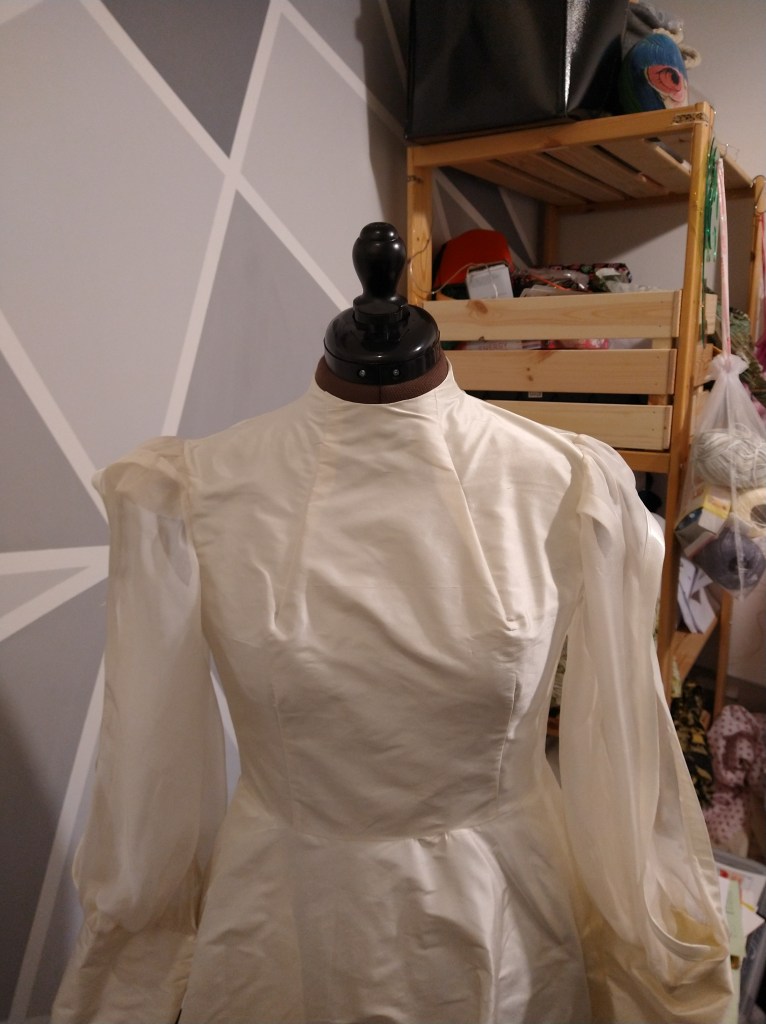
Following the lining, I made the outer bodice and joined the two together along the neckline, this was followed with understitching to ensure that it didn’t roll out. I then tacked the armholes together (with red thread) to ensure that the sleeves would go in well.
The bodice on the dressform with lining and outer fabric tacked together
Sleeves
Where does a queen keep her armies? (Up her sleevies)
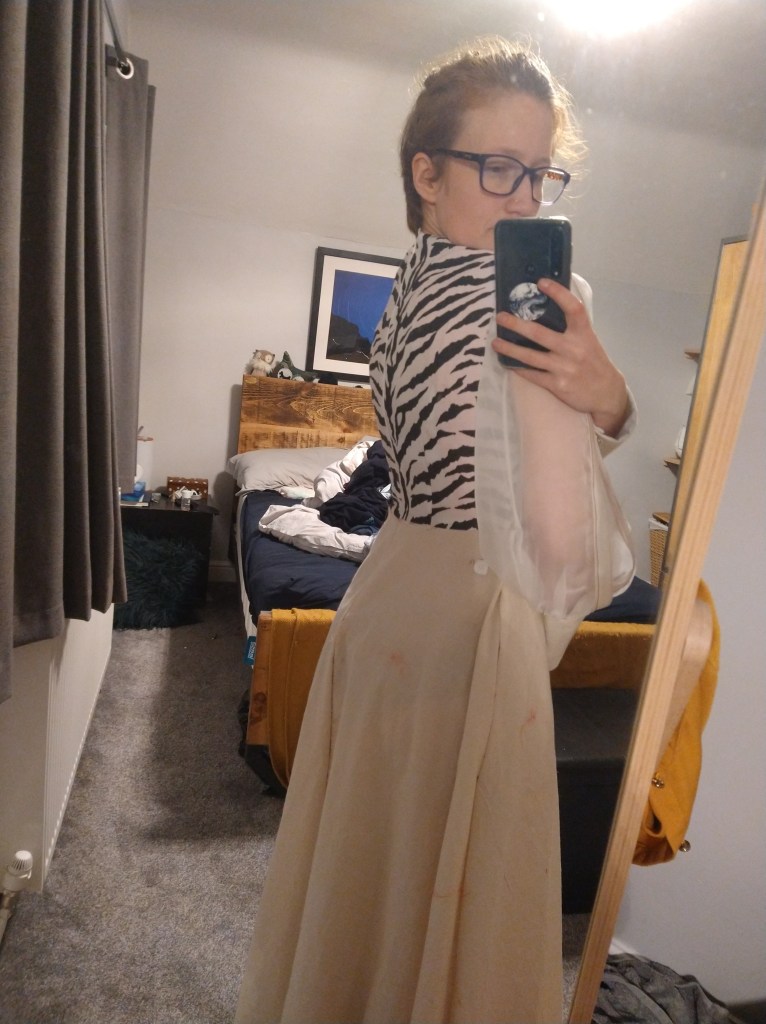
Silk chiffon is a beautiful fabric but it is a tricky fabric to sew with, there was another pep talk for this part. I took my time and planned a whole evening to put these in. Red thread was once again used for the basting stitches, to help me to remember to take it out. The bias binding addition was taken slowly, plenty of pins, sew, trim, turn, press, pin, sew. I am pretty happy with the overall finish on these, you can see a little pulling on the chiffon in the picture below but if I hadn’t told you, you would never have known! I french seamed in the sleeves, which took all of my nerve and patience (especially setting them in). I’m not a big fan of setting sleeves in flat, personally I find that it then creates a pull/twist under my arm which drives me mad whilst I’m wearing the garment in question. I definitely didn’t want that on my wedding day!
Slight pulling of the fabric and tacked pleats
Skirt
I did not manage to do the french seams in the skirt 100% correctly, the attachment of the pockets to the waistband and the side seam blew my mind, I didn’t manage to find a tutorial to help (suggestions welcomed). SO, I french seamed the side seams and the pocket individually, did a rolled hem on the part where the pocket opening attached to the skirt and vice versa. Then, I sewed in the pockets by machine/hand in a bodge worthy of a Duck-tape medal. Is it pretty, sort of, did it work? Yes. So I am counting it as a learning curve and a win.
I then attached the bodice to the skirt, using a french seam again. I now had an almost dress, just the back was open and that wasn’t quite the look I was going for. I attached the invisible zip, for which I bought an invisible zip attachment. I would wholeheartedly recommend using an invisible zip attachment to minimise your swearing whilst you sew. I found the linked tutorial from Nina Lee particularly helpful. I also basted in my zip prior to sewing in because it helps it shift less. I then tried the dress on to check that it fit prior to starting the appliques, because it would have been rubbish if I finished it and had to take it in/out/shake it all about.
It fits! So much relief
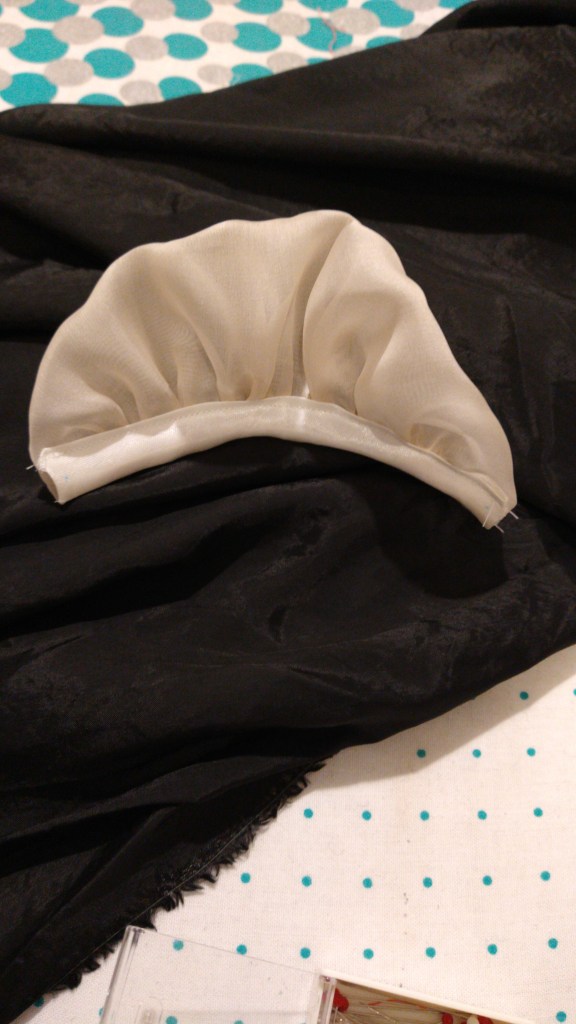
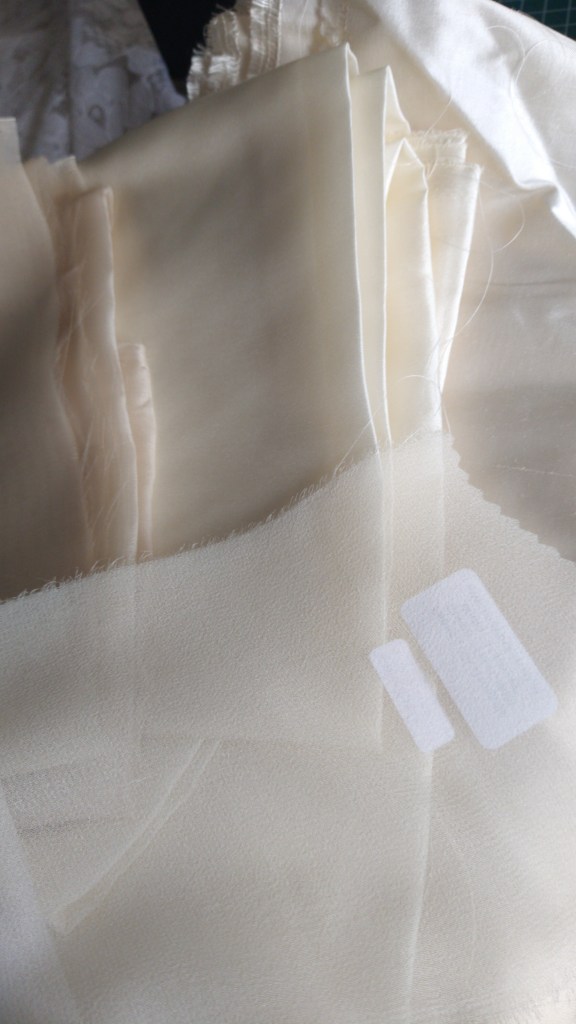
In Blog 1 I mentioned the organza I had purchased to add structure / OOMPH. The sleeves needed a little something to help make them shine and give the big sleeve energy I was hoping to achieve. A while ago I had seen a post from Bella Loves Patterns about the Vita Blouse and dress which is best made in a drapey viscose but needs some sleeve volume. Incredibly helpfully there was a tutorial on how to do sleeve head attachments (which when I showed Jenni we thought it looked like something out of Downton Abbey). I followed this tutorial and it helped to give the sleeves the oomph and structure at the top that I was looking for.
From L to R: A sleevehead, the dress with a sleevehead on the R but not on the L
Appliques
Also in Blog 1 I mentioned that I had got 2 types of applique. These were known as ‘Swirls’ and ‘Flowers’ I pinned both options to the dress to identify which I wanted. I then text multiple people (having already had the idea in my head of which I liked most) to see what the consensus was. I then decided I definitely wanted swirls!
Flowers on the Left, Swirls on the Right
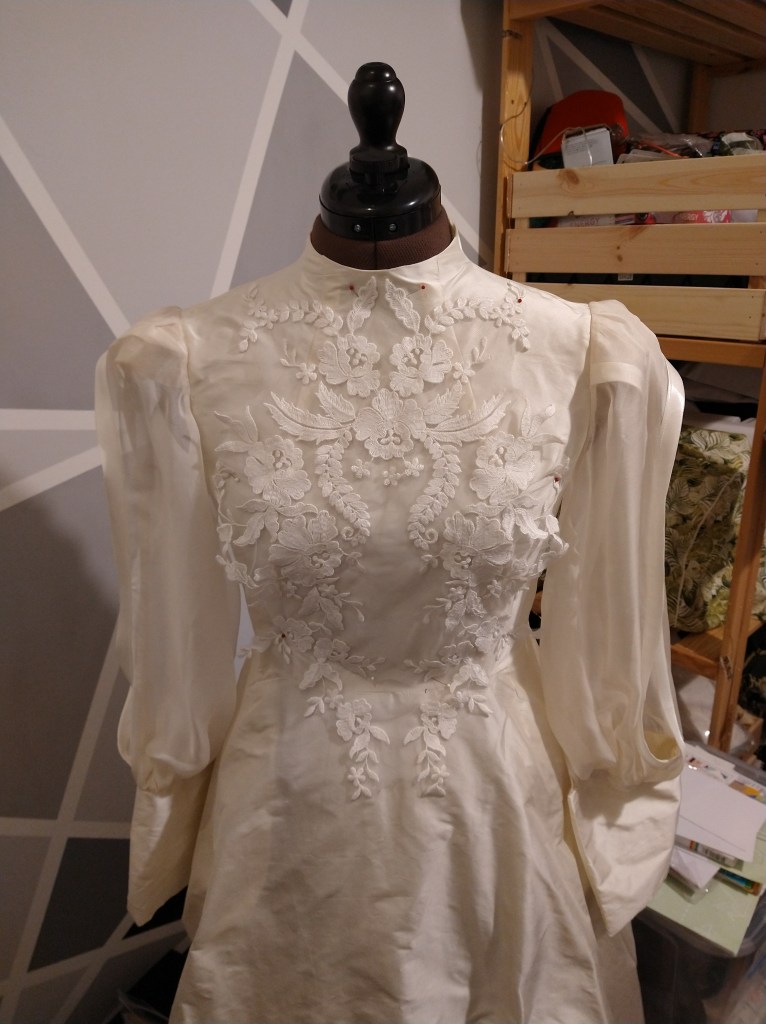
Let the hand stitching marathon begin. I’m going to be real here, this was a labour of love. It took me two weekends of solid ‘working days’ to stitch on these appliques and I did one twice as it wasn’t up to standard. There were a total of 8 appliques (4 front, 4 back). I sat in my sewing room, with the dress on my mannequin (for the back appliques) listening to many an audiobook. Applique pins were incredibly helpful to stop me from stabbing myself. I was also grateful that I had remembered not to sew the bodice lining down yet (also hand stitching) so the attachment would be hidden from the inside. I also removed all of the mesh post embroidery with a pair of embroidery scissors, which was pretty nerve wracking.
Finishing
The bodice lining was stitched down by hand to a) cover the zip tape and insertion and b) cover the waistline join. This was done to another audiobook session but felt like a breeze compared to the applique attachment.
I finished the hem using bias binding after having previously tried to use the rolled hem attachment to finish it, it looked like I’d had about 8 bottles of prosecco when I used this method. My one slight regret is that I didn’t finish the hem by hand, however, the bias binding gives it a bit of extra flare and structure, and sometimes you have to be practical and realise that if this is your biggest regret on a hand-made wedding dress you’ve done something right.
Buttonholes were made on my ‘fancy’ modern machine as the singer doesn’t do them and I don’t have the attachment (yet). I used the silk thread because I had it and it added another level of elevation.
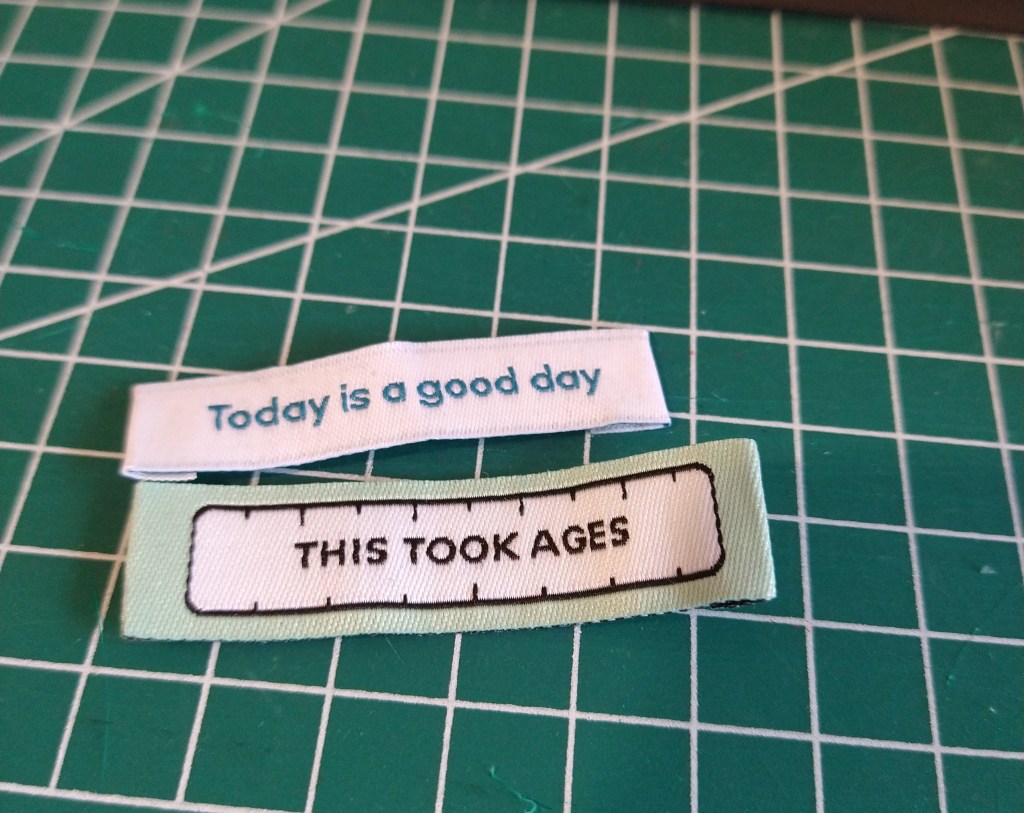
I had previously planned on adding a ‘This took ages’ label (with all the hand stitching, you can see why) however I ended up adding a ‘Today is a good day’ label as I wanted to focus on my day, not the dress construction. I also popped in a label from my school days as I thought it was a cute and personal touch.
Buttons
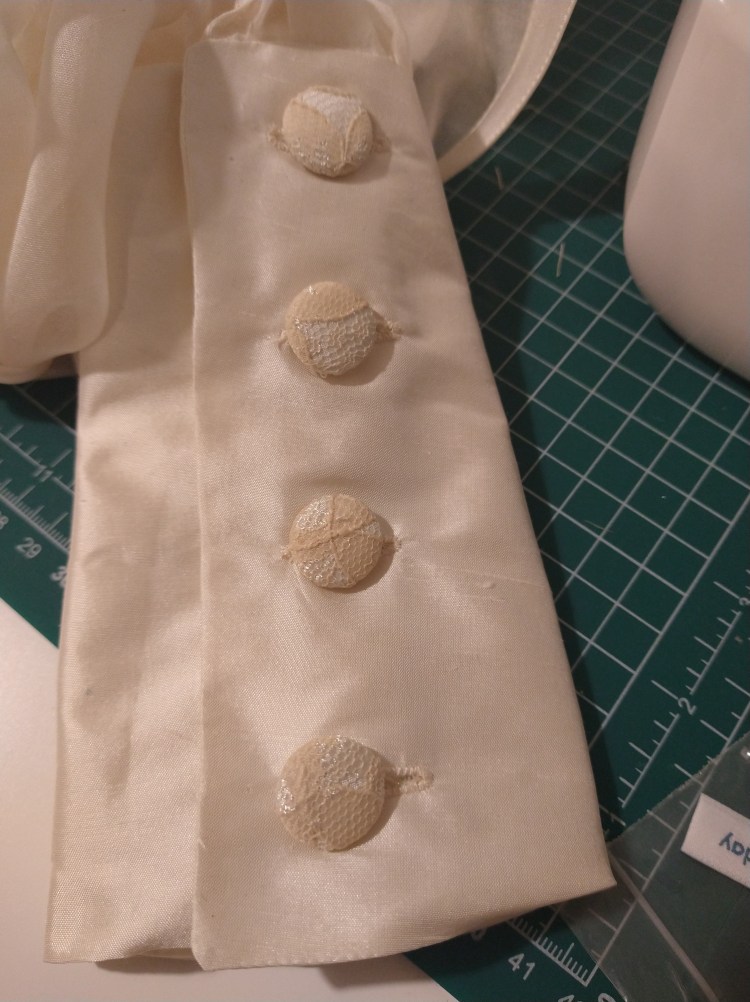
Buttons and Sleeve Cuffs
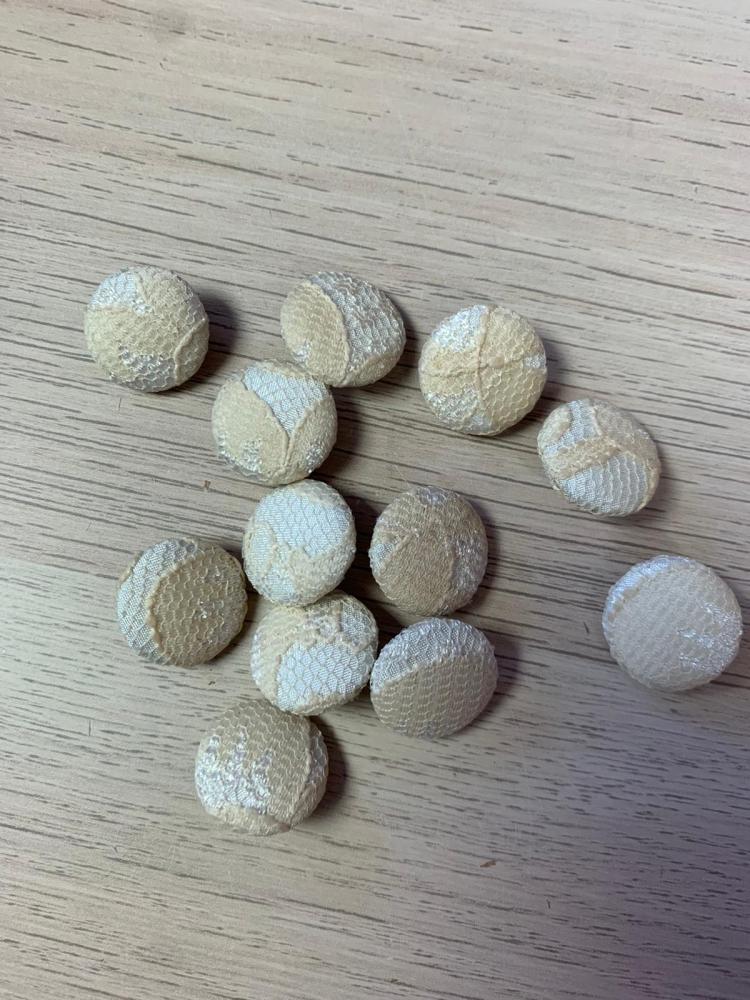
The buttons were made using the silk habotai and lace from Mums dress. Sarah of Like Sew Amazing has a covered button making service and had a thorough consultation with me about the placement of the lace on the buttons to help me get the most visually appealing ones. They are such a beautiful and bespoke element to add to the dress and I’m thrilled that she could help me make them.
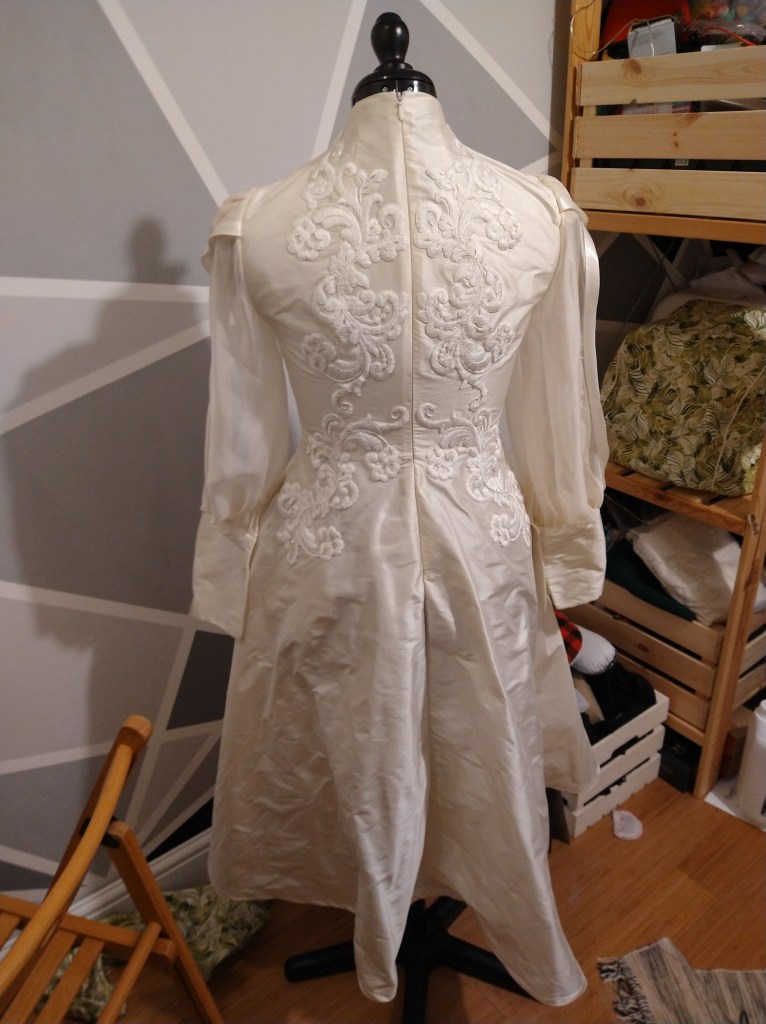
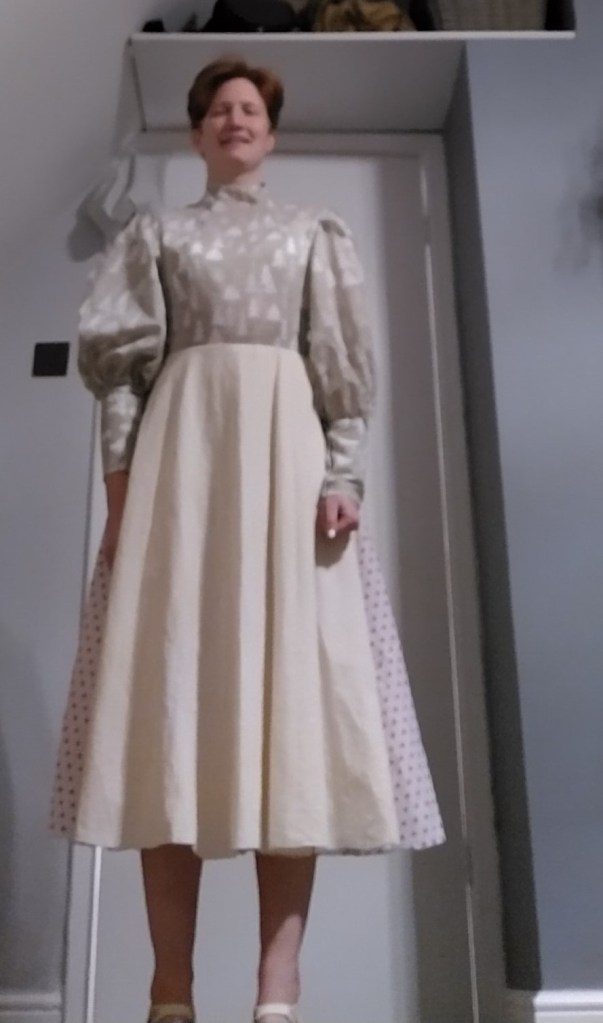
Front and back dress, just prior to adding the buttons
Next Up
So, that is the complete construction and a few photos of a dress in dire need of a decent pressing on both me and my dressform. Prior to the wedding I also took the dress in to get dry cleaned, this was to make sure it was presented the best it could be and to get my hand stitching ‘hand grub’ off. My next post is photos, photos and more photos, a few musings on what else I wish I had known prior to starting the process and reflections on the overall success. I hope you have enjoyed reading about the construction and if you have any questions drop a comment below or reach out to me on instagram.
I am thrilled with how this has turned out and I loved every minute of our wedding, knowing that I had made the dress too.
In the first blog I showed my design choices and where I sourced my fabrics. Here I’m aiming to show the fitting process and all of the tweaks necessary to get to the fit to be the best it could be (there’s no such thing as perfect). I had originally planned to show construction in this as well, however it has got pretty long!
Resources
A couple of essentials for me which allowed me to diagnose fit issues, redraw things and not lose my marbles were:
The Complete Photo Guide to Perfect Fitting – Sarah Veblen. This really allowed me to get some ideas of where things were going slightly awry, helping me to identify a short torso, how to fit the sleeves and get a good start on what I needed to do.
A see through french curve, to help redraw lines
Tracing paper, so I didn’t have to keep buying the pattern repeatedly. As it wasn’t available to buy in PDF format
Old bedsheets, calico fabric etc for the toile.
Fabric pens to draw balance lines on the toiles
Sewing friends with the patience to answer questions and challenge or confirm what I think!
The Elisalex Bodice fitting course, I managed to sneak onto this in December 2020 at the New Craft House after it had been lockdown cancelled in November. I had got most of the way, but going on the course helped me to make the final adjustments to make the pattern sing!
Toiles, toiles and more toiles
I’m a big fan of toiles in general, I’m fairly short and (thanks to the wedding dress) now know my neck to boob distance is pretty short. When I make trousers there’s often a quick bedsheet version too to check my rise.
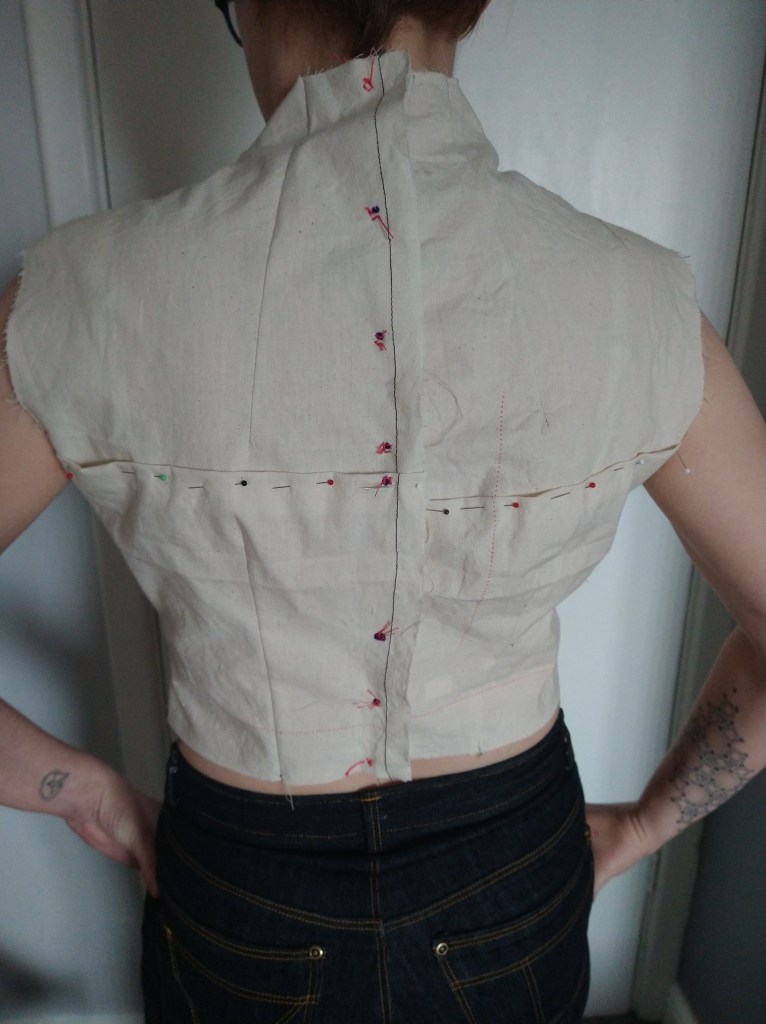
Toile 1
Make the bodice with no edits. The pattern helpfully came with 4 different cup sizes (A,B,C &D). I measured by high bust and my bust, the difference was 5cm so I picked the B cup for the first attempt. From my measurements I also initially went with the size 12, grading to a 14 at the waist.
The issues with this were:
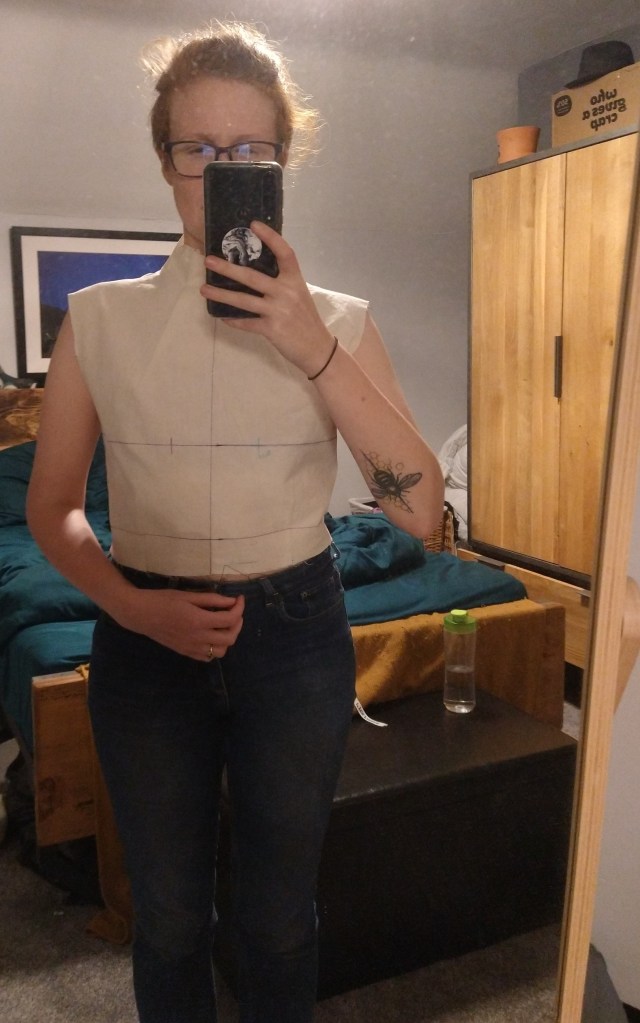
The apex of my bust was significantly higher than it should have been on the pattern. Aka. my nipples were about 1.5 inches higher than the bust line on the pattern.
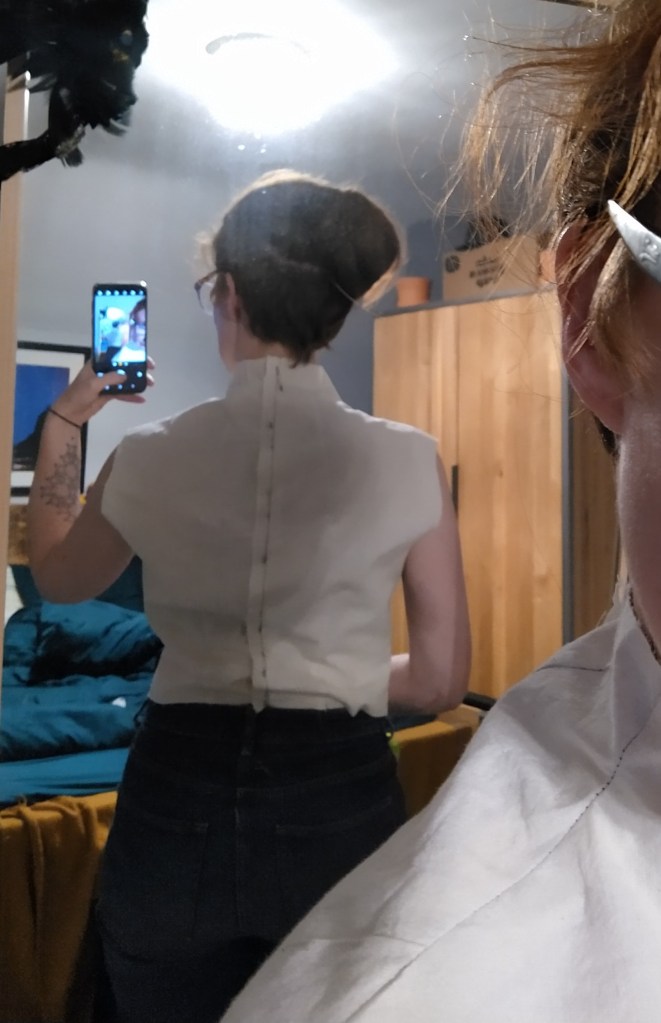
Similar issues with a large amount of fabric pooling at the back.
My shoulders were not sitting on my shoulders
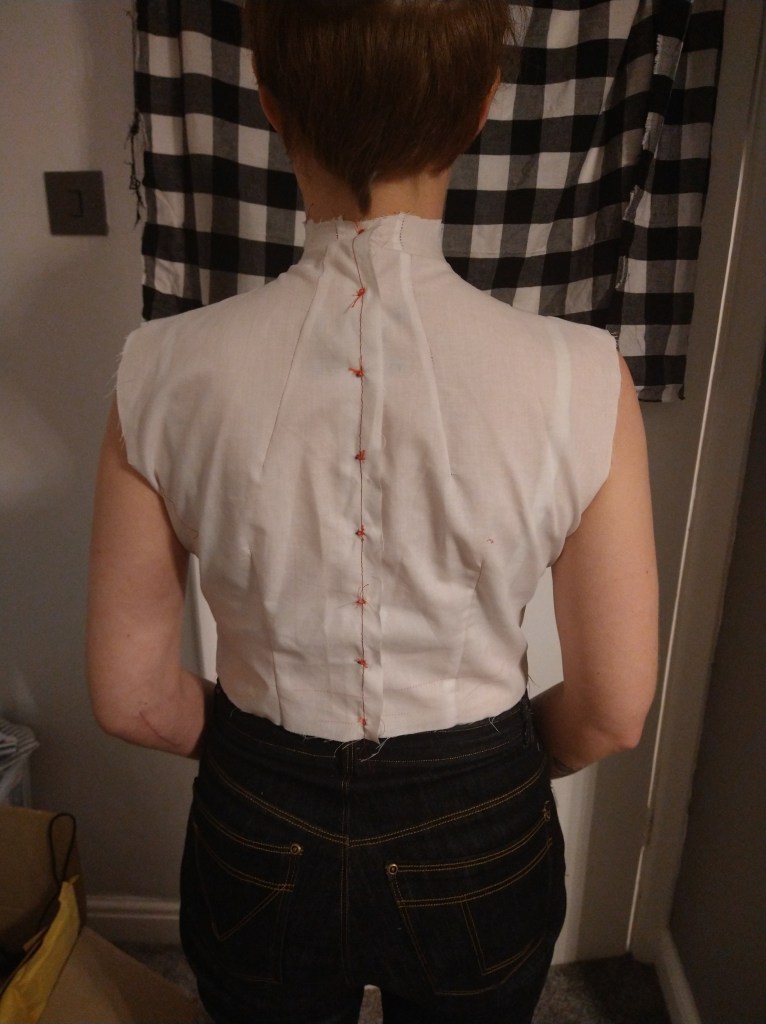
Toile 2
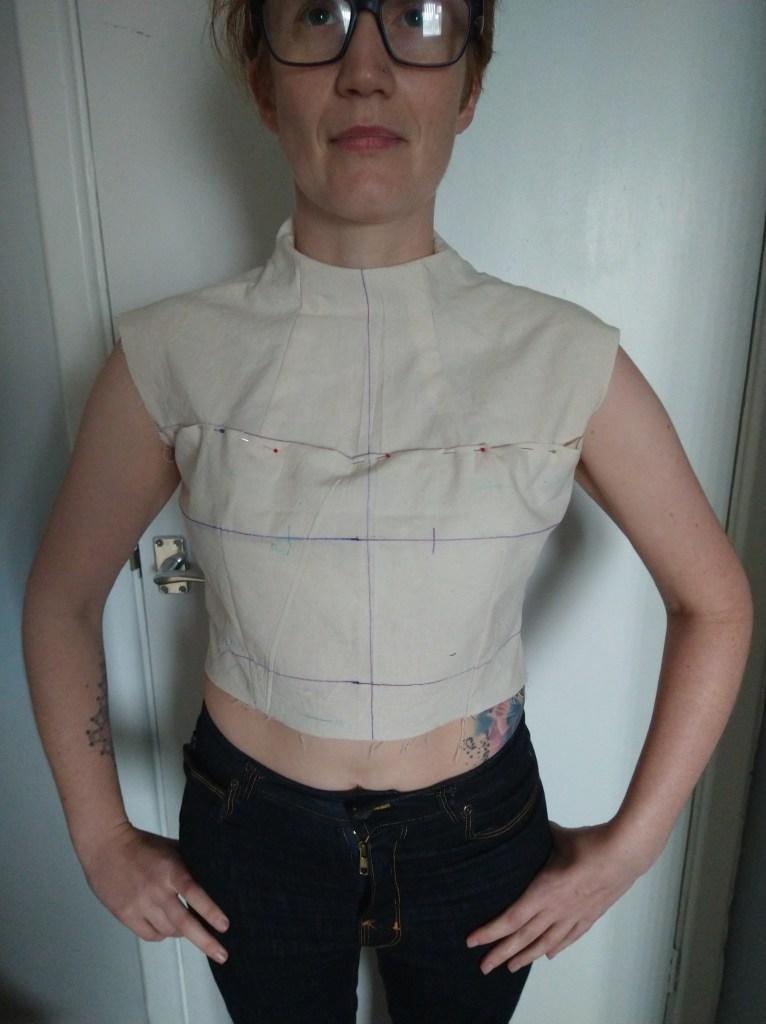
The shoulder to bust distance was taken out and the armhole was redrafted as well as making a 1.5cm narrow shoulder adjustment.
This wasn’t the most successful of my toiles as I had actually done the correction wrong. You can see how tight the neck is in this toile, what I did was also rotate the pattern piece whilst adjusting the shoulders. This was incorrect as the neckline was not gaping and therefore did not need pivoting, what I should have done and did in future toiles was just decrease the length of the shoulder seam by 1.5cm and then reconstruct the armhole.
The darts at the top were incorrect, I had tried to shorten them and was unsuccessful in my attempt.
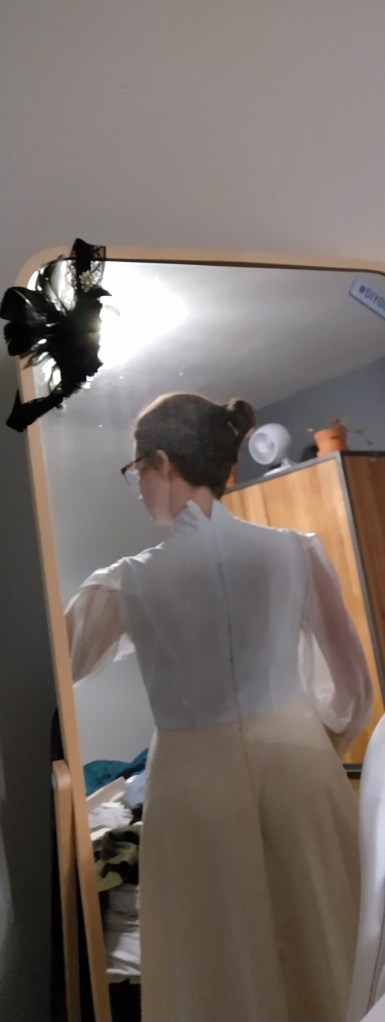
I re-lengthened the darts, adjusted the shoulders correctly so I wasn’t going to be strangled by the dress and cracked on. At this point I was relatively happy with the fit, despite Matt (my groom) pointing out that my boobs looked incredibly pointy. I will not begrudgingly admit he was right, but as I didn’t know how to fix it yet. I decided to sulk about this and pretend it was how it was meant to look. I also added the sleeves at this point for a bit of proof of concept. This was also the last step in the process he was allowed to see, I felt fairly safe up until this point as he is likely to forget what the dress looked like in concept as he can’t visualise things that well from description.
Putting the sleeves in was also a really helpful practice for me to work with chiffon and get used to the instructions. I have worked a fair amount with tricky fabrics but for my wedding dress I figured it couldn’t be bad to add in some extra practise.
I then added the skirt to allow me to identify what the weight of the skirt was going to do to pull the bodice down and allow it to drop, this may also pull a lot of the wrinkles of the bodice out. Plus, I wanted to see if the pockets included in the pattern were spacious enough. They most definitely were! Also, these cuffs. I LOVE these cuffs.
Overall I liked this toile and the fit of it, however it didn’t quite emphasise my waist as much as I would have liked, it felt like there was too much ease in it in general.
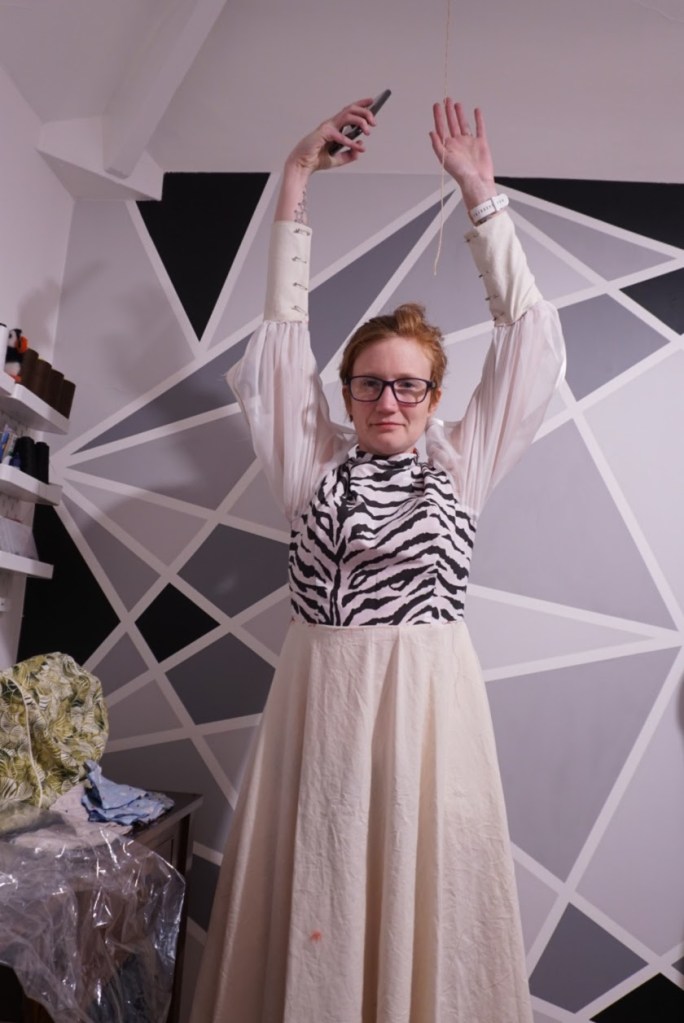
Toile 4
Size 10 graded to 12 at the waist.
1.5cm narrow shoulder adjustment
Same 1.5 inches (sorry imperial and metric use) out of the top of the bodice
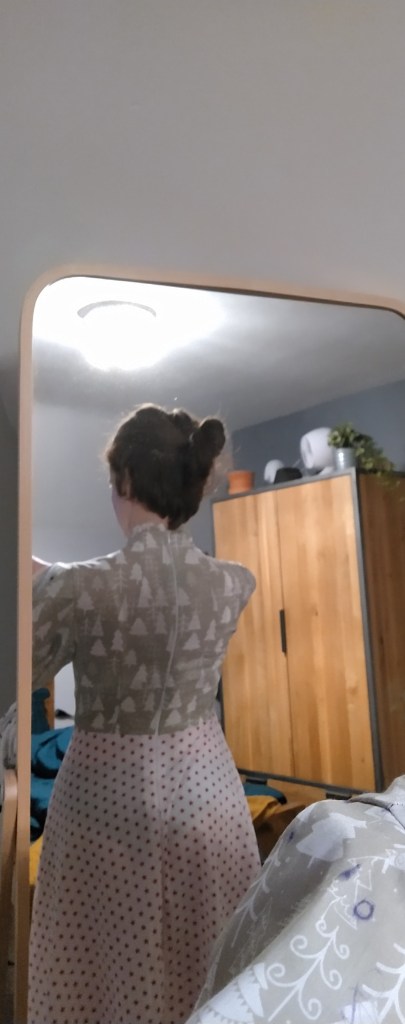
Now in funky zebra print fabric, plus lining practise
It is incredibly hard to see here (zebra fabric) but there is still quite a lot of excess at the bust. So, I made the same edits as above to the A cup bodice. It may seem like I was being pedantic here but I knew that I could make these tweaks to get the fit as close to ideal as possible.
Toile 5
I don’t have as many pictures of toile 5 as I do of the rest of them. This is the toile that came to the Elisalex bodice course with me. I’m incredibly glad that I took it as the final pieces of the fitting puzzle were unlocked.
A square shoulder adjustment of ½ inch (¼ inch on the front and back pattern piece)
Release each dart by ¼ inch to free the apex aka. Resolving the pointy boob problem from toile 3.
Toile 6
The final toile, the toile to end all toiles. (Please, I love this dress but I am nearly at the fudge it, this will do stage). I cut the skirt properly in a 12, (previously I was just bodging the 14 in), the sleeves in a standard poplin in a 10 (see previous bodging in) and then made the final toile. I also tried it on with my wedding bra to check that the fit worked well with it (I’ve been doing this since toile 4). At this point I made the petticoat to check the skirt poofed out correctly and allowed me to make the final length adjustments (with my wedding shoes shoes on)
This blog has turned into a bit of a mammoth one. So I’m going to start the next one for construction. I hope you have enjoyed reading about the process, seeing my ever changing messy bedroom, accidental black pants under toiles and bizarelly angled photos.
A quick summary of the changes
Size 10 at the top, A cup, graded to 12 at the waist
1.5 inches taken out between neck and boobs and armhole redrawn
5/8 inch narrow shoulder adjustment
1/2 inch square shoulder adjustment
1/4 inch dart release to de-point my apex.
I really loved making this pattern, the tweaks I made have definitely made it work and I know that I can make it again in different fabrics. Next up, construction!
There was a reason that I was hunting for a haribo ring in a box, which was hidden in our boiler cupboard on Friday 29th May 2020. That reason was I had ‘mentioned marriage 3 f****** times before 10 o’clock in the morning and the ring had been hidden for two months so I should really start looking’. The mentions were because I’d found a dress pattern that I thought was perfect for my wedding dress.
Pattern Selection & Design Decisions
The pattern in question was the Vogue Misses 2965, It has a gorgeous low back, is cut on the bias and has a cowl neckline. This would have shown off some of my favourite features of myself, my collarbones and my back. However, our choice of venue has a lot of stairs and I am terrified of tripping over hems / myself. Coupled with a planned March wedding in the UK where I may have frozen to death, I decided that however beautiful the dress would be, it wouldn’t look great with goosebumps. In the end we got married in April 2021 and had our reception at a city farm, so these practicalities still held true.
Vogue 2965, the dress pattern which launched a proposal!
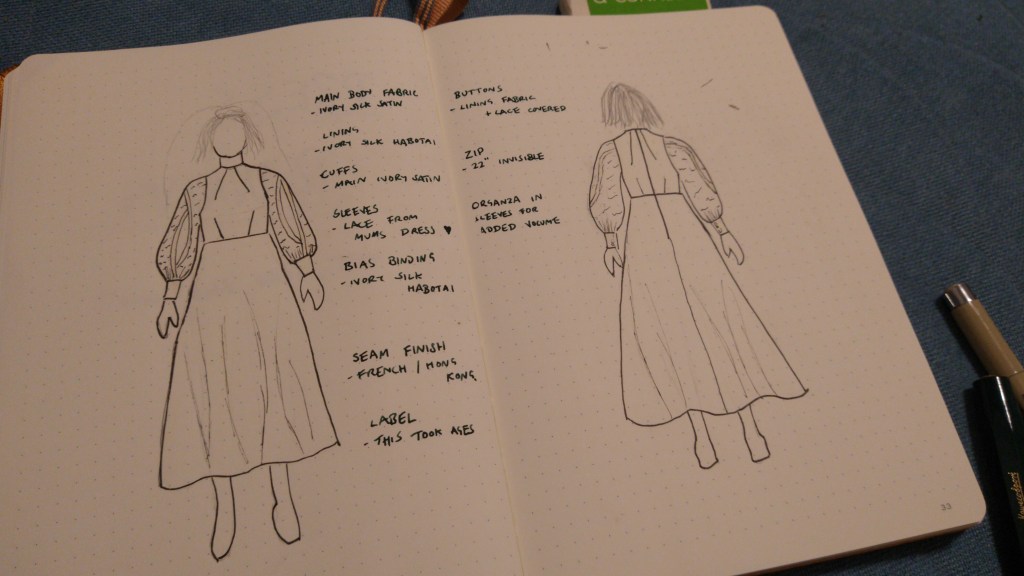
I had a few ideas in mind for my dress. I knew I wanted it to be ivory, silk, cover the tops of my arms and be mid-calf length/ tea length (they’re different!). I extensively searched lots of pattern websites (including the foldline) for inspo. I then made a shortlist, the Vogue 9327 Misses pattern caught my eye, particularly views B&C. I sketched up my ideas (using my mybodymodel) and had a chat with my mum and some of my friends. Most people couldn’t quite see what I was on about.
Vogue 9327, the pattern which caught my eye!
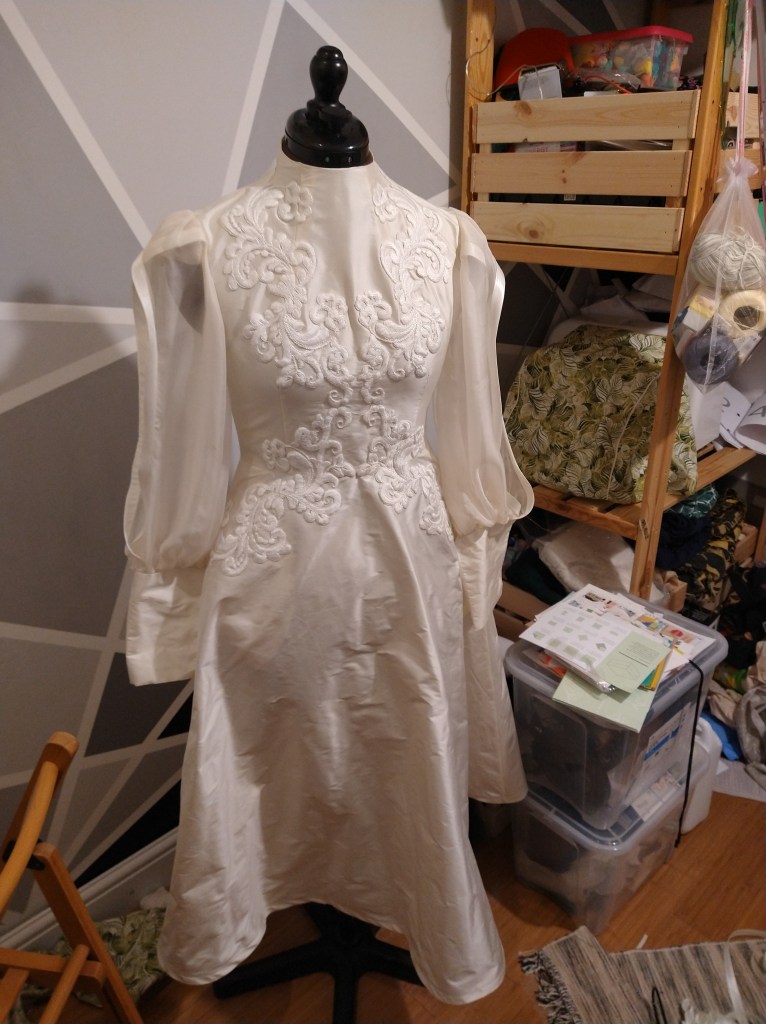
I really liked view B for the long cuffs and slashed, pouffy sleeves. In my first iterations and sketches I was considering the fabric for these to be lace. My mum had very kindly said I could recycle elements of her dress! After a while I settled on making them in a silk chiffon.
The initial design, which changed a bit, but not hugely during toileing
Even though I was making my own dress I didn’t want to miss out on the rite of passage that was going dress shopping. Me and my mothership went off to a boutique to try on some dresses, there weren’t many which were calf/ tea length and to get a sleeve, most of my options were adding a beautiful lacy bolero over the top. I even tried a really fitted fish tail dress on, which made my figure look great (but restricted my motion way too much).
Dress Trying on 2020 style!
I went back to the drawing board, bought a few more patterns and then decided to stick with my original vision as I couldn’t get it out of my head. I did however realise that I now really wanted appliques on my dress to elevate it to the next level. I also bought a petticoat pattern (Burda 6739) to give the skirt some support structure.
The two patterns I bought as other design options. One is a vintage reproduction
Fabric
About 3 hours (3 weeks) after Matt had proposed, I went on the New Craft House website. They do some bridal fabric drops every now and again, there was some ivory silk habotai of which 3 metres went straight into my basket. This was originally for the bias cut gown, it ended up as lining for my final dress. I then played the waiting game for other silks to come on to the website. I snapped up half a metre of the bone coloured silk organza when it appeared for the areas which may need some stiffening or extra OOMPH. Then, in one of those ‘risk it for a chocolate biscuit’ moments, I bought 4 metres of an ivory silk dupion.
I call it risky because I hadn’t touched, seen, heard, smelt OR tasted a single one of these fabrics and was largely relying upon the New Craft House to have used the same definition of ivory throughout their fabric collection. I have at least a weekly debate with Matt about what colour something is so I was absolutely thrilled when the dupion turned up and was an excellent match for the habotai. This especially cheered me up as I’d broken my arm rollerskating 3 days before it arrived.
The chiffon from the sleeves needed a bit more of a search, I knew it was unlikely that the New Craft House would have any ivory silk chiffon coming in in the timescale required (3 months). So I went in search of specialist silk websites. I came across Beckford Silk and ordered a few samples. I wavered between natural white, pale cream and cream, eventually deciding on pale cream and ordered 2 metres. Prior to dress construction I got all of my silks dry-cleaned to avoid shrinkage! If you happen to be in the Bristol area I can recommend Victoria Dry Cleaners for their knowledge and willingness to listen!
I also ordered two styles of cotton appliques from Etsy, I couldn’t decide which I liked more so waited until I could pin to the finished dress to get an idea of which went best with the shape of the dress.
For the petticoat I used some of the habotai for the yoke part and ordered some standard ivory tulle for the structure. I dyed some of the trimmings and lace from Mums dress and used these for the finish of the petticoat hem.
From left to right: Bone organza, ivory habotai, ivory dupion. Bottom, silk chiffon.
If you’re still with me, thank you and congratulations! The next post on the dress is going to be about the fitting process and construction tweaks, the final one will be a lot of picture spam with close up detail shots!
** Disclosure** I have put a lot of links in this blog, I haven’t been asked to include these links or been paid/given anything in return for linking them here. I just want to give the best information possible about my process
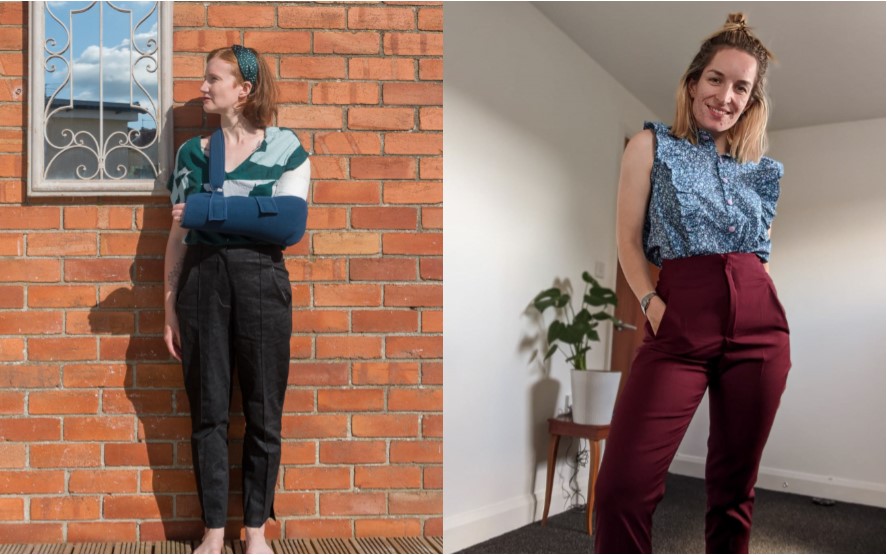
Between myself and Kat of Measure Twice Kat Once we’ve been on quite a trouser spree recently. Kat is starting her graduate job and I’m enjoying finding my sense of style so we decided to make some trousers together!
Vicky: Kat suggested the Tyyni trousers from Named Clothing. What drew us to the pattern was the shaping waist darts, the pockets and the nice detail of the side vents. This made them a little different to what else we’d seen out there. They also seemed fairly ideal for our pear-portions (puns make me happy).
Kat: To me, the Tyyni trousers seemed like a very classic work trouser, and so I had hoped to make a pair which fitted both my hips and waist – something which I have had difficulty finding in the past.
Size Selection/ Alteration
Vicky: My measurements are currently B32.4” W28” H39” which put me in the UK size 10. I tend to pick off finished measurements rather than size charts in general. I didn’t make any adjustments because there wasn’t any info available on the rise, where I usually make my trouser adjustments. The pattern does have handy marks about where the hip and knee are too.
Kat: My measurements are B33”, W25”, H37”. My hip measurement was closer to a 10 and waist closer to a 6, but after speaking to Sharlene (she made a gorgeous jacquard pair and matching blazer – my semi-inspiration) decided to cut a UK 6 due to the slight stretch of the material. I took 2 inches off the length as the pattern is drafted for someone who is 5’6”.
Vicky: Both of us were, to a large extent treating this as a wearable toile knowing that these would fit us way better than ready to wear but would still require some edits. Plus, we also needed to learn some construction techniques!
Fabric Selection
Vicky: This is always one of my favourite parts. The pattern calls for a stretch woven with 5-10% stretch. This was a totally new field for me but I knew Sarah at Likesewamazing had some gorgeous paisley designed deadstock in. I was inspired for these trousers after a chat with Stacie (Notions of a Dressmaker) who’d made the SOI Ultimate Trousers. Pockets wise I used some Grey Bamboo Tencel Twill I had leftover from previous projects because it is dreamily soft.
Kat: I struggled to find a nice stretch woven for ages, but when I was buying shirt material for some shirts I spotted this Burgundy stretch cotton suiting fabric from Croftmill, which was quite a steal at £6 a metre, so figured it would do for a wearable toile. I had some Burgandy Rayon leftover from my Sudley so used that for the pockets, which maybe clashes a bit but hopefully won’t be seen!
Construction
We constructed the lions share of these on a zoom call together. We used a regular stitch i.e. not zig zag or stretch for the seams and a sharp needle. We were a little unclear on if this was correct but it seems to have worked.
Vicky: I was slightly behind on construction compared to Kat as she’d already cut hers out. I added the pintucks as I enjoyed the overall aesthetic. I had to unpick the ones on the back as I’d used the wrong notch at the top but fortunately I’d used a longer stitch length!
After Kat had forged ahead and we looked at the instructions we used the method we were already familiar with to insert the inseam pockets. I’m not great at left and right so my fly is actually on backwards, I followed the instructions for inserting the fly mirrored.
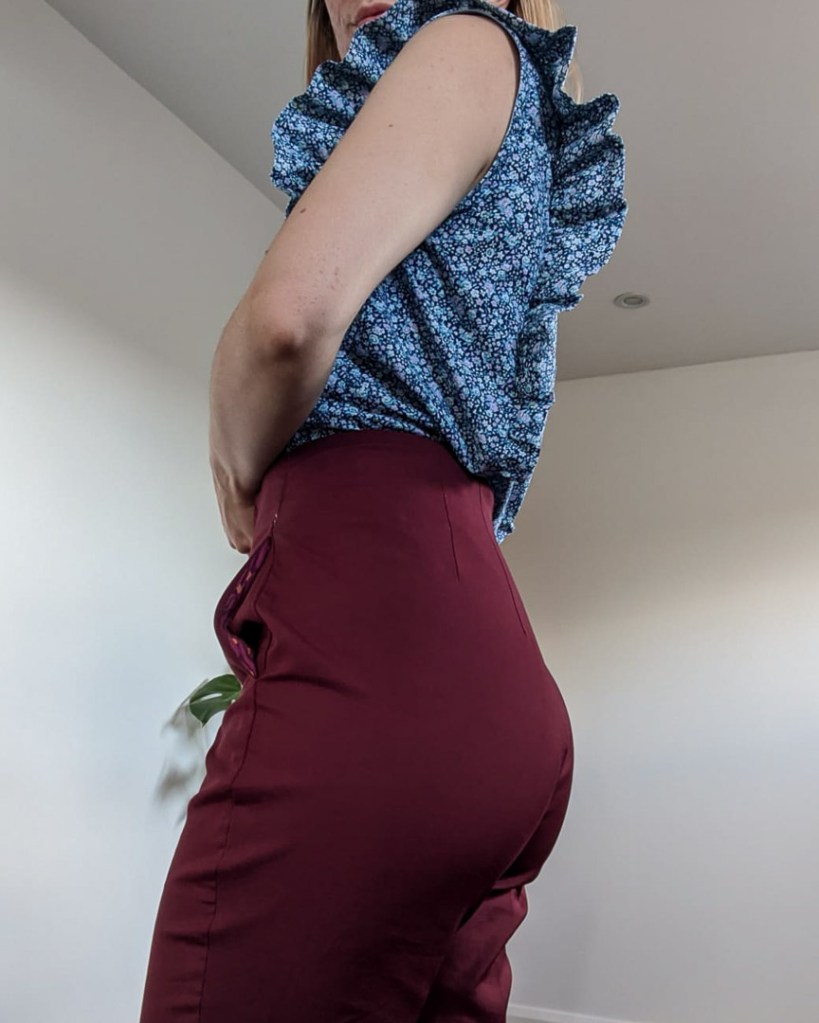
Kat: This was my first zip fly as when I’ve previously made trousers I’ve done the button fly, Vicky has a bit more experience from making her Dawns. I’d tried my trousers on at this point and identified I needed to take in about 4cm at the waist which I did using the back seam, starting from level with the bottom of the darts and grading up.
Vicky: We both found the fly insertion instructions to be tricky. I would recommend reading instructions for another pair with a fly too to really help understand the method. Once the fly had been inserted I tried mine on. The fit in the waist is great but in the hips they’re too large, I think I’ll size down to an 8 in the hips if I make them again.
Kat: Attaching the waistband was a challenge, I definitely had to put these in the naughty corner at least once. I was so confused by the instructions and my zip not being neatly sewn didn’t help. After cutting off the section it says to remove for the one side and about 4cm off the waistband as this was the amount removed from the back seam, I just couldn’t get the waistband to fit on. I ended up sewing on an extra section so it would work. This is possibly because my zip wasn’t sewn close enough, but to be honest I was very confused and frustrated at this point.
Vicky: having been slightly behind Kat I knew that this insertion was going to be a challenge. I sat down and had a cuppa first. My advice for construction is:
For the fly overlap, baste this prior to attempting waistband construction
Remember you are sewing the short sides of the waistband to the fly first.
Don’t cut any of the seam allowance before you’re 99% certain the waistband is on correctly.
Kat: The final few steps were comparatively easy and I enjoyed the construction of the vents at the bottom.
Vicky: My final tip for the fly is chalk on where you’re going to topstitch or you could end up incredibly wonky!
Verdict
This is definitely an intermediate sew and these are more challenging than the Chandlers or the Pietras. If you can find a sew along definitely do use one, but during Kat’s waistband meltdown she couldn’t find one.
Vicky: My fit requires a few more tweaks. I need to do a crotch to waist analysis and probably take them in to the 8 at the hips. These trousers are destined for my sister to see if they fit her. It’s not a priority but I would like to make another pair.
Kat: I actually really like the fit and style of these, but my zip was a massive fail. I am tempted to try again so it is a neater finish as think these could be great for the office. Hopefully no one will be staring at my crotch too much! My pockets stick out a bit, which may be due to not following instructions, or just down to my hip to waist ratio! Overall, a really nice pair of trousers which I’d like to attempt again and hopefully do a bit better!
Likes
The different style compared to what else is available
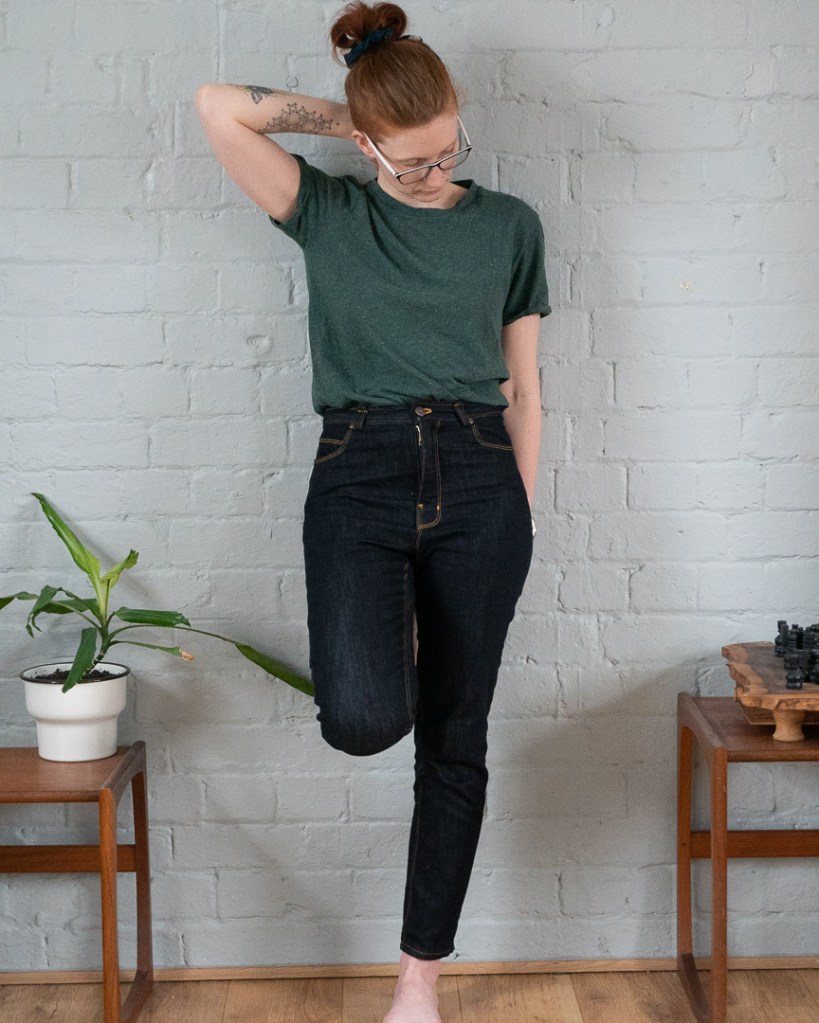
I’ve gone a little bit out of order here. As of yesterday I have a shiny new second pair of Dawn Jeans so I’m sharing them whilst my edits and the experience are fresh in my mind. I said previously I wanted to make these as my old ready to wear pairs had seen better days and they never really seemed to fit me.
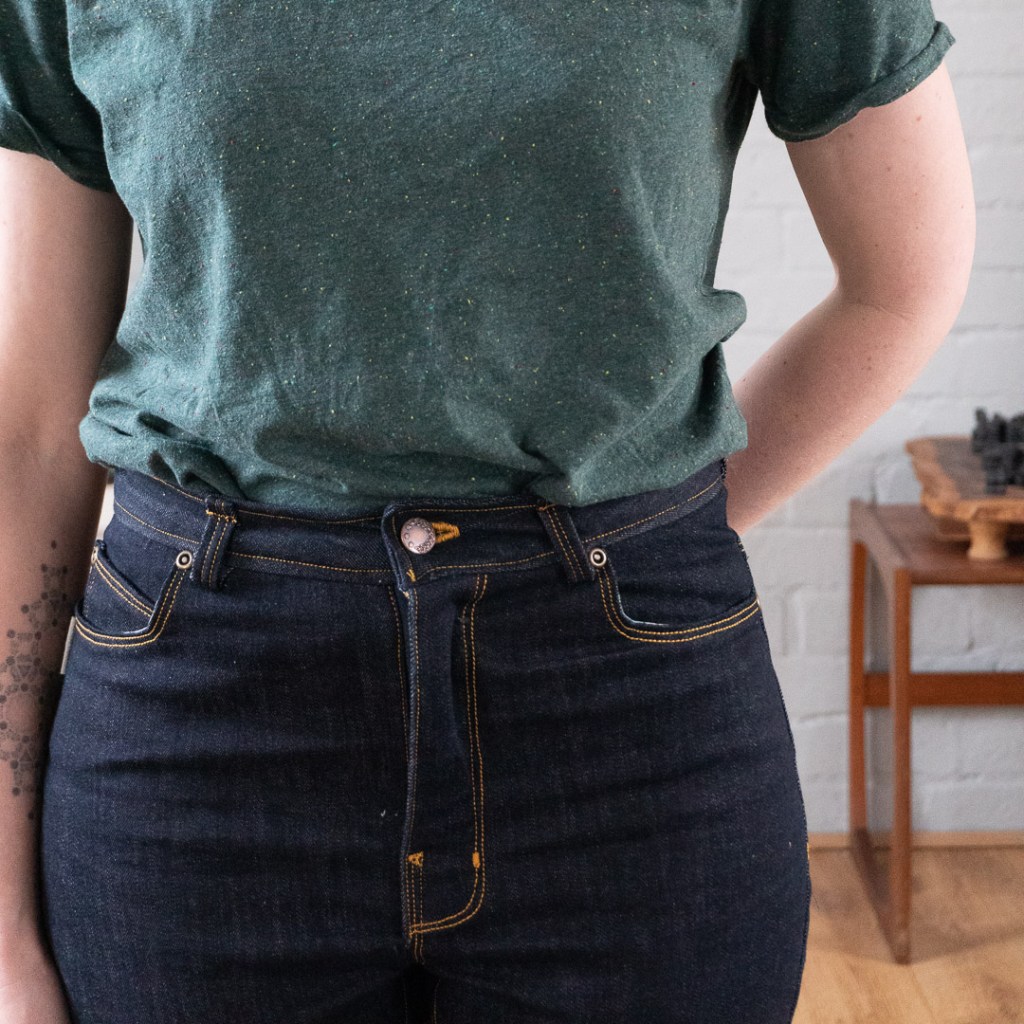
I made my first pair of Dawns in March in a blue (slightly) stretchy denim from Likesewamazing which I bought at the shops 1st Birthday Party! I had a voucher from my Grandparents for Christmas and I knew this would be a perfect use (my Grandparents are very supportive of my creativity). I cut the pattern as a straight size 6, regular length as my waist is 27(ish) inches and my hips are 37(ish) inches and I started sewing!
I really enjoyed making these jeans. I went high risk for my first attempt and selected golden yellow for my topstitching. Making my Dawns helped me to realise I really love topstitching. I put my initials on my back pockets because I can and I wanted something a little personal. I wouldn’t have been able to do such neat (in my opinion) topstitching without the straight stitch foot that came with the Singer 201k. It really helped me to visualise the spacing.
One error I made on the first pair is not grading my seams enough. This made it REALLY hard to do the button hole. I almost cried at sewing club when it wasn’t working because I was so frustrated. However, I eventually got the buttonhole completed, hardware on and have a pair of jeans that I love! BUT I knew I could make the fit even better….
Enter the second pair of Dawns! Having assessed the fit and sent WAY too many pictures of my (clothed) crotch and backside to @Measuretwice.katonce I had a vague idea of where I could make the fit better. I identified these using the Closet Core Patterns fit guide for the Morgans.
Sway back adjustment due to the wrinkling at the top of the back
A flat pubis adjustment due to the wrinkling at the front
A low butt adjustment due to the wrinking at the bottom of the back
I made a toile of these edits in some non stretch stripe denim I’d had in my stash for years, maybe a decade? They were a tad tight around the thigh so adjustment number 4 was identified.
4.Full thigh adjustment
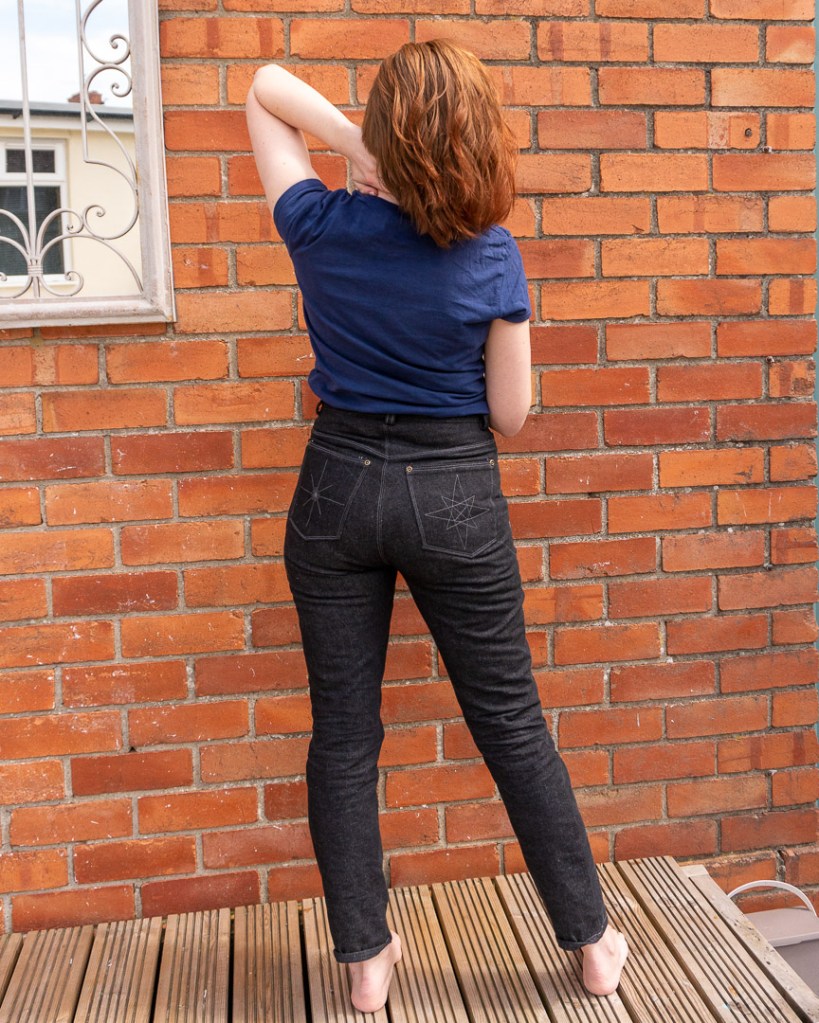
This pair were made in some non-stretch denim from Stof Stil which, was bought for me by my Gran for my Birthday. It’s taken me 3 months to work up the courage to start making these adjustments(!). For the sway back, full thigh and low butt adjustments I made edits to the back pattern piece (see below). For the flat pubis I made adjustments whilst sewing to make the front inseam slightly deeper.
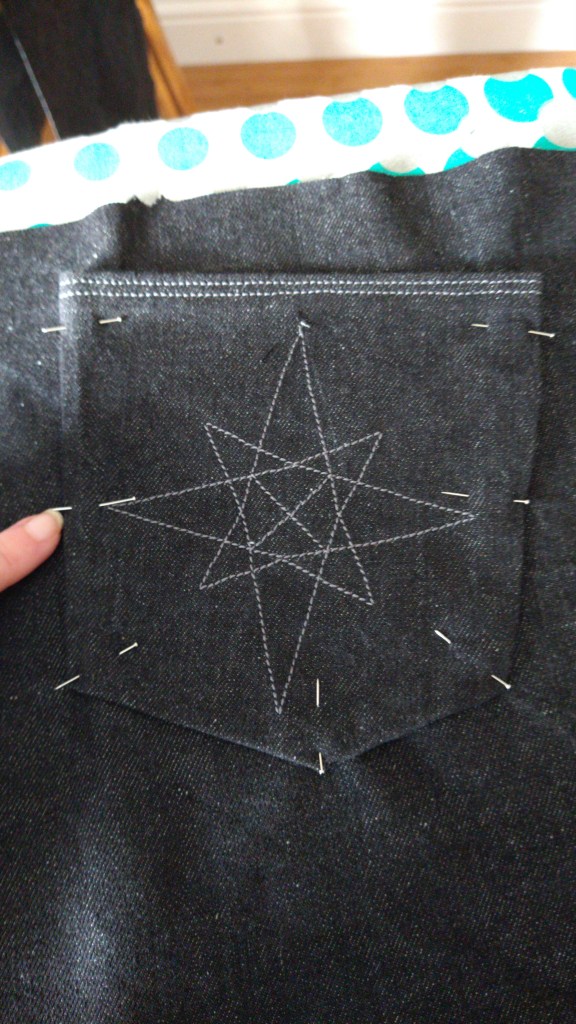
I chose not to put my initials on this time and my back pockets have a starburst and compass style of designs. I put these together using Microsoft publisher on an A5 size sheet and the design is 12cmx12cm square. This was then transferred onto the pockets using wax paper and one of the tracing wheels. I didn’t get the compass one quite straight so I slightly fudged it so the topstitching didn’t overlap.
After I’d sewn together the yoke and the back legs I realised that my pockets weren’t even. Some days I would accept this but I couldn’t this time so I unpicked and re-stitched. I was a lot happier with them the second time round.
One construction tip I have is: when you have sewn your inseam DON’T TOPSTITCH YET. Baste the side seams together and check for fit. This way if you aren’t happy with it you don’t have to unpick 3 lines of stitching and potentially some overlocking you only have the side seam and the initial inseam. I didn’t have to unpick but this is part of the reason I said ‘meh’ it’ll do to the first pair on the fit.
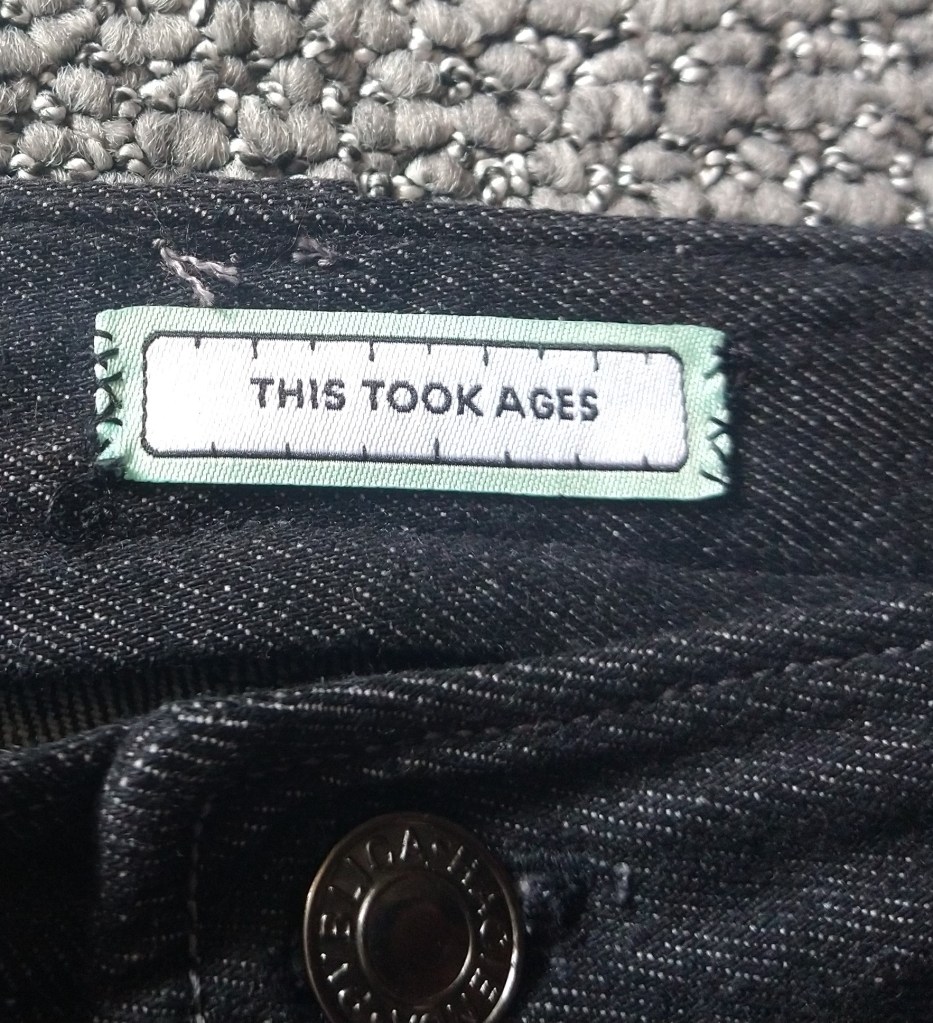
Once I’d fitted them I ploughed ahead with the rest of the construction. I have had a minor ‘Sewing fail’ as one of my belt loops is on inside out but I’m living with that. I also had trouble with the button hole again, despite having graded my seams much better this time. However, they are together, fitted better and I’m thrilled with them. I finished with a Pink Coat Club ‘This took ages’ Label because I spent time on this project and did unpick topstitching I wasn’t happy with several times.
For my photoshoot styling I have attempted to add some entertainment by emulating some vintage jeans adverts. Photography is another of my passions and I enjoy mucking about with the camera.
Things I like
Incredibly thorough instructions
Fun options for topstitching
High waisted and flattering cut
Regular length hits me in the right place without having to chop loads off
Things I don’t like
I often forget to put a label in until it’s too late
Buttonholes on thick denim are very tricky
Bartacks on thick denim are tricky too
Enjoy sewing, you can have jeans that fit, topstitching is surprisingly fun!